Setting Expectations with Your Web Designer: A Guide to a Smooth Project
Rebecca Person

Setting Expectations with Your Web Designer: A Guide to a Smooth ProjectDefining the Project Scope and DeliverablesWhat's Included (and What's Not)Establishing a Realistic TimelineAgreeing on the Budget and Payment StructureCreating a Communication PlanChoosing Your Communication ToolsSetting a Schedule for Updates and MeetingsDefining Availability and Response TimesEstablishing the Feedback and Revision ProcessHow to Provide FeedbackAgreeing on the Number of Revision RoundsClarifying the Process for Additional ChangesConclusionReferences
Setting Expectations with Your Web Designer: A Guide to a Smooth Project
The foundation of a great client-designer relationship is built on clear, mutual understanding from day one. Setting expectations early prevents misunderstandings, aligns vision with execution, and ensures the entire project runs smoothly. A crucial first step is a comprehensive onboarding process where you provide all necessary information. Once aligned, you can focus on creating a framework for collaboration, including how you'll provide effective feedback on the designs.
Working with a web designer should feel like a partnership, not a guessing game. When you hire the best web designers, you're investing in more than just technical skills – you're bringing on a creative collaborator who can transform your vision into reality. But even the most talented designer needs clear direction and boundaries to deliver their best work.
Think of expectation-setting as building a roadmap for your journey together. Without it, you might find yourself lost in revision cycles, confused about timelines, or frustrated by communication gaps. The good news? With a bit of upfront planning, you can avoid these common pitfalls and create a smooth, productive working relationship.
Defining the Project Scope and Deliverables
Before any design work begins, it's essential to have a written agreement that explicitly details the scope of the project. This document acts as the single source of truth for both you and your designer.
I've seen too many projects derail because someone assumed the logo redesign included business cards, or that "a few tweaks" meant unlimited revisions. That's why getting everything in writing isn't just paperwork – it's your project's safety net.
Your scope document doesn't need to be a legal tome. It just needs to be clear, specific, and agreed upon by both parties. Think of it as a promise you're both making about what will happen, when it will happen, and what it will cost.
What's Included (and What's Not)
Clearly list all deliverables, such as the number of pages, specific features (e.g., e-commerce, blog), and the number of revision rounds. Being specific helps prevent scope creep later on.
Start by listing exactly what your designer will create. If you're building a website, specify each page: home, about, services, contact, blog template, and so on. Don't just say "website" – that could mean anything from a single landing page to a 50-page corporate site.
Include technical requirements too. Will the site need a contact form? Email newsletter signup? Social media integration? Each feature takes time and expertise, so spell them out. If you're unsure what you need, ask your designer for recommendations based on your goals.
Equally important is what's NOT included. Maybe you're providing the copy yourself, or perhaps stock photos aren't part of the package. Maybe ongoing maintenance is a separate conversation. Whatever the boundaries, make them explicit.
Here's a simple format that works well:
Included:
5-page responsive website design
Mobile optimization for all pages
Basic SEO setup
Contact form integration
2 rounds of revisions per page
Not Included:
Content writing
Stock photography purchases
Web hosting setup
Ongoing maintenance
Additional pages beyond the initial 5
Establishing a Realistic Timeline
Work with your designer to set a realistic timeline with key milestones for each phase of the project, from initial mockups to final launch. This ensures both parties are accountable and aware of deadlines.
A good timeline isn't just about the final deadline – it's about the journey to get there. Break your project into phases, each with its own mini-deadline. This creates natural check-in points and prevents last-minute surprises.
Your designer might suggest something like this:
Week 1-2: Discovery and research phase Week 3: Initial concepts and mood boards Week 4: First draft of homepage design Week 5-6: Remaining page designs Week 7: First round of revisions Week 8: Final revisions and handoff
Notice how each phase builds on the last? That's intentional. You can't revise what hasn't been designed, and you can't design without understanding the goals.
Be realistic about your own availability too. If you need three days to gather feedback from your team, build that into the timeline. Nothing frustrates designers more than rushing to meet a deadline, only to wait a week for client feedback.
Remember, good design takes time. Rushing the process rarely saves time in the long run – it usually just creates more revision cycles. Trust your designer's experience when they suggest timelines. They've done this before and know how long quality work takes.
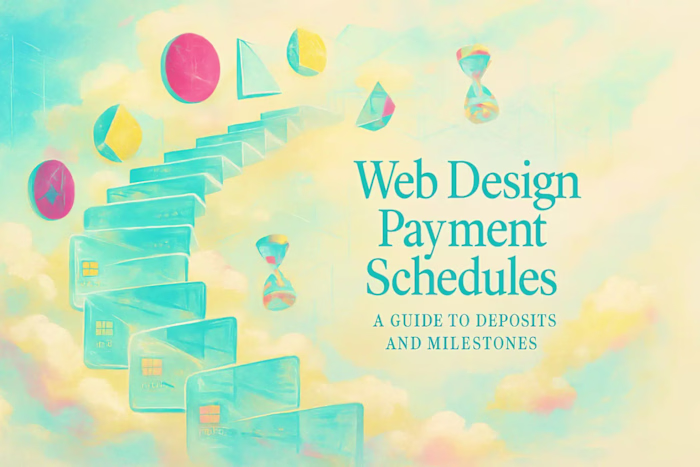
Agreeing on the Budget and Payment Structure
Finalize the total project cost and payment schedule. Whether it's a fixed fee, hourly rate, or milestone-based payments, having this in writing protects both you and the freelancer.
Money conversations can feel awkward, but they're essential for a healthy working relationship. The clearer you are about budget from the start, the smoother everything else becomes.
Most web designers offer a few payment structures:
Fixed Project Fee: You pay one agreed amount for the entire project. This gives you cost certainty but requires a very clear scope.
Hourly Rate: You pay for the actual time spent. This offers flexibility but can make budgeting trickier.
Milestone-Based: You pay in chunks as each phase completes. This balances risk for both parties and keeps the project moving.
A typical milestone structure might look like:
25% upon signing the contract
25% after initial concepts are approved
25% after first draft designs
25% upon final delivery
Whatever structure you choose, get it in writing. Include what happens if the project expands, how additional revisions are billed, and when payments are due. Many designers require partial payment upfront – this is normal and shows mutual commitment.
Don't forget to clarify what "final payment" triggers. Is it when files are delivered? When the site goes live? When you're happy with everything? Define this clearly to avoid confusion later.
Creating a Communication Plan
Effective communication is the lifeblood of a successful project. Decide on the frequency, channels, and expectations for communication to keep everyone aligned and informed.
Poor communication kills more projects than poor design ever could. You might have the world's best designer, but if you can't communicate effectively, the project will struggle. That's why setting communication expectations upfront is so crucial.
Think about your own communication style. Do you prefer quick Slack messages or detailed emails? Morning check-ins or end-of-week summaries? There's no right answer – just what works for both of you.
The key is consistency. Random, sporadic communication creates anxiety on both sides. Regular, predictable touchpoints create confidence and momentum.
Choosing Your Communication Tools
Agree on the primary tools for communication, whether it's email, Slack, or a project management platform like Trello or Asana. This centralizes conversations and avoids lost messages.
The best communication tool is the one you'll actually use. If you're not a Slack person, don't agree to use Slack just because it seems professional. You'll end up missing messages and creating frustration.
Here's what works well for different situations:
Email works great for formal updates, sending files, and creating a paper trail. It's less ideal for quick questions or brainstorming.
Slack or similar chat tools excel at quick questions and real-time collaboration. They can get overwhelming with too many channels or notifications though.
Project management tools like Asana or Trello keep everything organized in one place. Comments, files, and deadlines all live together. The learning curve can be steep if you're not familiar with them.
Video calls are perfect for complex discussions, presenting designs, or when text just isn't cutting it. Schedule these rather than calling randomly.
Pick one primary channel and stick to it. Maybe email is your main communication method, with weekly Zoom calls for design reviews. Or perhaps everything lives in Asana, with Slack for urgent questions only.
Whatever you choose, establish boundaries. Just because Slack enables instant messaging doesn't mean you should expect instant responses. Which brings us to...
Setting a Schedule for Updates and Meetings
Establish a regular cadence for check-ins, such as weekly progress updates or bi-weekly calls. This ensures the project is moving forward and provides a dedicated time to address questions.
Regular check-ins serve two purposes: they keep the project moving and they prevent communication overload. When you know you'll talk every Tuesday at 2 PM, you can save non-urgent questions for that call instead of sending ten separate emails.
A good meeting schedule might look like:
Weekly 30-minute video calls during active design phases. Use these to review progress, discuss feedback, and plan the week ahead.
Brief written updates between calls. A simple "Here's what I accomplished this week and what's planned for next week" email works wonders.
Milestone presentations for major deliverables. Give these more time – maybe an hour to properly review and discuss initial concepts or final designs.
Keep meetings focused and productive. Come prepared with specific questions or feedback. If you say "I don't like it" without explaining why, you're wasting everyone's time. Better to say "The color feels too corporate for our playful brand" – now your designer can actually help.
Some designers prefer asynchronous updates – detailed emails or Loom videos you can review on your own time. This works especially well across time zones. Discuss what format works best for both of you.
Defining Availability and Response Times
Be upfront about working hours and expected response times. A freelancer may have other clients, so understanding their schedule helps manage expectations for how quickly they'll reply.
One of the biggest friction points in client-designer relationships? Mismatched expectations about availability. You send an urgent email at 6 PM Friday and wonder why there's no response until Monday. Meanwhile, your designer is maintaining healthy boundaries with their work-life balance.
Have an honest conversation about:
Working hours: When is your designer typically available? Some work traditional 9-5, others prefer evening hours. Neither is wrong – you just need to know.
Response time expectations: How quickly will emails be answered? Within 24 hours is reasonable for most communications. Same-day responses might cost extra.
Urgent communication protocols: What constitutes an emergency? How should urgent issues be flagged? Maybe urgent items go through Slack while regular updates stay in email.
Time zone considerations: If you're in different time zones, when do your working hours overlap? Schedule meetings during these windows.
Vacation and time off: Everyone needs breaks. Discuss how time off will be communicated and how the project timeline adjusts.
Remember, freelancers often juggle multiple clients. They're not ignoring you – they're managing their workload. Respect their boundaries and they'll respect yours.
Set your own boundaries too. If you don't want weekend emails, say so. If you need 48 hours to gather feedback from your team, communicate that. Mutual respect for time creates a healthier, more productive relationship.
Establishing the Feedback and Revision Process
A structured feedback process is essential for making progress without getting stuck in endless revision cycles. Agreeing on how feedback will be provided and handled is key.
Feedback is where many projects go off the rails. Without a clear process, you end up in endless revision loops, with both parties frustrated and the project stalled. The solution? Define your feedback process before you need it.
Good feedback is specific, actionable, and consolidated. "Make it pop more" helps no one. "The header feels too subtle – could we try a bolder font or darker color?" gives your designer direction they can work with.
Think of feedback as a conversation, not a decree. Your designer brings expertise you hired them for. If they push back on a suggestion, listen to why. They might see technical or design issues you haven't considered.
How to Provide Feedback
Decide on the format for feedback. Will you use comments on a design file, an annotated document, or a dedicated feedback tool? This keeps feedback organized and actionable.
The format of your feedback matters almost as much as the content. Scattered emails, text messages, and verbal comments create chaos. Pick one method and stick to it.
Design file comments work great for specific visual feedback. Tools like Figma or InVision let you click exactly where changes are needed. Your designer sees precisely what you're referring to.
Consolidated documents help when you have lots of feedback or multiple stakeholders. Create one document with all comments organized by page or section. This prevents contradictory feedback and helps your designer prioritize.
Video walkthroughs can clarify complex feedback. Record yourself navigating the design while explaining your thoughts. Tools like Loom make this easy.
Feedback forms or templates ensure you cover all important points. Your designer might provide a template with questions like "Does this align with your brand?" or "What specific elements aren't working?"
Whatever method you choose, be thorough in each round. Collect all feedback from your team before sending. Nothing frustrates designers more than implementing changes, only to receive completely new feedback from another stakeholder.
When giving feedback, try this structure:
What's working well (always start positive)
What needs adjustment and why
Specific suggestions or examples
Questions about design decisions
Agreeing on the Number of Revision Rounds
Most designers include a set number of revision rounds in their contract (e.g., two or three). This encourages consolidated, thoughtful feedback rather than a constant stream of small changes.
Revision rounds aren't about limiting your input – they're about creating focused, productive feedback cycles. When you know you have two rounds of revisions, you'll think more carefully about your feedback.
Here's how revision rounds typically work:
Round 1: Major structural changes. This is where you address big-picture items like layout, navigation, or overall design direction. Don't nitpick small details yet.
Round 2: Refinements and details. Now you can focus on specific colors, fonts, spacing, and other finishing touches.
Final review: A last check to ensure everything's perfect. This isn't for new changes – just confirming previous revisions were implemented correctly.
Some projects need more rounds, especially for complex sites. Discuss this upfront. Additional rounds usually come with additional costs, which is fair – they require additional work.
To make the most of your revision rounds:
Gather all stakeholder feedback before submitting
Be specific and detailed in your comments
Prioritize changes by importance
Trust your designer's expertise on technical limitations
Remember, revision rounds reset with major scope changes. If you decide halfway through to add an e-commerce section, that's not a revision – it's a new project phase.
Clarifying the Process for Additional Changes
Discuss how changes outside the initial scope or beyond the agreed revision rounds will be handled. This usually involves a formal change request and may affect the timeline and budget.
Even with the best planning, projects evolve. Maybe you realize you need a blog after all, or your CEO wants to add team member profiles. That's fine – just understand these changes affect everything else.
Establish a change request process upfront:
Formal request: Additional changes should be requested in writing, not mentioned casually in a call. This creates clarity about what's being asked.
Impact assessment: Your designer should explain how the change affects timeline and budget. Adding one page might seem simple, but it could push back the launch by a week.
Approval process: Both parties should formally agree to the change, including any additional costs or timeline adjustments.
Documentation: Keep a record of all change requests and approvals. This prevents confusion later about what was included in the original scope.
Common changes that fall outside the original scope:
Additional pages or sections
New functionality (forms, galleries, integrations)
Complete redesigns after approval
Content creation or copywriting
Rush delivery requests
Your designer isn't being difficult when they flag scope changes – they're protecting both of you from project creep. Respect the process and you'll maintain a positive relationship even as the project evolves.
Conclusion
Setting clear expectations with your web designer isn't about creating rigid rules – it's about building a foundation for creative collaboration. When both parties understand the scope, timeline, communication preferences, and feedback process, magic happens. The project flows smoothly, stress stays low, and the final result exceeds expectations.
Take time at the project's start to have these conversations. Yes, it might feel like a lot of upfront work, but it saves countless hours of confusion and frustration later. Your designer will appreciate your professionalism, and you'll appreciate their focused creativity.
Remember, the best client-designer relationships feel like partnerships. You bring the vision and business knowledge; they bring design expertise and technical skills. Clear expectations let both of you do what you do best.
Start your next web design project right. Have the conversations outlined in this guide. Create the documents. Set the boundaries. Then watch as your project unfolds smoothly, professionally, and successfully. Your future self – and your designer – will thank you.
References
Like this project
Posted Jun 30, 2025
Clear expectations are the key to a successful web design project. Learn how to agree on communication, feedback, timelines, and tools from the very beginning.