Built with FLORA
Cross-Platform Content Generation Pipeline

Anush | Foundrline


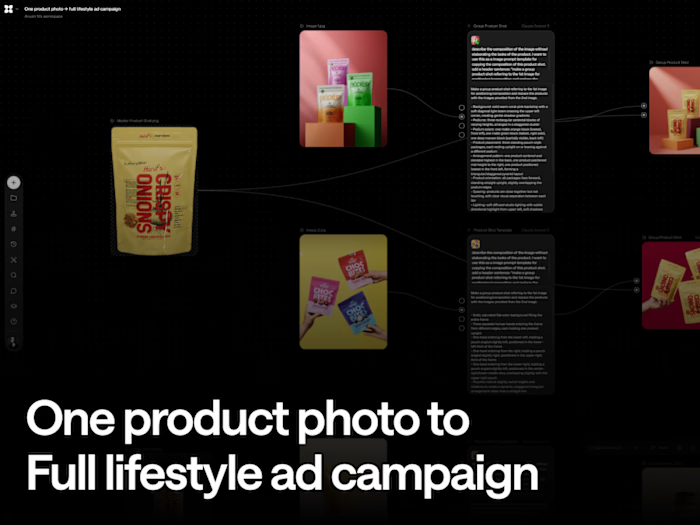
One product photo to Full lifestyle ad campaign
What we're building
A pipeline that takes one hero visual + a headline/message and produces a matching set of platform-ready thumbnails and covers YouTube thumbnail, Instagram feed, Reels/Story, podcast cover, LinkedIn, Twitter/X all sharing the same visual language, generated and correctly sized in one pass instead of manually recomposing and cropping for each platform separately.
Problem it solves
Every platform wants a different aspect ratio, and a straight crop from one format to another usually cuts off the subject or leaves awkward empty space a 1:1 square doesn't just resize into a 9:16 vertical, it needs to be recomposed. Doing that by hand for 5-6 formats per piece of content is slow and inconsistent. This workflow regenerates the composition per platform (not just crops it) while keeping the same subject, headline, and brand look across the whole set.
Workflow Steps
Step 1 - Hero Visual (Image Node)
The single source image everything else derives from one branded hero shot (product + logo + headline + CTA), generated or uploaded once. Label "Hero Visual 1." This is the only node that feeds every branch below.
Step 2 - Recomposition Concept, per platform (Text-to-Text Node, Claude Sonnet 5)
One of these per target platform, each connected to Hero Visual 1. Prompt pattern:
"Recompose this image [Hero Visual 1] as [Platform Name] ([aspect ratio], [exact pixel dimensions]). Keep the same subject and style, but reframe naturally for the new aspect ratio do not just crop, actually reposition the subject to work in this format. Leave clear space for headline text."
Claude's output is a detailed written recomposition plan background handling, subject placement and scale, where UI elements (CTA button, contact info, icons) move to, and what stays visually consistent (lighting, color, style) rather than just the image itself. This is the step that makes the final output deliberate instead of a lucky prompt guess.
Step 3 - Generate the platform-specific image (Image Node, Nano Banana 2)
Connected to both Hero Visual 1 and that platform's Step 2 concept text. Nano Banana 2 renders the actual recomposed thumbnail following the written plan exactly — subject repositioned, background extended/adapted, layout elements relocated as specified.
Step 4 - Repeat Steps 2-3 per platform
Built out here for: YouTube Thumbnail (16:9, 1280×720), Instagram Feed Square (1:1, 1080×1080), Instagram Feed Portrait (4:5, 1080×1350) etc... same two-node pattern (concept → render) repeated for each additional format needed (Story/Reels 9:16, podcast cover, etc.)
Step 5 - Export
Pull the finished set one properly composed asset per platform, not a crop of the original.
Workflow Project link - https://app.flora.ai/projects/ns7ec5wykk4vyd07cmm7a827j58dj6c1
Like this project
Posted Oct 6, 2026
Developed a pipeline to create platform-specific content from a single hero visual.
Likes
0
Views
4