Medium Post: Connecting Custom GPTs to Discord in 5 minutes
This Medium article was written for Runbear about how to connect custom GPTs to Discord without code and in 5 minutes.
Have you ever wished for a way to streamline your business operations and to make your workflows faster and more efficient?
Imagine the power of integrating AI into your daily processes. Now, with a few clicks, you can have your own personal data assistant, article summarizer, compliance review assistant, and more. The options are truly limitless.
If you’re a business looking to leverage AI capabilities, Runbear offers a seamless solution. Within a few minutes, you can integrate custom GPTs into your Discord, transforming your server into a powerful tool for automation and productivity.
The best part? You don’t need to write a single line of code.
In this guide, we’ll walk you through the process of setting up your custom GPTs with Runbear. By following these steps, you’ll be able to leverage the full potential of your custom GPTs within your Discord server.
How it Works
Here’s a simple rundown of the integration process:
Build a custom GPT using OpenAI GPTs. We assume you’ve already built one.
Make sure that you’ve converted the custom GPT to an OpenAI Assistant, so that Discord can send API requests to it. We’ve created a handy bookmarklet that will do this for you: read on to learn more. If you would rather do it manually, you can follow the OpenAI GPTs Integration Guide.
Connect the OpenAI Assistant to Discord with Runbear!
Follow the guide below to connect your custom GPTs to Discord, increasing your and your team’s productivity and efficiency.
1. Importing custom GPTs to RunBear
Now, let’s prepare for Discord integration by importing your custom GPTs to Runbear. It only takes seven steps.
Sign in to Runbear.
Open the Runbear LLM apps page on the top menu and click the “Add App” button.
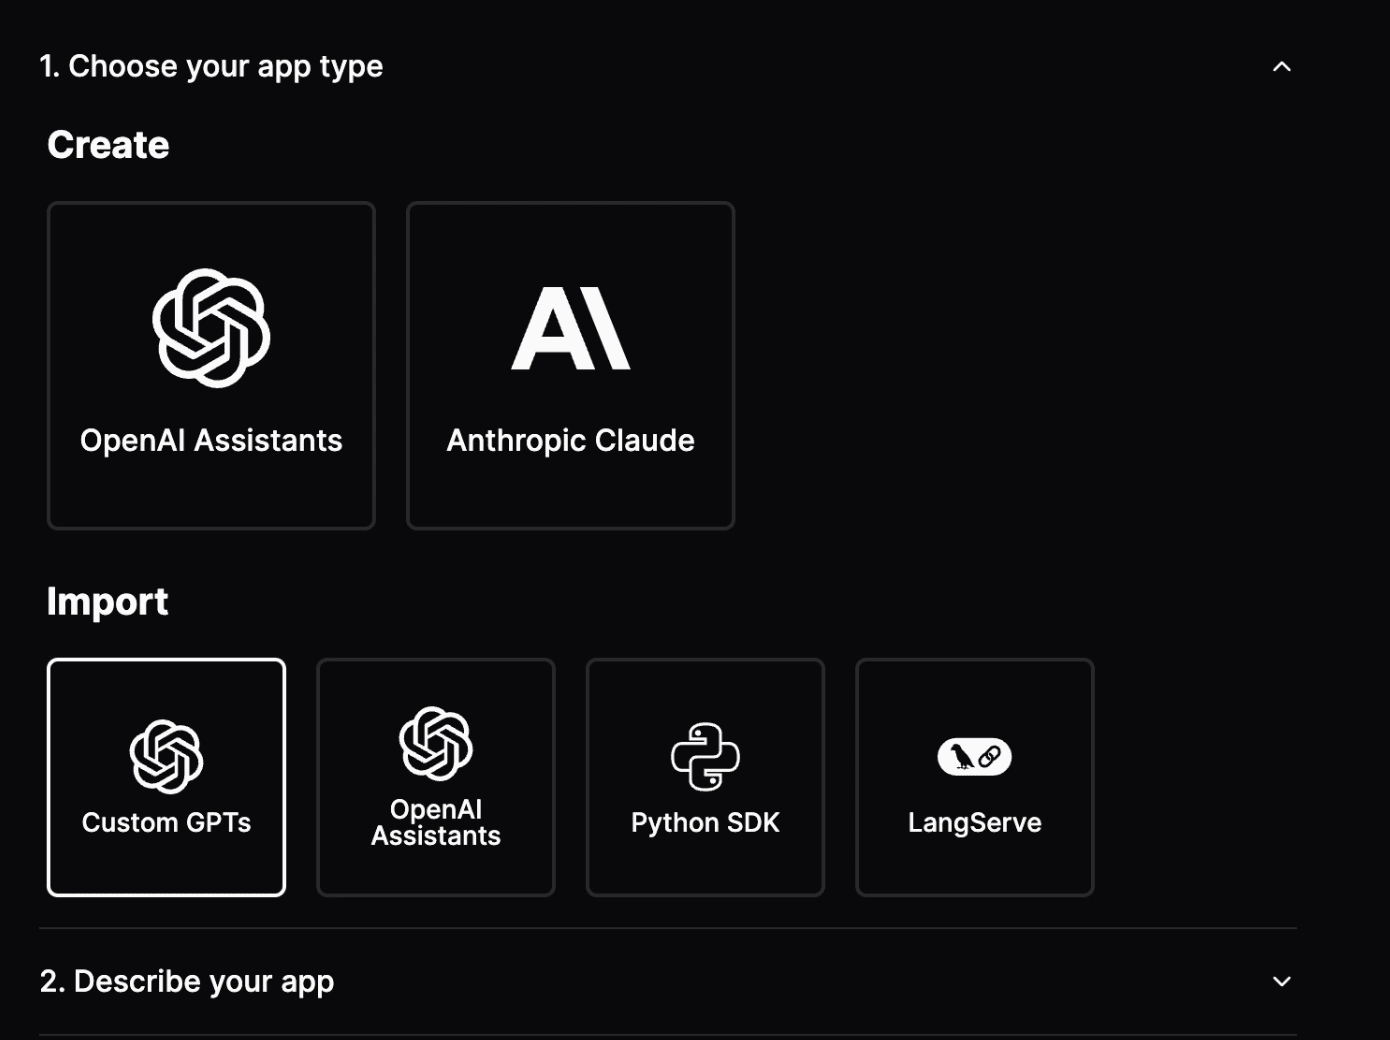
Select the “Custom GPTs” option under the “Choose your app type” dropdown menu.

4. Display your bookmarks bar. To do this, click the icon with three dots next to your browser's address bar, then click "Show Bookmarks Bar" under "Bookmarks and Lists.
5. Drag the “GPTs → Runbear v.31” button to your bookmarks bar.
6. Go to chatgpt.com and open the GPT or GPTs you wish to integrate with your Discord.
7. Click the “GPTs → Runbear v.31” button. Once redirected to Runbear’s page, review the details to ensure accuracy and click the “Create” button at the bottom. Repeat this step for the following GPTs you’d like to connect to Discord with Runbear.
Following these steps ensures that your custom GPTs are ready for integration. Now, you’re prepared for the next phase: connecting them to your Discord workspace.
2. Connecting GPTs to your Discord
Go to the Channels page on Runbear, and add your Discord server.
Now, head to the Connections page, click the “New Connections” button.
Select the LLM app of your choice, select the Discord server, and select the Discord channel.
Set the Trigger conditions for your connection. Then click Create.
And that’s it! You’ve successfully connected your custom GPTs to your Discord!
Now, head to your Discord to try it out. Invite “@Runbear” to your Discord server and ask the bot questions with a mention. Your custom GPTs will get the query and give you the answer you need.

Ready to supercharge your workflow? Use Runbear to start integrating custom GPTs with your Discord today!
Like this project
Posted Aug 6, 2024
An instructional Medium article about connecting custom GPTs to your Discord in 5 minutes (without code).


