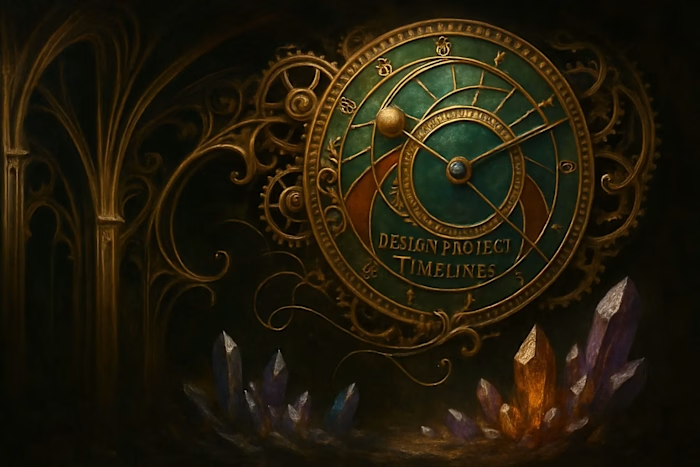
Project Rescue: How to Handle Delays, Scope Creep, and Miscommunication
Randall Carter

Project Rescue: How to Handle Delays, Scope Creep, and MiscommunicationWhen Timelines Slip: How to Handle DelaysIdentifying the Root Cause of the DelayRe-evaluating Priorities and Adjusting the TimelineCommunicating Changes to StakeholdersThe Battle Against Scope CreepRecognizing Scope Creep vs. Necessary ChangesImplementing a Formal Change Order ProcessLearning to Say 'No' Gracefully (or 'Not Now')Clearing the Air: Resolving MiscommunicationsThe 'Seek First to Understand' PrincipleMoving from Text to a Call for Sensitive IssuesDocumenting Decisions and Action Items Post-ConversationBuilding a Resilient Project Plan from the StartIncluding Buffer Time in Your Initial TimelineDefining Scope and 'Out of Scope' ClearlyEstablishing Clear Communication Protocols During OnboardingReferences
Project Rescue: How to Handle Delays, Scope Creep, and Miscommunication
Even with perfect planning, projects can face unexpected challenges. Issues like delays, scope creep, and miscommunication are common, but they don't have to derail your project. The key is to address them proactively and collaboratively. This guide provides practical strategies for navigating these common project pitfalls and keeping your collaboration with your designer on solid ground.
When you're working with designers across time zones, these challenges can feel even more complex. Different schedules and communication delays can amplify small issues into bigger problems. That's why having a solid plan for handling setbacks is crucial, especially when hiring a professional Figma designer for your next project.
When Timelines Slip: How to Handle Delays
Delays are one of the most common project challenges. How you respond to them determines whether they are a minor hiccup or a major crisis.
Think about it this way: every project is like a road trip. Sometimes you hit traffic, take a wrong turn, or need an unexpected pit stop. The journey might take longer than planned, but you can still reach your destination successfully. The trick is staying calm and adjusting your route.
Identifying the Root Cause of the Delay
First, understand why the delay is happening. Is it due to unforeseen technical challenges, a change in requirements, or a simple underestimation of the work? Talk with your designer to identify the core issue without placing blame.
Start with curiosity, not criticism. Instead of asking "Why is this late?" try "What challenges are you facing with this part of the project?" This approach opens up honest dialogue. Your designer might reveal that a seemingly simple animation requires complex coding, or that a design element needs special licensing that's taking time to secure.
Sometimes delays stem from external factors nobody could predict. Maybe a key software update broke existing work. Perhaps your designer got sick or faced a family emergency. Understanding the real reason helps you respond appropriately and find the best path forward.
Document what you learn. Keep notes about which tasks took longer than expected and why. This information becomes invaluable for planning future projects more accurately.
Re-evaluating Priorities and Adjusting the Timeline
Once you know the cause, you can adjust. This might mean simplifying a feature, re-prioritizing tasks, or officially extending the deadline. The goal is to create a new, realistic plan.
Start by listing all remaining project tasks. Work with your designer to estimate how long each will realistically take, given what you now know. Be generous with these estimates – it's better to under-promise and over-deliver at this stage.
Consider what's truly essential versus nice-to-have. Can you launch with a simpler version of that complex feature? Would users be okay with a basic animation instead of the elaborate one originally planned? These compromises might feel disappointing, but they keep the project moving forward.
Create a revised timeline that includes specific milestones. Instead of one big deadline, break the remaining work into smaller chunks with their own due dates. This makes progress more visible and helps catch any new delays early.
Communicating Changes to Stakeholders
Be transparent with all project stakeholders about the delay and the new plan. Proactive and honest communication is crucial for managing expectations and maintaining trust.
Draft a clear update that explains the situation without getting bogged down in technical details. Focus on three key points: what happened, what you're doing about it, and when stakeholders can expect delivery. Keep the tone professional but human – acknowledge the inconvenience while showing confidence in the solution.
Timing matters when sharing bad news. Don't wait until the original deadline to announce a delay. As soon as you know the timeline needs adjustment, communicate it. This gives everyone time to adjust their own plans and reduces frustration.
Follow up your initial announcement with regular progress updates. Even brief weekly notes showing completed milestones help maintain confidence. When stakeholders see steady progress, they're more patient with revised timelines.
The Battle Against Scope Creep
Scope creep—the slow, uncontrolled expansion of a project's requirements—can quietly sabotage your timeline and budget. A defined process is your best defense.
Picture scope creep like a snowball rolling downhill. It starts small – just one tiny addition here, a minor tweak there. Before you know it, your simple website redesign has morphed into a complete platform overhaul with features nobody originally asked for. The project that should have taken six weeks is now entering its fourth month with no end in sight.
Recognizing Scope Creep vs. Necessary Changes
Not all changes are bad. Differentiate between 'scope creep' (uncontrolled additions) and 'strategic pivots' (necessary changes). The key is to evaluate every new request against the project goals.
Ask yourself three questions when a new request comes in. First, does this change directly support the project's core objectives? Second, what happens if we don't make this change? Third, can this wait until after the current project launches?
Necessary changes usually fix problems or address critical user needs discovered during development. Maybe user testing revealed a major usability issue, or new regulations require specific accessibility features. These changes, while disruptive, protect the project's success.
Scope creep, on the other hand, often sounds like "While we're at it, could we also..." or "I just had a great idea for..." These additions might be valuable, but they weren't part of the original plan. They dilute focus and stretch resources thin.
Implementing a Formal Change Order Process
When a new request is made, use a formal change order process. This involves documenting the request, assessing its impact on the timeline and budget, and getting formal approval before any work begins.
Create a simple change request form that captures essential information. Include fields for the requested change, the business reason, and the person making the request. Your designer should then estimate the time and cost impact. This documentation transforms vague requests into concrete decisions.
Set clear approval thresholds. Minor changes under a certain hour or dollar amount might need only your approval. Larger changes should require sign-off from key stakeholders or whoever controls the budget. This prevents surprise overruns and keeps everyone accountable.
Make the process visible but not burdensome. A shared spreadsheet or project management tool can track all change requests and their status. This transparency helps everyone understand why the project scope and timeline might shift.
Learning to Say 'No' Gracefully (or 'Not Now')
It's okay to say no to requests that don't align with the project's core objectives. Alternatively, you can suggest adding the idea to a 'Phase 2' or 'Future Enhancements' list to acknowledge the idea without derailing the current project.
Practice responses that acknowledge the value of an idea while protecting project boundaries. Try phrases like "That's an interesting concept. Let's capture it for our next iteration" or "I can see how that would add value. How about we explore it once we've launched the core features?"
Create a visible parking lot for future ideas. This could be a dedicated section in your project management tool or a simple shared document. When people see their suggestions recorded and valued, they're more accepting of the "not now" response.
Remember that saying no protects the quality of what you're building. A focused project delivered on time creates more value than an bloated one that never quite gets finished. Your designer will appreciate the clarity, and stakeholders will appreciate the results.
Clearing the Air: Resolving Miscommunications
In a remote setting, miscommunications are inevitable. Assuming good intent and addressing misunderstandings quickly and directly can prevent them from escalating into larger conflicts.
Remote work removes many communication cues we take for granted. You can't read body language in an email or hear tone of voice in a Slack message. What seems like a straightforward comment to you might feel harsh or confusing to your designer. These small misunderstandings compound over time if left unaddressed.
The 'Seek First to Understand' Principle
If a design isn't what you expected, don't assume the designer didn't listen. Start by asking questions to understand their rationale. This approach fosters open dialogue and often reveals a simple misunderstanding.
Lead with curiosity when something seems off. Instead of "This isn't what I asked for," try "Can you help me understand the thinking behind this approach?" This simple shift changes the dynamic from confrontation to collaboration.
Often, designers make choices based on technical constraints or best practices you might not be aware of. That color you wanted might not meet accessibility standards. The layout you envisioned might break on mobile devices. By understanding the reasoning, you can work together to find solutions that satisfy both vision and practicality.
Take notes during these conversations. Write down not just the decisions made, but the reasoning behind them. This creates a valuable reference for future projects and helps prevent similar misunderstandings.
Moving from Text to a Call for Sensitive Issues
It's easy to misinterpret tone in written text. If you sense tension or a significant misunderstanding, suggest a quick video call. A face-to-face conversation can resolve issues much more effectively than a long, drawn-out comment thread.
Watch for warning signs that a conversation needs to move beyond text. Long email chains going in circles, messages with lots of clarifying questions, or any hint of frustration are good indicators. A 15-minute call often resolves what hours of written back-and-forth cannot.
Start video calls with a friendly check-in. A simple "How's your day going?" helps both parties relax and remember there's a human on the other side of the screen. This small gesture sets a collaborative tone for addressing the actual issue.
Keep these calls focused and productive. State the issue clearly, listen to the other perspective, and work together toward a solution. End by summarizing what you've agreed upon to ensure you're both on the same page.
Documenting Decisions and Action Items Post-Conversation
After a call where important decisions are made, send a brief written summary to all parties. This ensures everyone is aligned on the outcome and the next steps, preventing future misunderstandings.
Your summary doesn't need to be formal or lengthy. A quick email with bullet points works perfectly. Include what was discussed, what was decided, and who's responsible for what next steps. Add any relevant deadlines to keep things moving.
Make this a consistent habit, even for seemingly minor decisions. It takes just a few minutes but prevents the "I thought we agreed on..." conversations later. Your designer can correct any misunderstandings immediately rather than after doing work based on incorrect assumptions.
Store these summaries in a central location. Whether it's a project folder, a shared document, or your project management tool, having easy access to past decisions helps everyone stay aligned throughout the project.
Building a Resilient Project Plan from the Start
The best way to handle problems is to anticipate them. Building resilience into your project from the beginning can help you absorb unexpected shocks.
Think of project planning like packing for a trip. You can't predict every situation, but you can prepare for common scenarios. Just as you might pack an umbrella even if rain isn't forecast, building flexibility into your project plan helps you handle whatever comes your way.
Including Buffer Time in Your Initial Timeline
As a rule, always add buffer time (e.g., 15-20%) to your project timeline. This gives you the flexibility to handle small delays or unexpected issues without stress.
Calculate buffer time based on project complexity, not just duration. A straightforward design refresh might need only 10% buffer, while a complex interactive project could benefit from 25% or more. Consider factors like the number of stakeholders, technical complexity, and how well-defined the requirements are.
Distribute buffer time strategically throughout the project. Don't just tack it onto the end. Build small cushions into each major phase. This helps you identify and address delays early rather than hoping to make up time later.
Be transparent about buffer time with your team but cautious with external stakeholders. Your designer should know the real timeline to plan effectively. However, some stakeholders might see buffer time as an invitation to add more requirements. Use your judgment about what to share and with whom.
Defining Scope and 'Out of Scope' Clearly
In your initial project brief, be explicit about what is included in the scope and, just as importantly, what is not. This provides a clear reference point when new requests are made.
Create a detailed scope document that leaves little room for interpretation. Instead of "design a homepage," specify "design a responsive homepage including hero section, three feature blocks, testimonial carousel, and contact form." The more specific you are upfront, the easier it is to identify scope creep later.
List explicit exclusions to prevent assumptions. If the project includes website design but not copywriting, state that clearly. If you're designing for desktop and mobile but not tablet, document it. These exclusions might seem obvious to you but could be assumptions for others.
Get written agreement on the scope from all key stakeholders before work begins. This might feel overly formal, but it provides crucial protection for both you and your designer. When someone asks for additions later, you can reference this agreed-upon document.
Establishing Clear Communication Protocols During Onboarding
Use the onboarding process to establish the communication rules of engagement. Agreeing on how you will handle feedback, changes, and questions from the start prevents confusion later on.
Set expectations for response times based on the communication method. Maybe emails get a 24-hour response window while urgent Slack messages need attention within two hours. Whatever you decide, make sure everyone knows and agrees to these standards.
Designate specific channels for different types of communication. Project updates might go in a weekly email, quick questions in Slack, and design feedback in your project management tool. This organization prevents important information from getting lost in the noise.
Create templates for common communications like feedback, change requests, and status updates. Templates ensure nothing important gets missed and make communication more efficient for everyone. They also help maintain consistency when multiple people are involved in the project.
Schedule regular check-ins from the start. Weekly video calls, even when things are going smoothly, create space for addressing small issues before they become big problems. They also build the relationship that makes difficult conversations easier when challenges arise.
Remember, every project will face some challenges. The difference between a successful project and a stressful one isn't the absence of problems – it's how you handle them. By preparing for common issues, maintaining open communication, and staying flexible, you can navigate any obstacle while keeping your project and professional relationships intact.
The strategies in this guide aren't just about damage control. They're about building stronger, more resilient working relationships. When you and your designer successfully navigate challenges together, you build trust and understanding that makes future projects even smoother. That's the real value of learning to handle delays, scope creep, and miscommunication effectively.
References
Like this project
Posted Jul 6, 2025
Even the best-laid plans can go awry. Learn how to navigate common project challenges like delays, scope changes, and miscommunications with your designer.