How To Use Canva For Print-On-Demand Designs: 5 Easy Steps
Like this project
Posted Sep 8, 2023
Discover our step-by-step guide on How to Use Canva for print-on-demand. Create stunning designs easily, no experience needed!
Likes
0
Views
566
So you have some crazy cool ideas you want to make for your print-on-demand business but Adobe is too complex and expensive. That’s where Canva comes in.
Canva is a free and easy-to-use web-based graphic design tool that’s perfect for both beginners and pros. It’s like a magic wand that turns your design ideas into reality, without being a professional designer!
Getting started is so easy too! Seriously, all you gotta do is create a Canva account, choose or create a template, edit your heart out, export your design, and boom—you’re in business.
So why’s Canva a winner? It lets you dip your toes into design without diving into a graphic design degree. You get to flex your creative muscles however you wish, without getting lost in an interface or spending anything.
Ready to make some sick designs? Stick around, and I’ll break down How To Use Canva For Print-On-Demand in this simple step-by-step guide.
Step-by-Step Guide to Creating Your First Design in Canva
Using Canva for a POD business may seem like a daunting task, but with a little guidance, it’s easier than pie.
Quick Overview Of The Steps
Setting Up Your Canva Account: I’ll take you through the steps to create your Canva account.
Navigating the Canva Interface: The Canva home interface can be a bit confusing at first with so many options. This is where you’ll be choosing templates and sizes, and you can manage all of your designs.
Creating Your Design: I’ll take you through the exact steps to creating the design you want, whether it be with a template or from scratch.
Preparing Your Design for POD: Your designs need to be a certain resolution and size to be uploaded to your provider. This will depend on your print provider as well as the product your design will be on.
Exporting Your Design from Canva: It is important to download your designs in a high-quality image type such as PDF to JPG.
Setting Up Your Canva Account
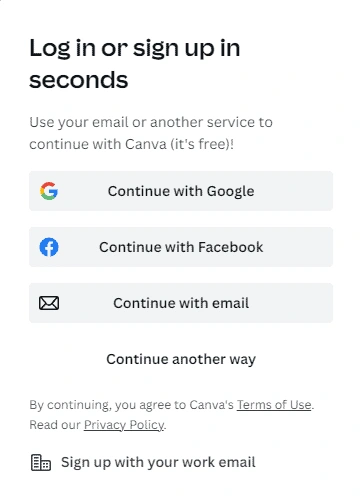
First things first, you need to set up your Canva account. It’s super simple – just follow these steps:
Go to the Canva website.
Click that “Sign up” button.
You can sign up using your Google, Facebook, or Apple account, or you can use your email.
Once you’ve signed up, you’ll be taken to the Canva dashboard. This is where the magic happens!
Navigating the Canva Interface
Now that you’re in, let’s take a look at what’s on that home page.
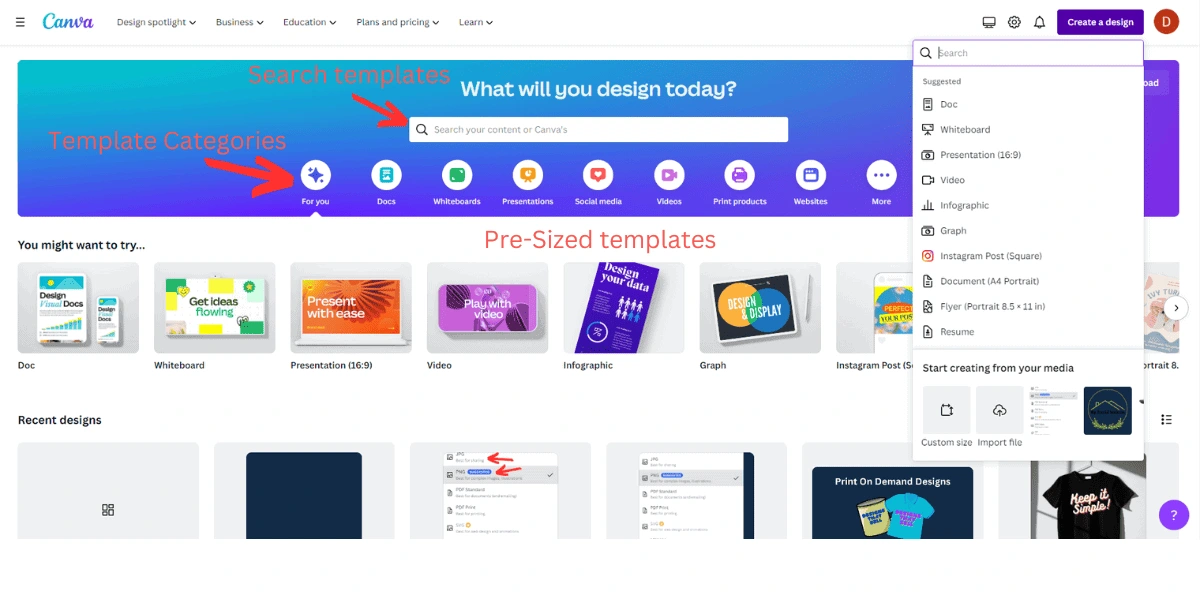
This page is where you’ll be managing all of your designs. Right at the top you’ve got a search bar if you’d like to find a specific template. The template categories are right below if you want to take a look at all they offer, and below that they have some recommended templates for you to try.
If you’d like to start from scratch, the top right has a “Create design” button that will create a blank canvas for you to start with of your size choice.
Now that you’ve got the homepage down, let’s take a look at the editor interface.
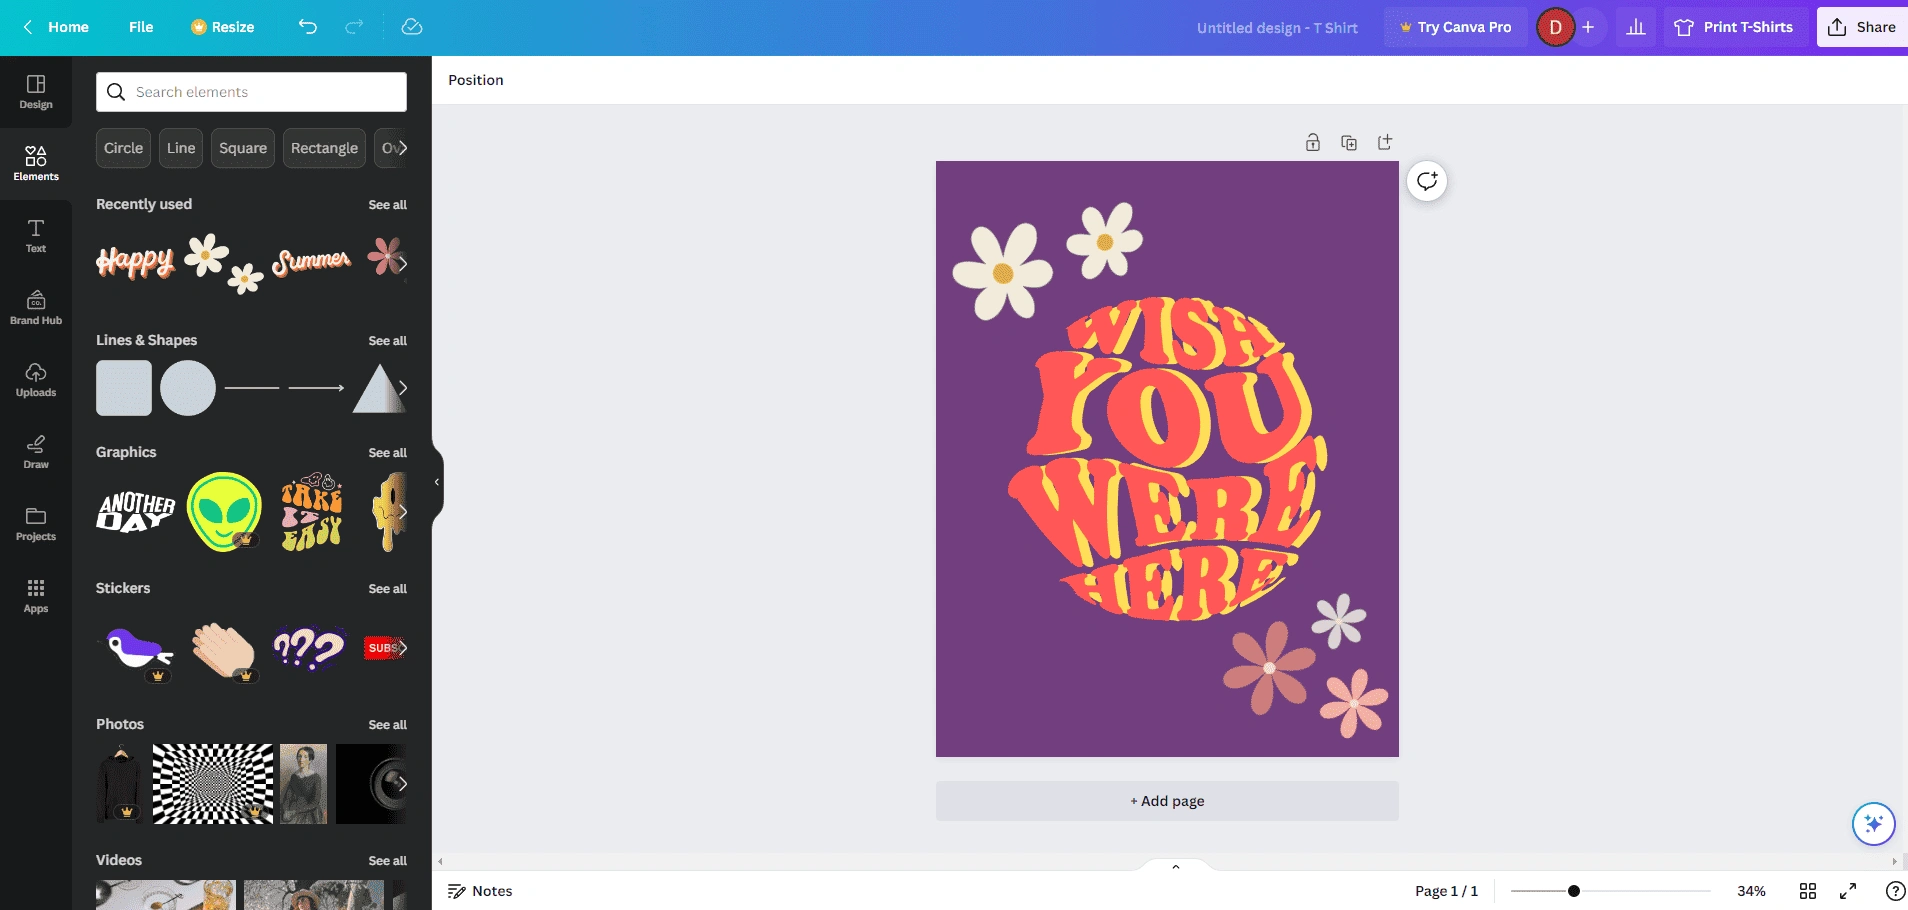
– The sidebar on the left is where you’ll find design templates, elements, text options, and more.
– The right section is your canvas. This is where you’ll see and edit your designs.
– Above your canvas is a bar to edit the individual element(s) you have selected
– The top bar has options for resizing your design, undoing and redoing actions, and downloading your design.
In the next section, we’ll dive into creating your first design. Get ready to unleash your creativity!
Creating Your Design
Now let’s get to the fun part, learning to create stunning designs:
1. Choose a Template: Canva has a library of templates specifically designed for POD products like t-shirts, mugs, phone cases, and more. You can use these as a starting point and customize them to fit your brand. Just click on “Templates” in the sidebar and browse through the categories.
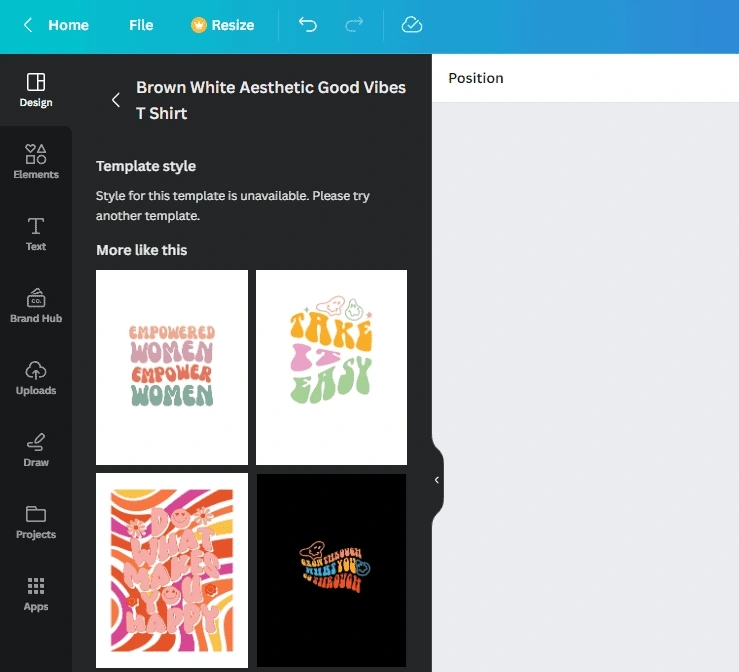
2. Customize Your Template: Once you’ve chosen a template, you can customize it by changing the text, colors, images, and even the background. Just click on the background or element you want to change and use the options that appear.
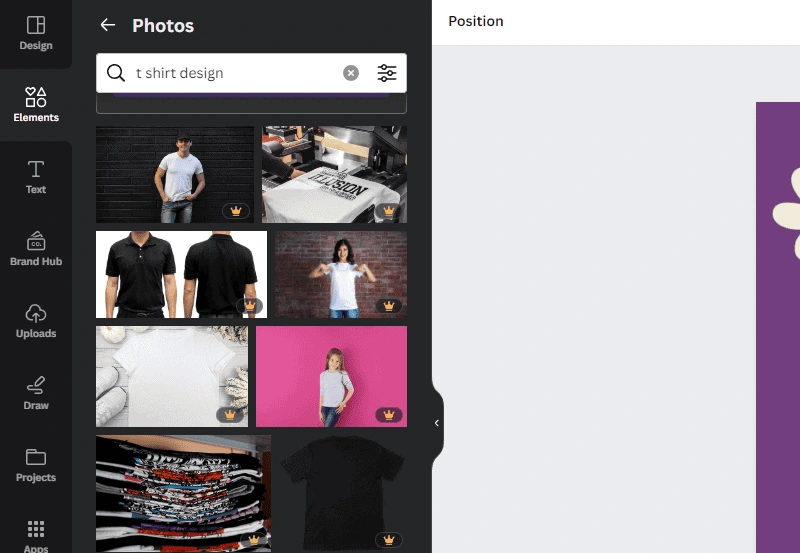
3. Add Elements: You can add additional elements to your design, like shapes, lines, and icons. Just click on “Elements” in the sidebar and drag and drop them onto your canvas.
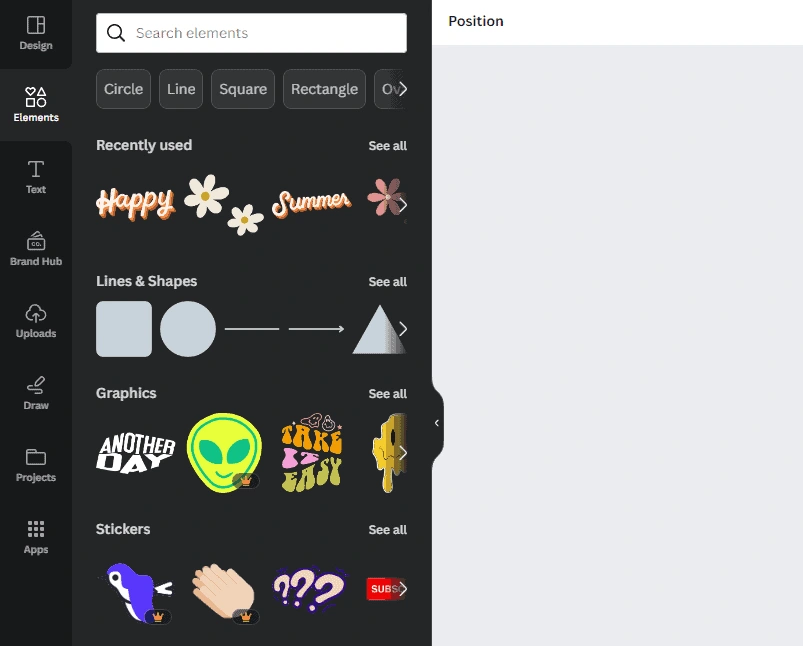
4. Save Your Design: Don’t forget to save your design as you go along. Canva autosaves your work, but it’s always a good idea to manually save just in case.
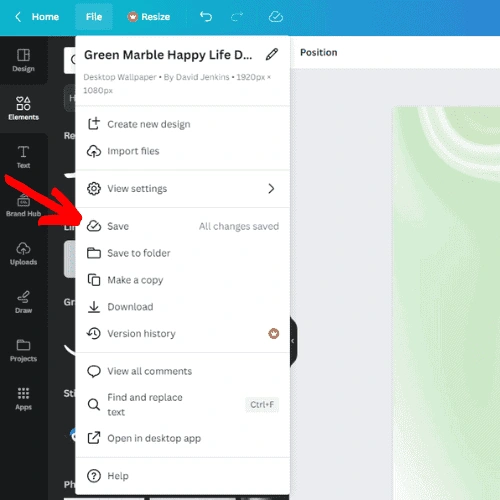
And voila! You’ve created your first design. But before you rush off to print it, note that there are a few things you need to do to prepare your design for your print-on-demand platform. Let’s dive into that next.
Preparing Your Design for Print-on-Demand
Before you download your design, you need to make sure it’s a print-ready file and meets certain requirements (if applicable from your print provider). Here’s what you need to do:
1. Check the Resolution: For print-on-demand printing, your design needs to be high resolution. This ensures it will look crisp and clear when printed. In Canva, you can check the resolution of images in your design by checking what pixel dimensions you have.
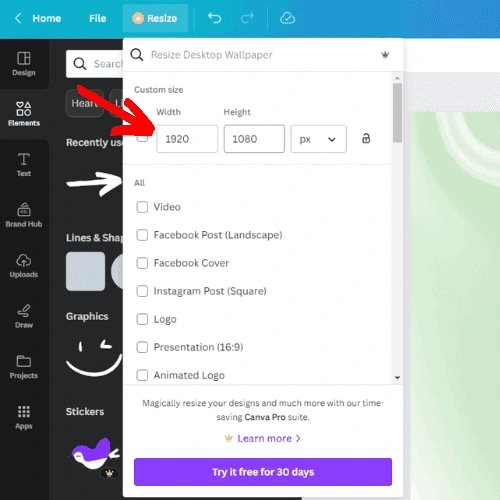
2. Check the Size: Make sure your design is the right size for your print-on-demand product. The size will need to be much larger for a shirt than say a sticker or pin. You can check and change the size of your design by clicking on the ‘Resize’ button at the top of the screen.
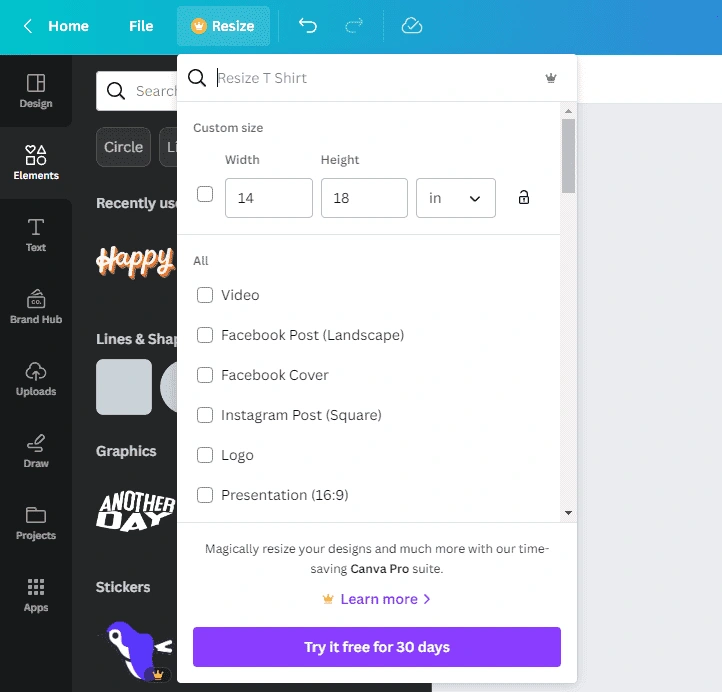
Once you’ve checked these things, you’re ready to export your design. Let’s move on to that next.
Exporting Your Design from Canva
You’ve created your design and prepared it for your print-on-demand service. Now you’re ready to export your print-ready files. Here’s how:
1. Click on the ‘Download’ Button: You’ll find this at the top right corner of your screen. This will open the download options menu.
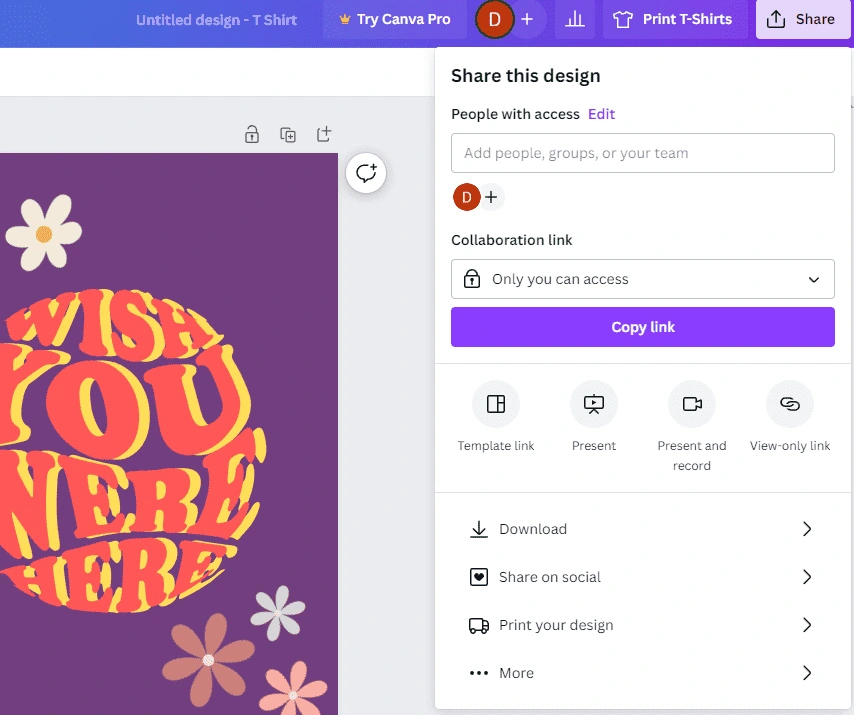
2. Choose the Right File Type: For print-on-demand, it’s best to choose a high-quality file type like PDF Print or PNG. This will ensure your design looks its best when printed.
3. Download Your Design: Click on the ‘Download’ button to save your design to your computer. And voila! You’ve successfully created and exported your first design for print-on-demand.
Congratulations! You’ve just taken a big step in your print-on-demand journey. But we’re not done yet. There are a few key considerations to keep in mind to ensure your designs are always top-notch. Let’s dive into those next.
Key Considerations To Create Successful Custom Designs With Canva
Creating a successful design isn’t just about following the steps. There are a few key considerations to keep in mind:
1. Know Your Audience: The design that will appeal to a teenager might not be the same as the one that will appeal to a retiree. Always keep your target audience in mind when creating your own designs.
2. Stay On Brand: Your designs should reflect your brand’s personality. Use colors, fonts, images, and even transparent background styles that align with your brand identity.
3. Less is More: When it comes to design, simplicity often works best. Don’t overcrowd your design with too many elements.
4. Experiment and Have Fun: The best designs often come from experimentation. Don’t be afraid to try different things and make new ways to have fun with the process!
Taking it to the Next Level: Enhancing Your Canva Designs
Once you’ve mastered the basics, you can start to explore more advanced features in Canva. Here’s how you can take your designs to the next level:
1. Use Pro Features: Canva Pro offers a host of advanced features like the ability to automatically resize designs, access to premium stock photos, and more. If you’re serious about your print-on-demand business, it might be worth the investment.
2. Try Animation: Canva allows you to animate your designs, adding a whole new level of interest. While this might not be applicable for print designs, it can be a great way to showcase your designs on social media.
3. Use Brand Kit: With Canva’s Brand Kit, you can save your brand colors, fonts, and logos for easy access. This can save you a lot of time and ensure consistency across your designs.
Remember, the key to great design is practice. So, keep experimenting, keep learning, and most importantly, keep having fun!
Now that you’ve got the process down, let’s take a closer look at what Canva is.
What is Canva?
So, what actually is this Canva thing I’ve been raving about? Well, Canva is a graphic design tool that’s perfect for both beginners and pros.
Their online platform allows you to create designs that look professional for anything from social media graphics to posters, and of course, designs for your print-on-demand products.
And the best part? It’s super user-friendly. The interface is intuitive, and you can drag and drop elements, change colors, add text, and much more with just a few clicks.
Why Canva Is Important For Your Business
You might be wondering, “Why should I bother learning Canva for my print-on-demand business?” Well, let me tell you, Canva is a perfect fit for the POD business model. Here’s why:
1. It’s User-Friendly: You don’t need any design experience to get started with Canva. The interface is intuitive, and the features are easy to use. You’ll be creating great designs in no time!
2. It’s Versatile: With Canva’s templates, you can create a wide range of designs to sell them. Whether you’re selling t-shirts, mugs, or posters, Canva has got you covered.
3. It’s Cost-Effective: Canva offers a free version with plenty of features to get you started. Plus, the paid version is affordable and offers users even more design options.

With Canva, you can take control of your design process and create products that truly reflect your brand. Plus, not paying a professional graphic designer will definitely help you save money. It’s time to let your creativity shine!
Alternatives to Canva
While Canva is a fantastic tool, it’s not the only one out there. If you’re looking for alternatives, here are a few you might consider:
1. Adobe Spark: This is a free, user-friendly design tool that also comes with a range of templates and customization options. It’s a bit more advanced than Canva, but still accessible for beginners.
2. PicMonkey: PicMonkey is another great option for creating designs. It offers a range of editing tools and templates, and it’s known for its photo editing capabilities.
3. Crello: Like Canva, Crello is a drag-and-drop design tool that’s easy to use. It offers a range of templates and design elements, and it also has a free version.
Remember, the best tool for you will depend on your specific needs and preferences. So, don’t be afraid to try out different options and see what works best for you!
How To Use Canva For Print-On-Demand: Final Thoughts
Jumping into creating your own designs doesn’t have to suck; it can be fun. And when you pair it with a platform like Canva, it’s easy too. Trust me, with countless hours on various design platforms, Canva is by far the easiest to use with the most features. Plus being free on top of everything else is like a cherry on top.
So, if you’re ready to take control of your brand with Canva, you won’t regret it. It’s time to unleash your creativity and take your print-on-demand business to new heights.
Get started with Canva for free today and start creating amazing designs today.


