Building a Containerized Web Application using Amazon ECS
Features of AWS Fargate
AWS Fargate is a serverless compute engine that allows you to run containers without needing to manage the underlying infrastructure. Here are the main features of Fargate:
Serverless Compute: Fargate eliminates the need for you to provision or manage EC2 instances by abstracting the underlying infrastructure. Only the resources needed to run your containers are paid for.
Auto-Scaling: It enables your application to handle fluctuating loads with ease by automatically scaling the compute capacity according to your task requirements.
Enhanced Security: Fargate improves security by limiting the surface area for attacks by isolating each task in a separate virtual machine.
Seamless Integration with ECS and EKS: Fargate is compatible with a variety of container orchestrations because it integrates with both Amazon Elastic Container Service (ECS) and Amazon Elastic Kubernetes Service (EKS).
Resource Allocation: By only provisioning what is required for each container, it optimises resource usage and costs by allowing you to specify exact CPU and memory requirements.
Reduced Operational Overhead: Teams can concentrate more on applications and code because Fargate automatically handles server updates, OS patches, and other infrastructure maintenance duties.
Task-Level IAM Roles: You can assign specific IAM roles to individual tasks, improving access control by limiting permissions to each task’s requirements.
Cost-Effectiveness: Fargate’s pricing is based on per-second billing, ensuring you pay only for the compute and memory resources used by running tasks, rather than paying for idle capacity.
Compatibility with CI/CD Pipelines: Fargate supports containerized application workflows and integrates with DevOps tools, making it easier to implement CI/CD pipelines.
Hands-On
Now, let’s do hands-on to set up ECS using AWS Fargate and run a sample web application using AWS Fargate.
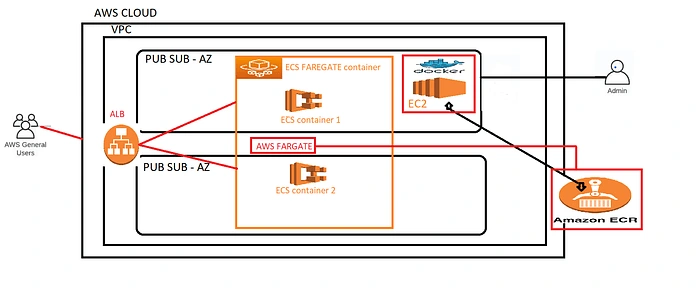
The steps of this implementation are as follows:
Step 1: Build an application using docker container.
Step 2: PUSH the docker container to AWS ECR.
Step 3: Build the ECS container using docker container image pushed to ECR
Step 4: Using Fargate cluster build the application (Task defination — task and Service)
Step 5: Using the ALB to connect www
Pre-requisites
Need an EC2 instance to install Docker and the Application.
IAM role
Application Load Balancer (ALB)
Step 1: To build an application using a Docker container, we need to create an EC2 instance and install Docker on it. We can also include a boot strap script that installs Docker while launching the instance.

Log in to the EC2 instance to see if Docker was successfully installed.
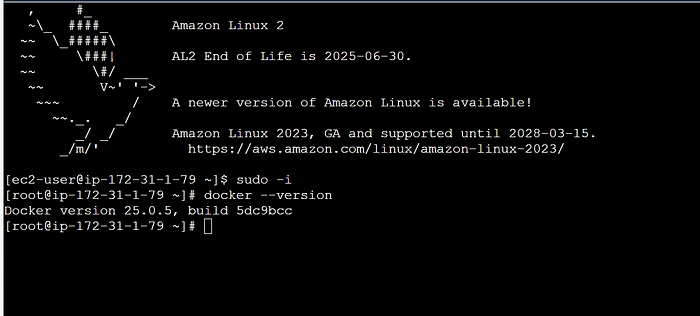
Docker has been installed successfully
Create a Dockerfile for the application, then install Apache.
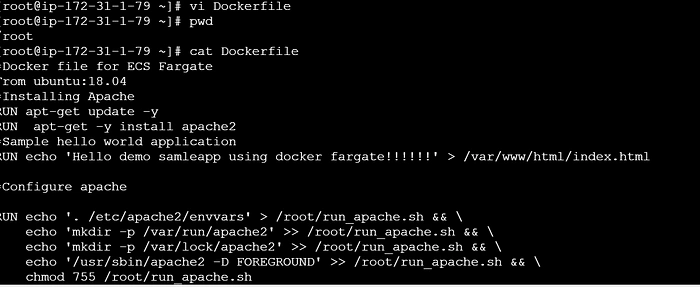
Using the Dockerfile, we will create a Docker image by running the commands listed below.

By running the above command, containers are created. We can check it by running the following command:

The container has been successfully created using the Docker image. Let’s check the Apache output by entering the IP address into the web browser.
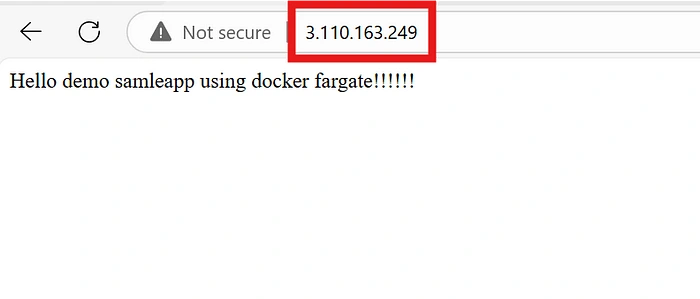
Step 2: Push the Docker container to AWS ECR. A private repository must be created in AWS. To create a private repository, we must first create an IAM role because the EC2 instance service and the ECR service must be connected.

The role has been created successfully. Now, attach the role to the EC2 instance.
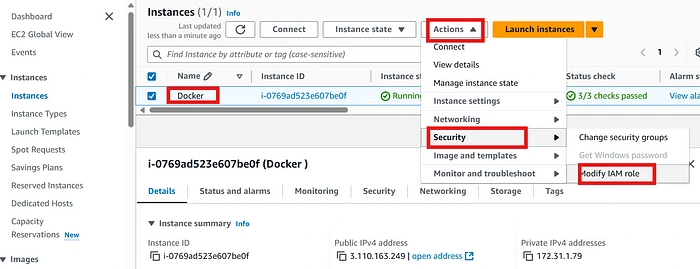
To attach the role to the EC2 instance, select the instance where you need to change the role and click on actions. Go to security, and from the drop down menu, select Modify IAM role. You will be taken to another page where we can attach the IAM role that we created and click on update IAM role.
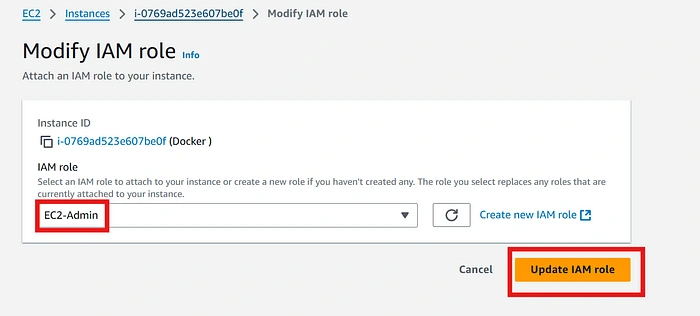
Step 3: Build the ECS container using docker container image pushed to ECR
Now let us create the private repository in command line.

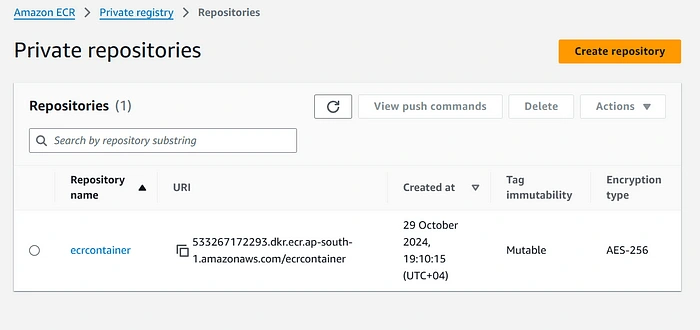
The private repository was created successfully. We need to use the CLI command to push the Docker container image to this private repository. When you click on the repository, you’ll be taken to another page where you can see the view push command. To push the image to the private repository, execute the commands.

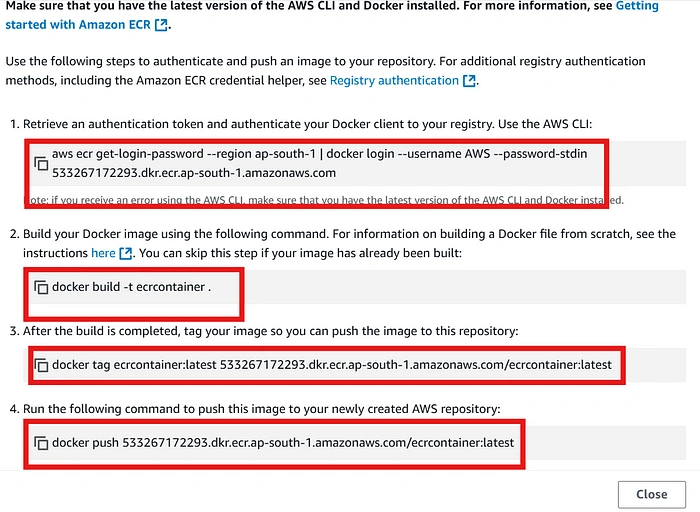
Execute the commands sequentially to push the image to the private repository.
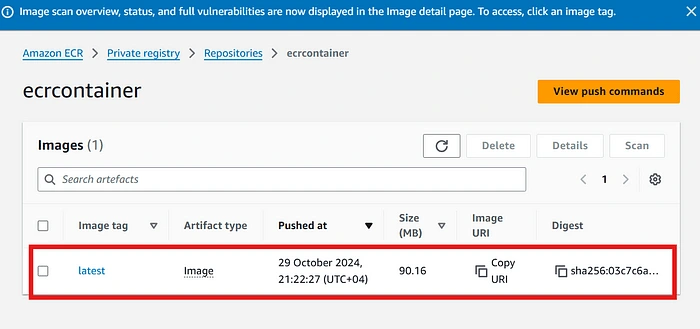
The image was successfully pushed to the private repository, which is the ECR (Elastic Container Registry). With this image we are going to spin up a container in ECS (Elastic Container Service).
Step 4: Using Fargate cluster build the application (Task definition — task and Service)
To spin a container, we must first create a cluster, and then define the task and services within that cluster. Go to Elastic Container Service (ECS) and click on Create Cluster.

After we’ve created the cluster, we must define the tasks within it for that click on the task definition.


When creating the task definition, the container information must map to the container image URL, which must be obtained from the (ECR) Elastic Container Registry.
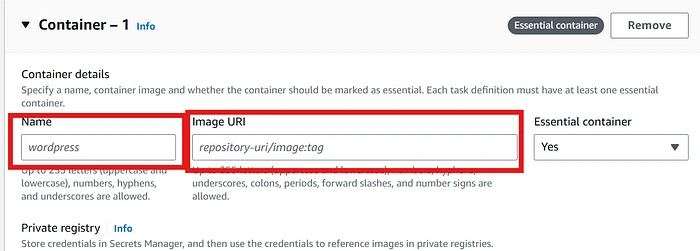
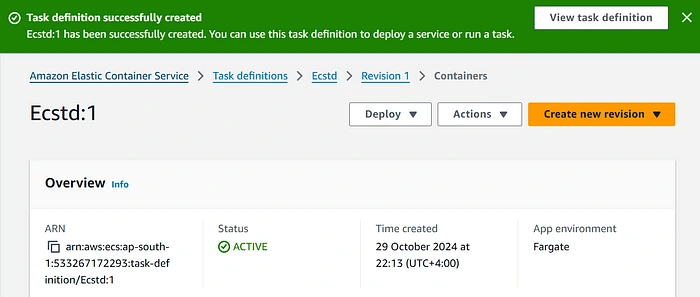
The task definition was created successfully. Now we need to create tasks in the cluster. Go to the tasks tab for the specific cluster and click on new task.
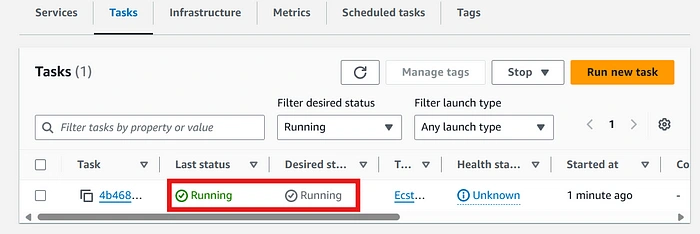
Tasks allow us to spin up the containers. Please check the output of the containers. Use the public IP address of your browser to check the container output.
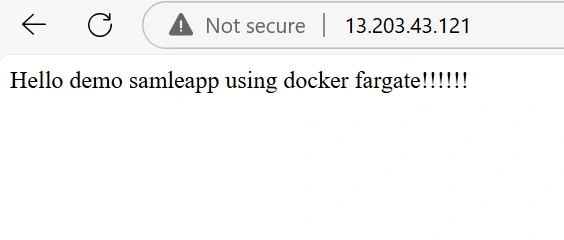
Step 5: Using the ALB to connect www
Target groups are required to build the Application Load Balancer. Under EC2, we can see the target groups form a new target group.
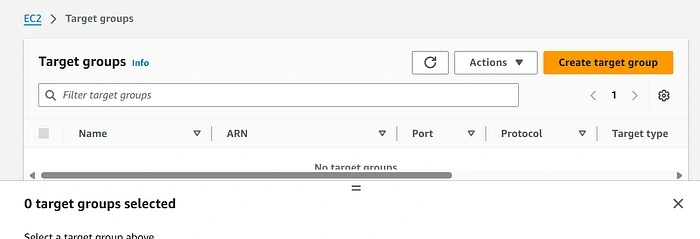

The target groups have been created successfully. Now, navigate to load balancer and choose application load balancer.
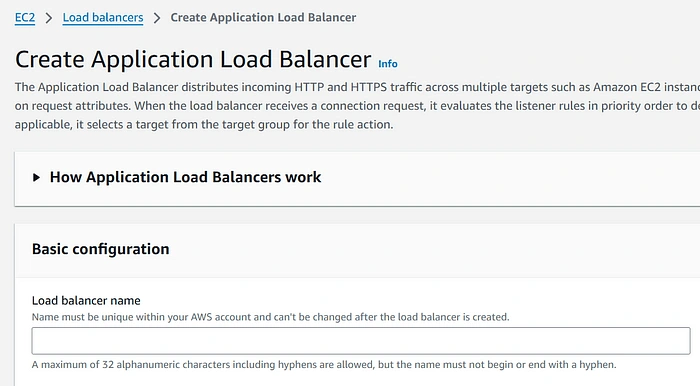
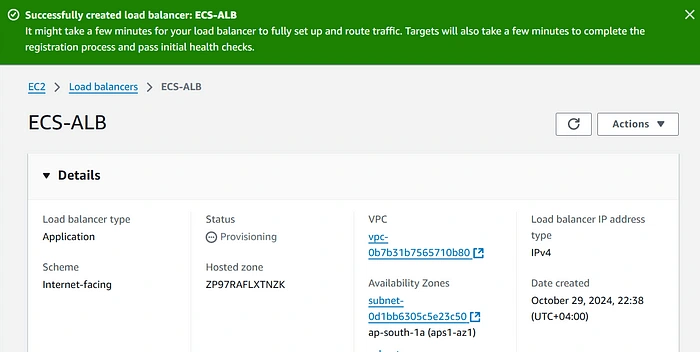
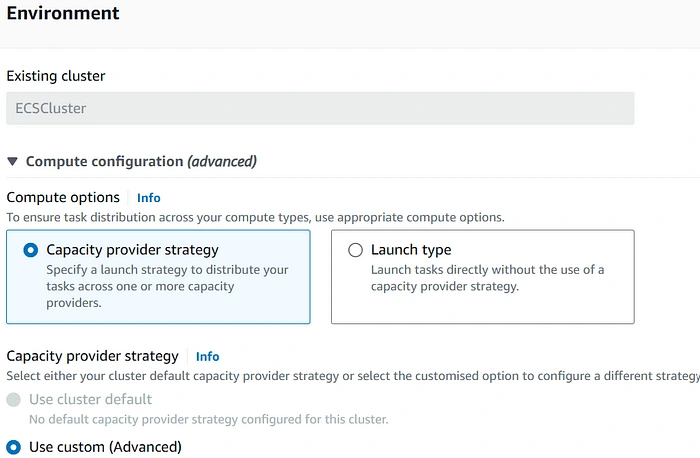
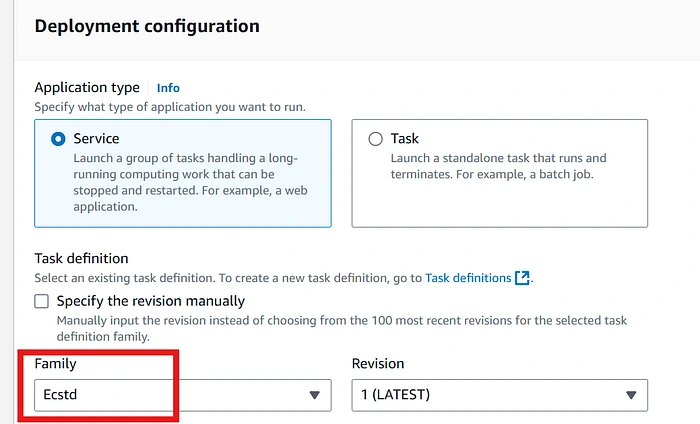
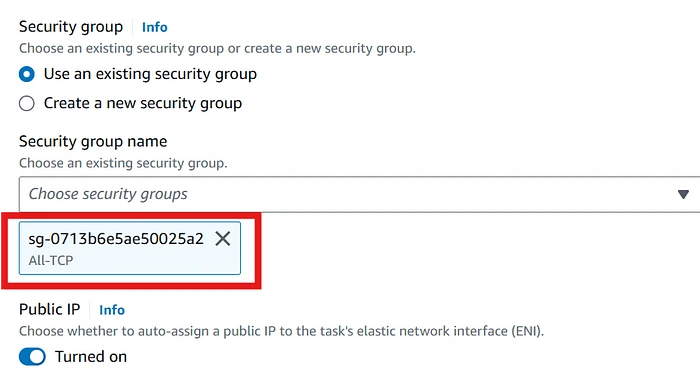
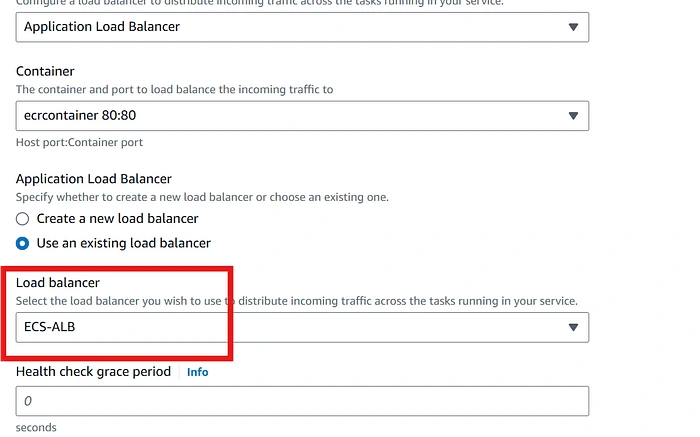
The load balancer was created successfully. This load balancer must be linked to the service within the Elastic Container Service (ECS). Navigate to ECS and select the cluster to which we need to add the service. To add load balancer information, select the service tab. Under service creation, enter the necessary information such as the name of the security group and the load balancer, and then save the changes.
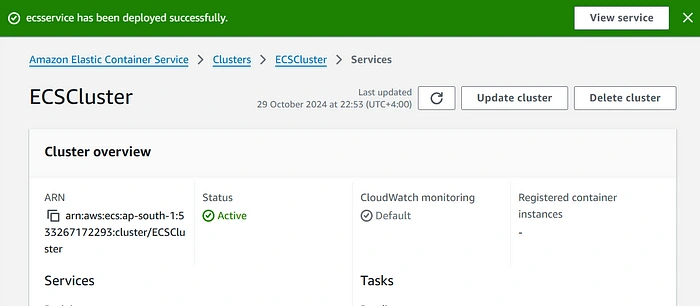
To check whether the load balancer is active for the cluster, enter the load balancer URL into your browser and you should see your web application.

We successfully deployed the application in ECS using the load balancer.
Like this project
Posted Jan 9, 2025
We successfully deployed the application in ECS using the load balancer.
Likes
0
Views
4
Tags


