
One-line summary
An independent 6-slide visual guide that turns Grey's KYC process into plain steps and fixes the most common rejection causes.
The problem
KYC is where many fintech users get stuck. A blurry photo, a name mismatch or an expired ID means rejection, a support ticket, and sometimes an abandoned account. Grey's help content is accurate, but it's text-heavy and spread across several articles.
What I did
I read Grey's official Help Center articles on verification, accepted documents and failure reasons, then rebuilt them as one short visual guide for first-time users.
What's in the guide
A 3-step overview: address and proof, PEP check, ID and face video, review
A pre-verification checklist so users prepare before they start
One slide per step, with a single action per row and a tip
A problem-and-fix table covering six common rejection reasons
Accepted ID types for Nigerian users
My writing decisions
One action per line, in plain language
Technical terms explained once (PEP, KYC)
Rules stated as do and don't, such as "original ID, not a photocopy or screenshot"
Failure states paired with an immediate fix
Why it matters for fintech teams
Clear onboarding content reduces avoidable rejections and gives support teams something to point users to instead of repeating answers.
Tools: Google Slides, desk research of official documentation.
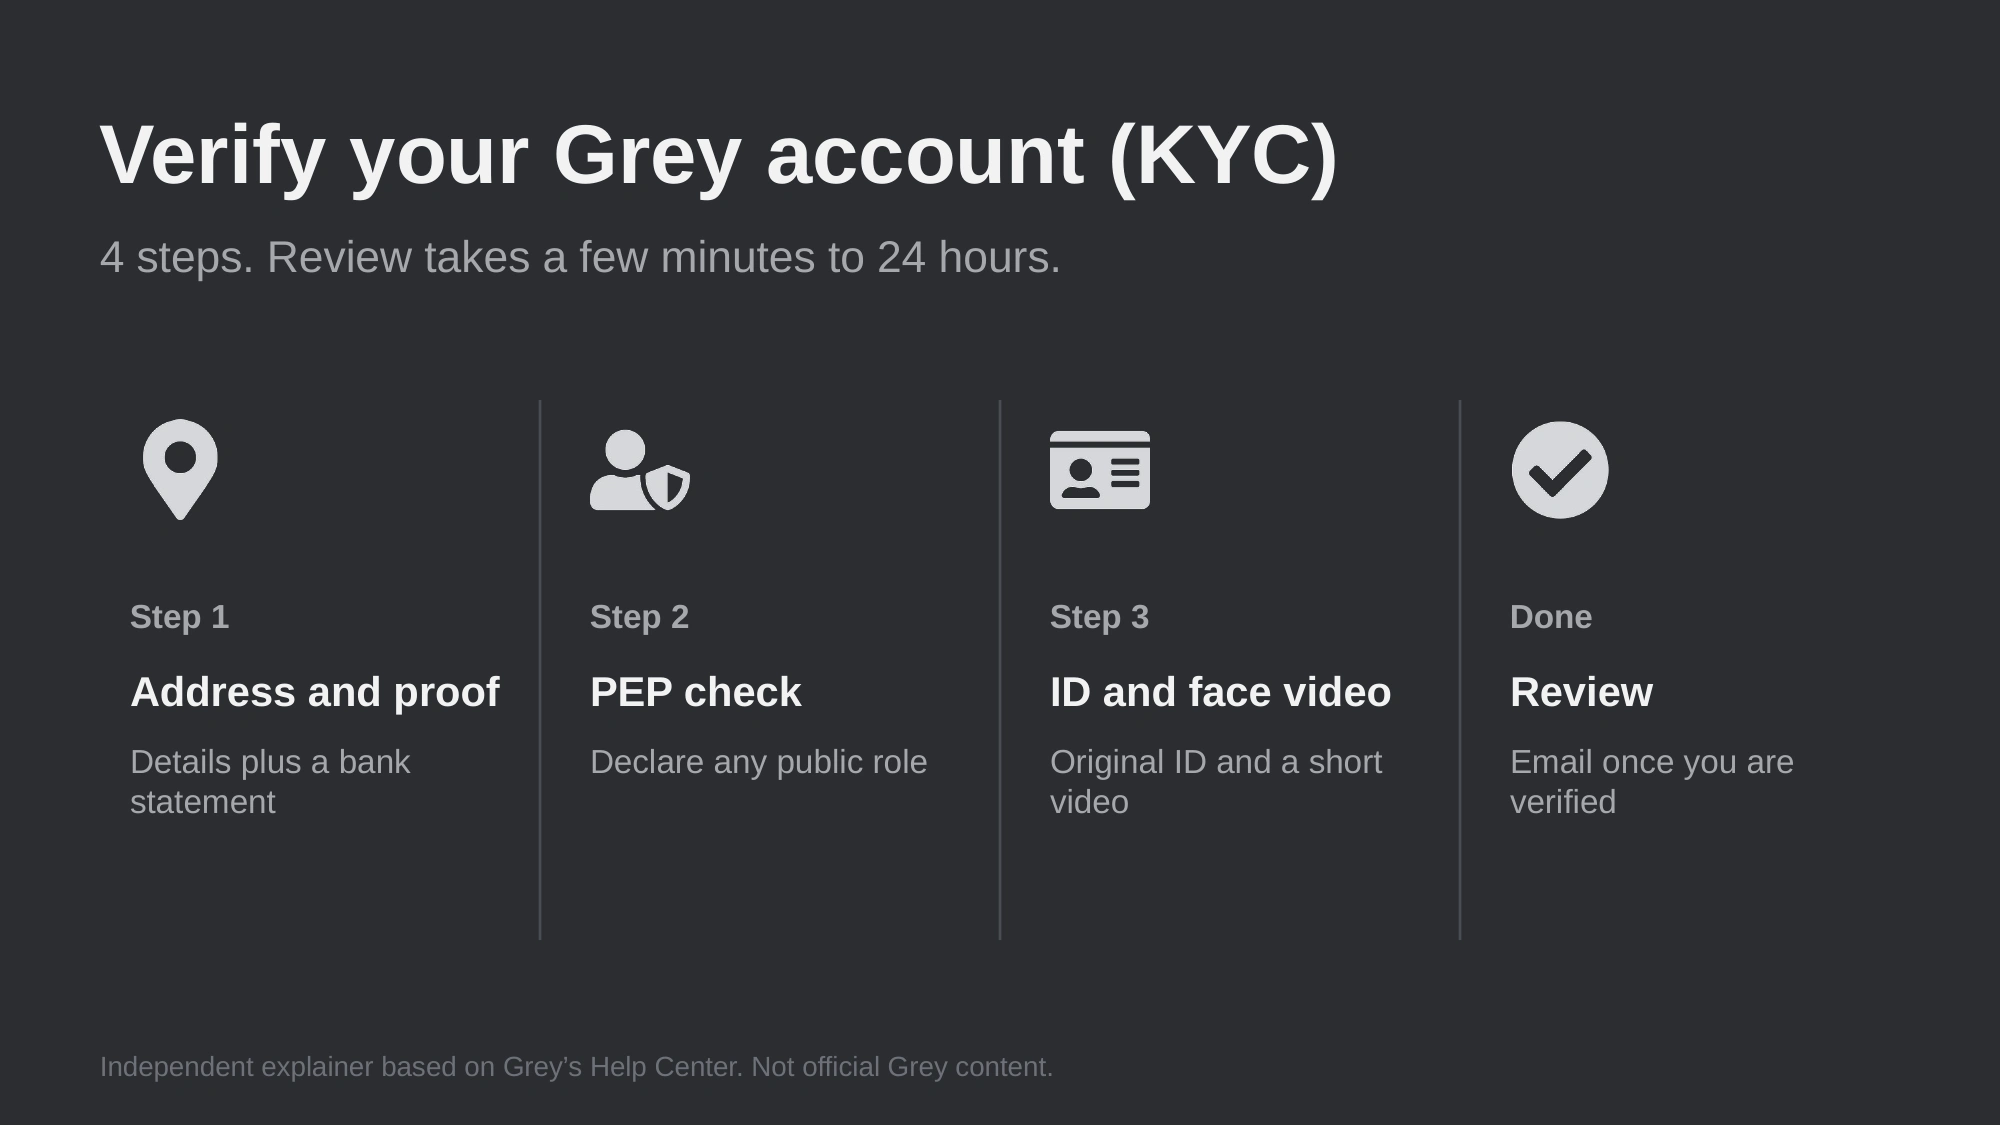
Grey KYC verification guide: the 4 steps to verify your Grey account
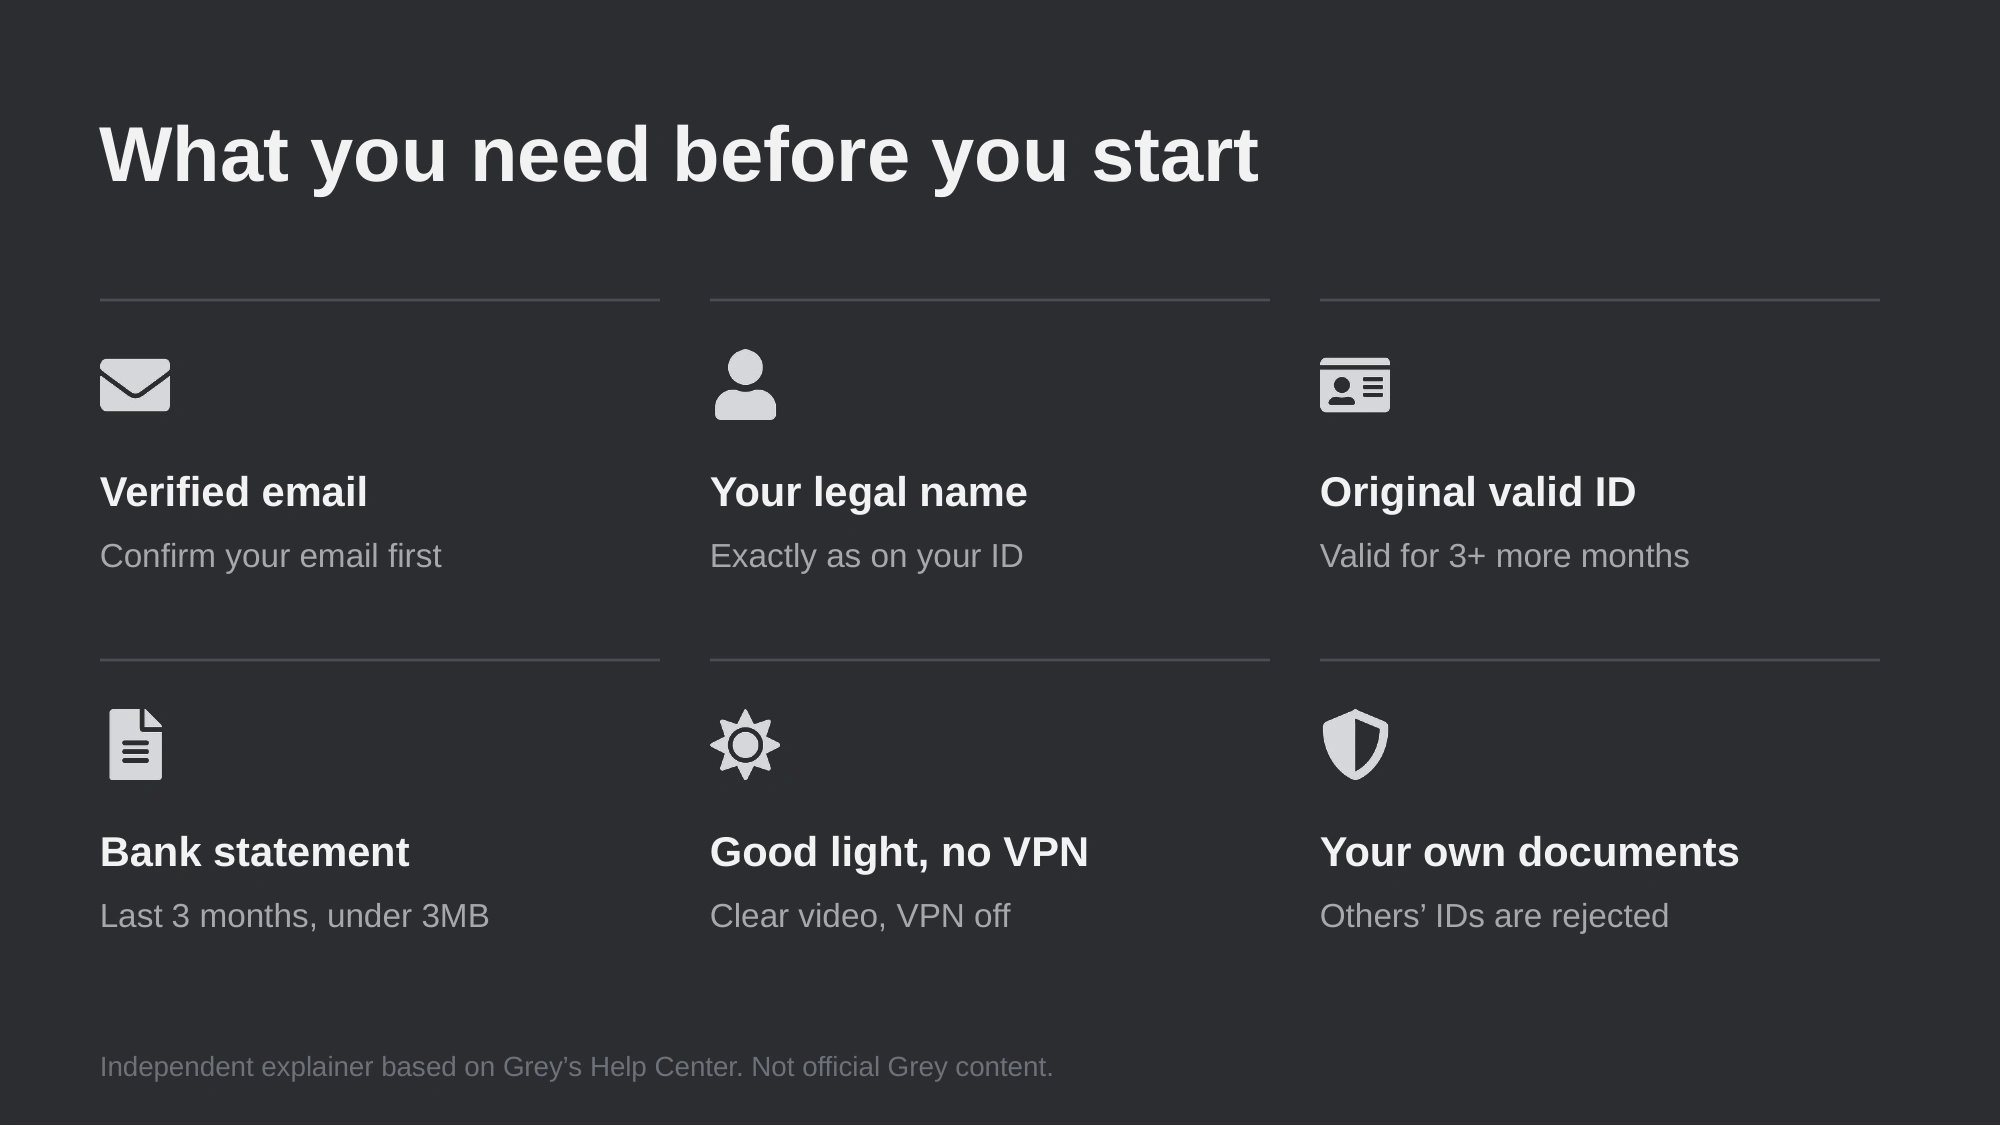
Documents needed for Grey KYC: valid ID, bank statement, legal name and a clear video
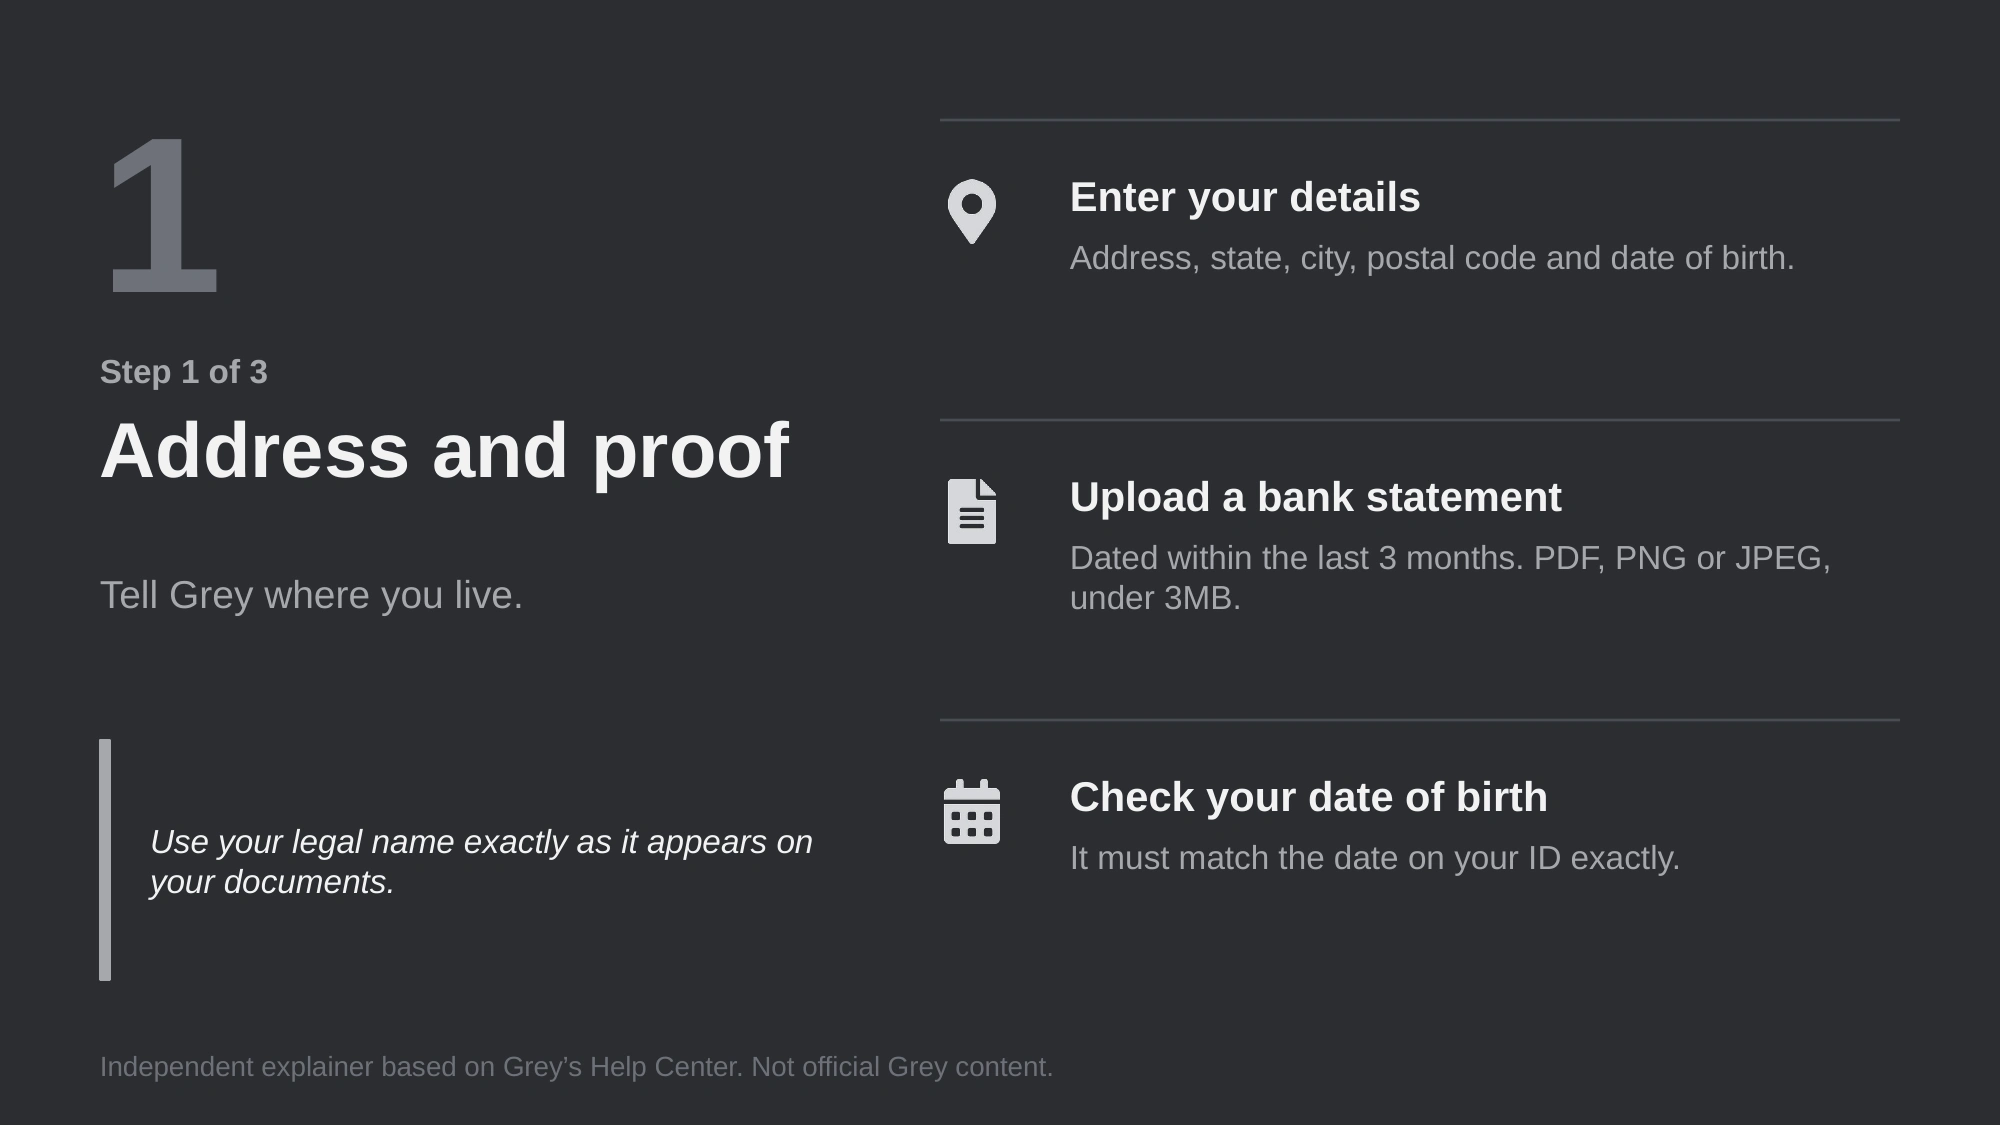
Step 1 of Grey identity verification: enter your address and upload a bank statement
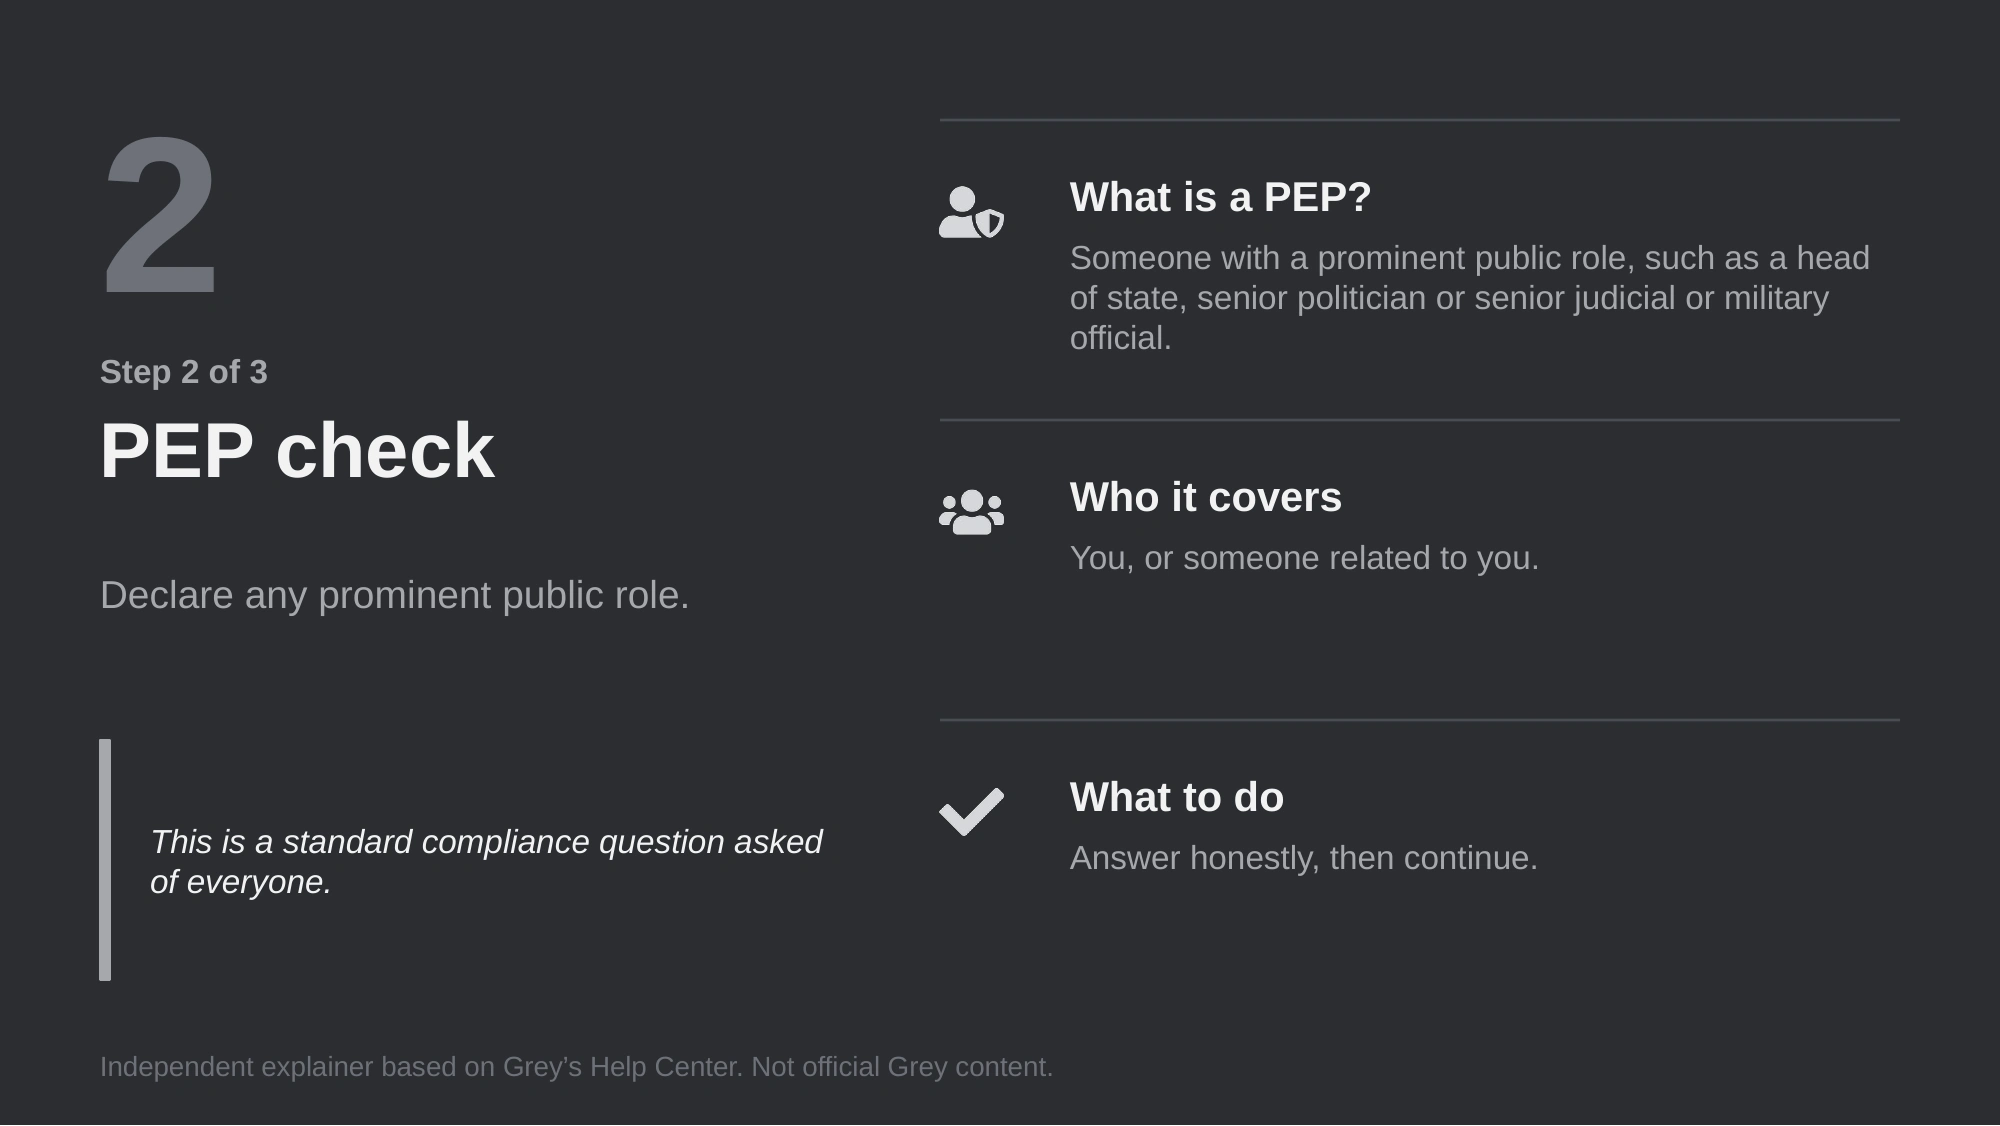
Step 2 of Grey KYC: the PEP (politically exposed person) declaration explained
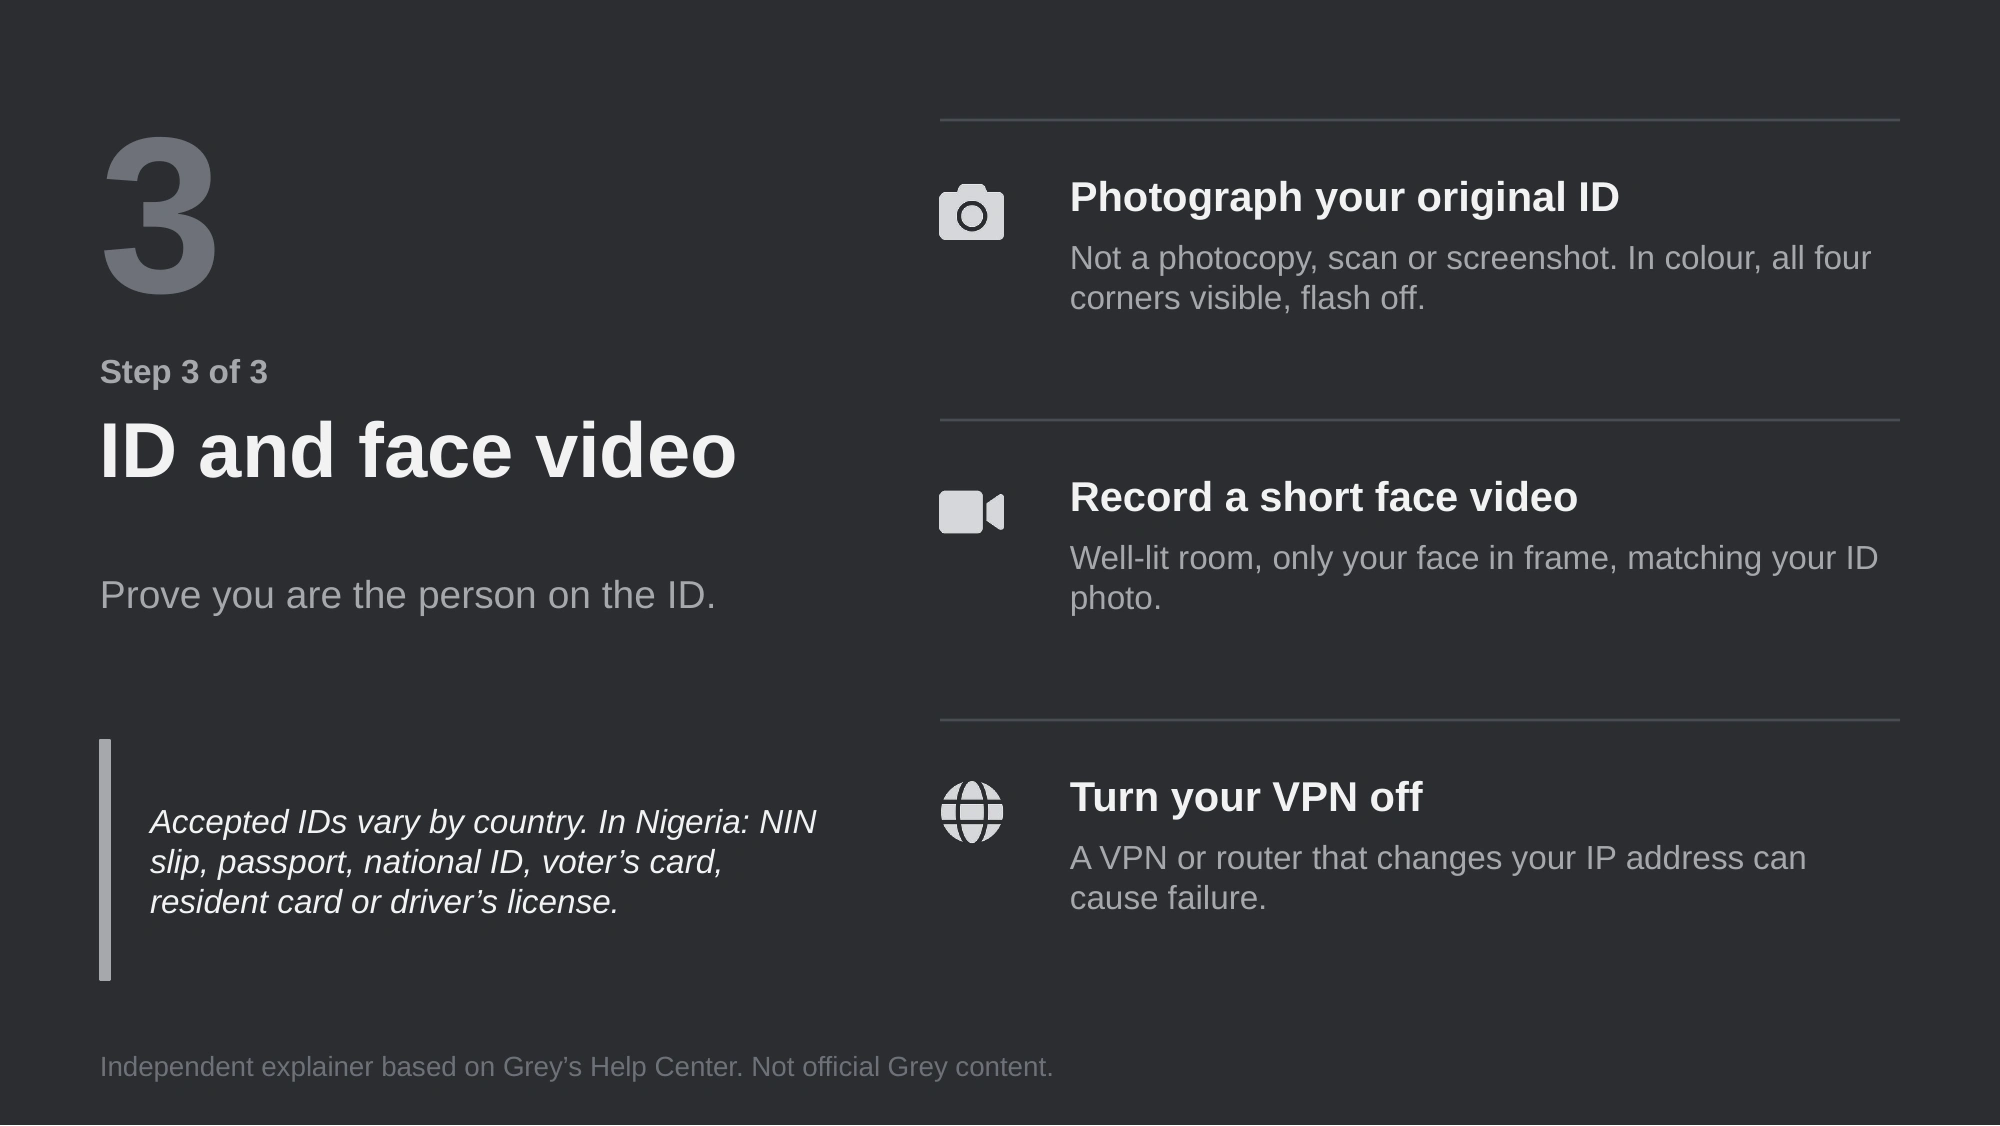
Step 3 of Grey KYC: photograph your original ID and record your face video
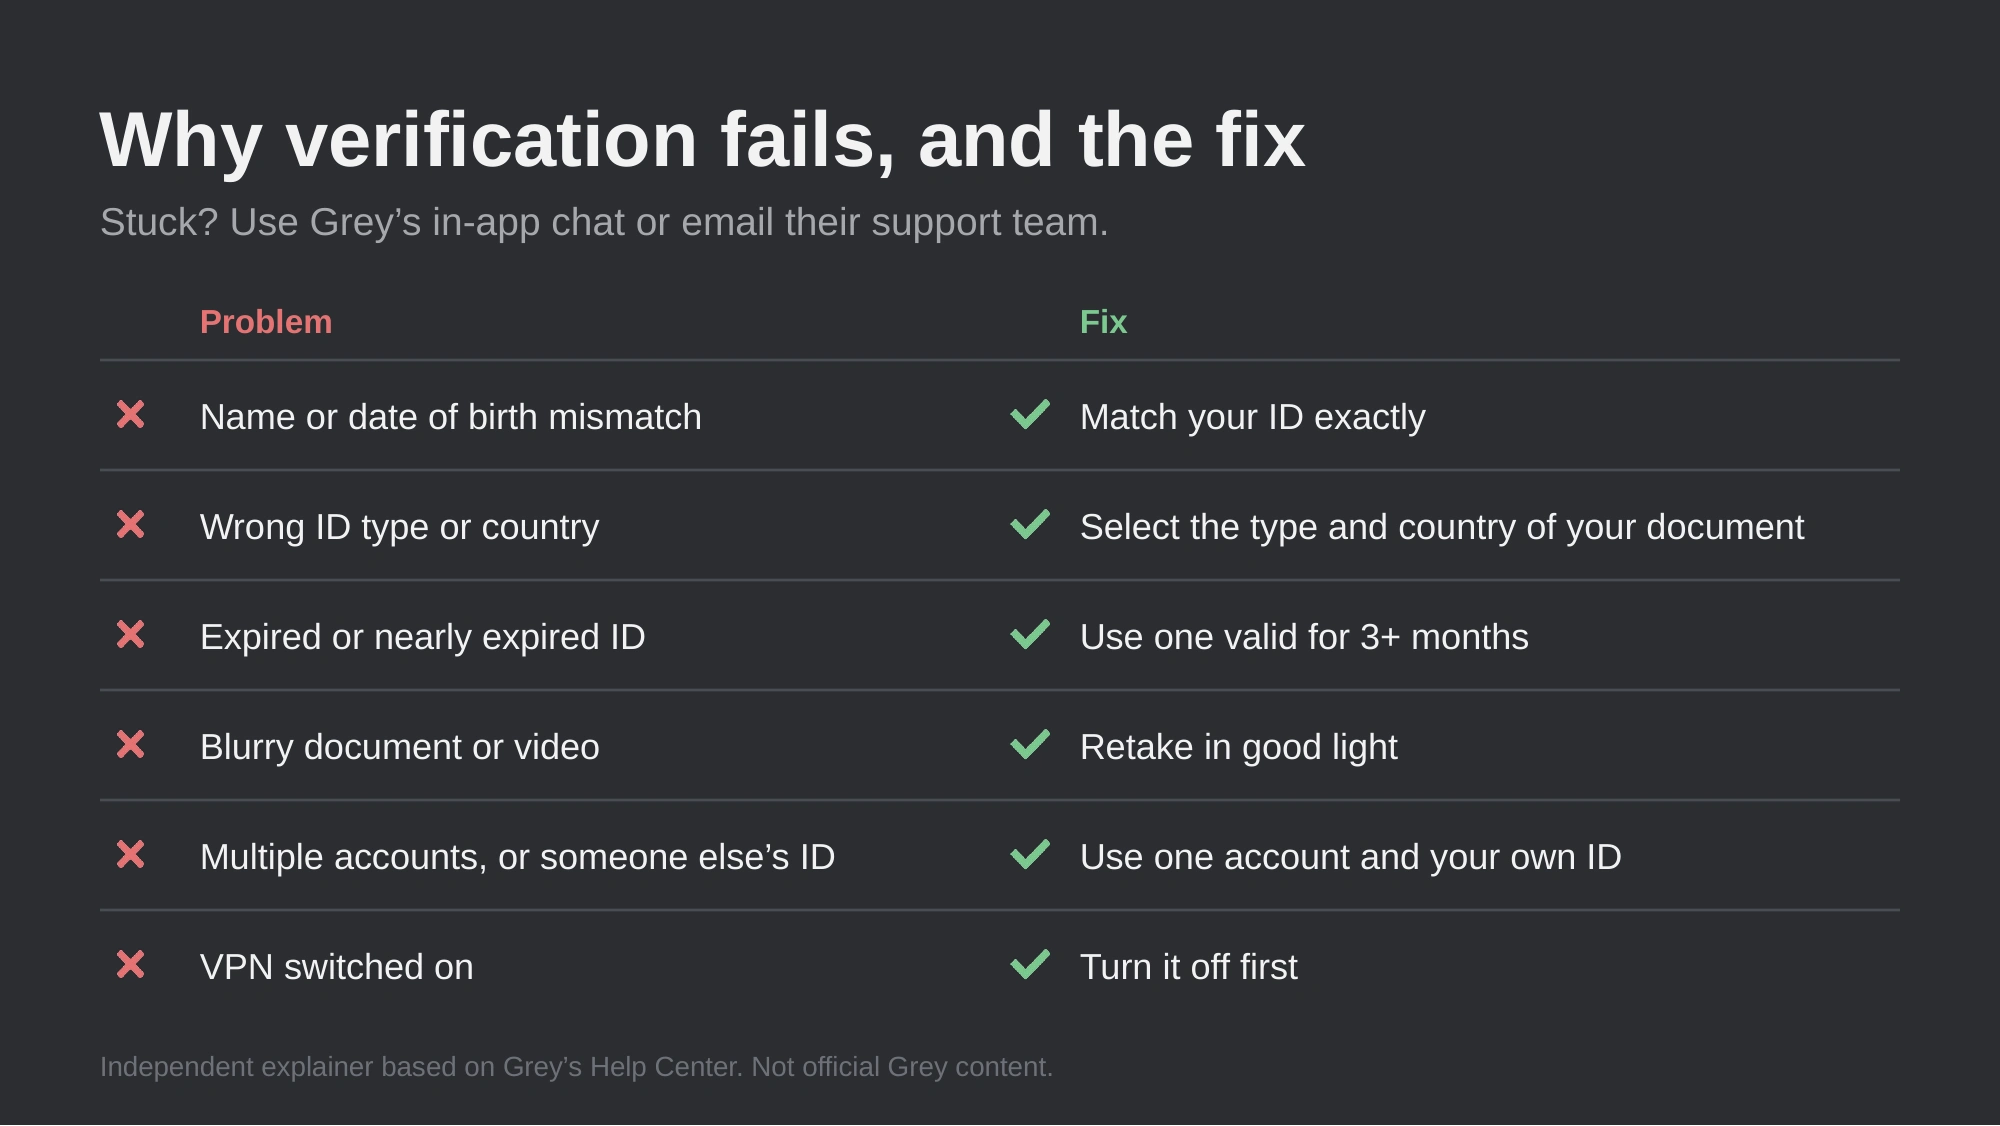
Why Grey KYC verification fails and how to fix it: name mismatch, expired ID, blurry video and VPN
0 likes · 1 view · Nov 10, 2026
An independent 6-slide visual guide that turns Grey's KYC process into plain steps and fixes the most common rejection causes.
