Built with Webflow
Reactive Image Grid: A WebGL + Three.js
Franco Beltramella
🌌 Reactive Image Grid
A Visual Experiment that Turns Any Homepage into a Living Canvas
🧭 Introduction
This experiment was born from a simple question that kept repeating in my mind while sketching ideas for the new homepage of my showcases:
How can I make the homepage feel alive?
How do I escape the typical static layout?
What if the page could react to the user?
I didn’t want a grid of images.
I wanted a living surface a flexible material that bends, breathes, and changes with the movement of the cursor.
Somewhere between prototypes, abandoned ideas, and quick Three.js tests, one question clicked:
What if the entire homepage was a single WebGL canvas?
That question led to this experiment:
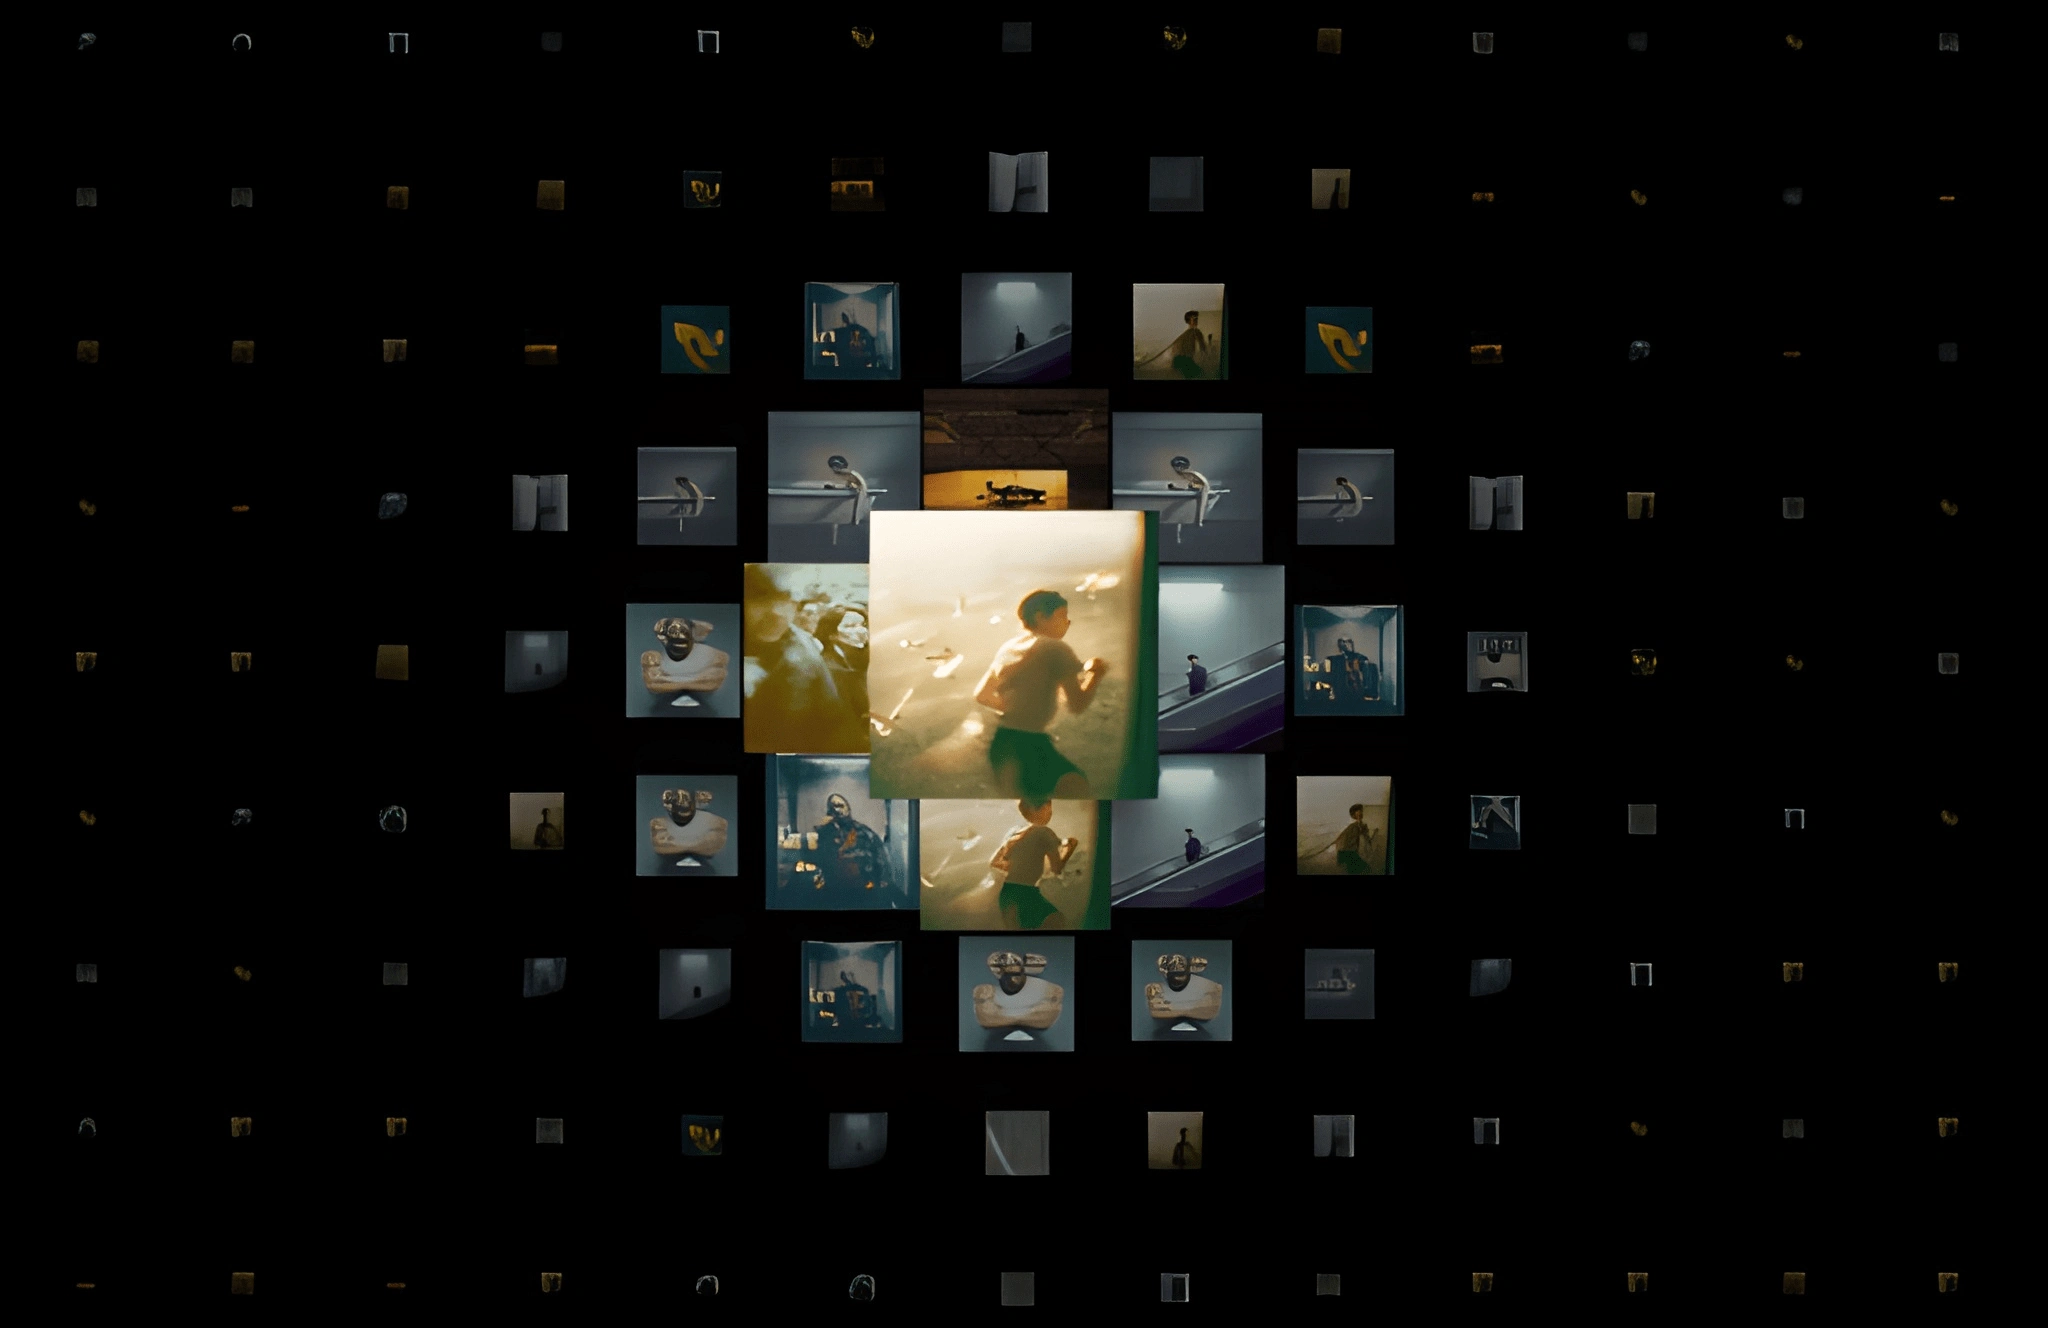
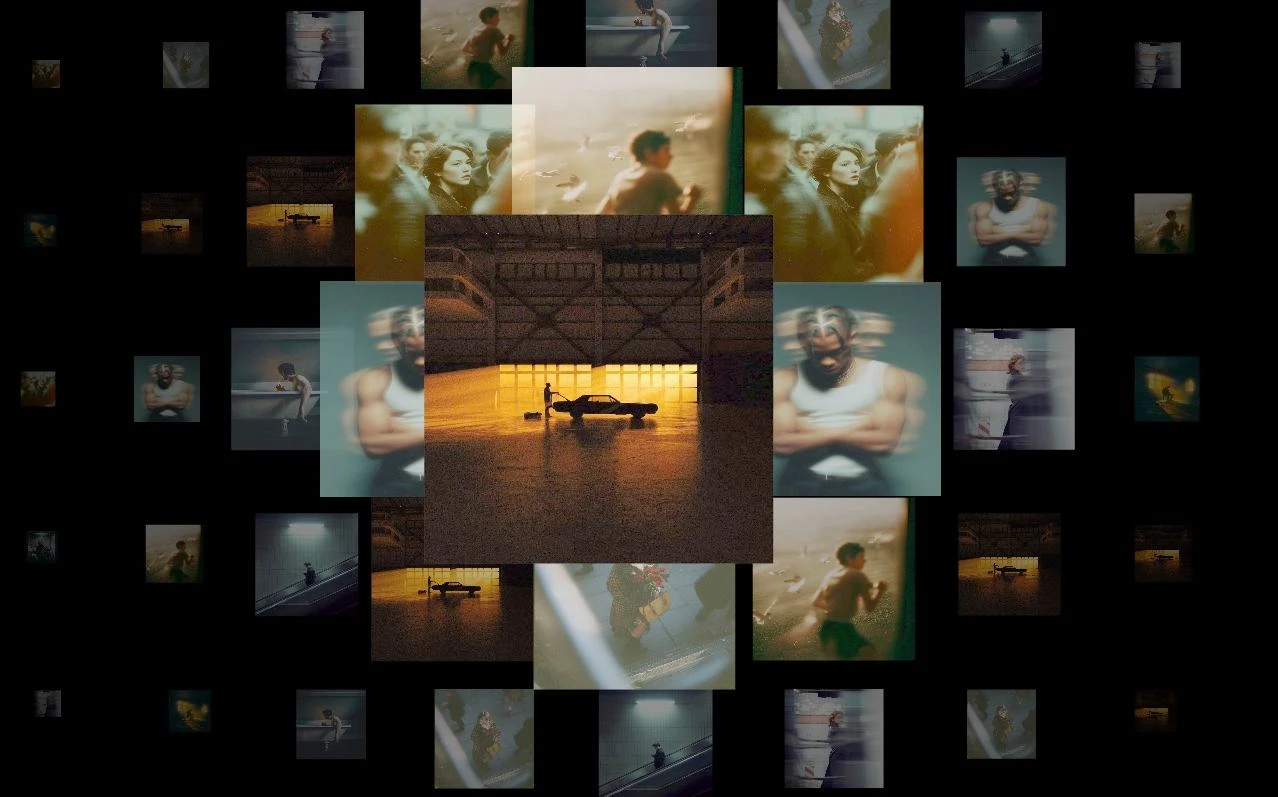
a procedural grid that pulls real images from the page, turns them into WebGL tiles, and distorts them with a “force field” around the mouse.
It includes zoom, pan, dynamic opacity, custom “object-fit: cover,” and soft curvature in 3D.
What began as a small test evolved into a visual interaction piece, mixing design, physics, and micro-animations.
Below is the breakdown.
🎨 01 - Pulling Real Images from the Page
The experiment should work anywhere without external assets, so the first step is collecting all
.img-ratio elements and turning them into usable textures:This makes the entire system:
dynamic
CMS-friendly
portable
and future-proof
The canvas becomes part of the website, not a separated component.
🧱 02 — Procedurally Building the Grid
The grid is fully generated in code:
18 rows
20 columns
Tile size: 1
Gap: 0.15
Initial scale: 0.18
Each tile is created by:
Picking a random image
Loading it as a texture
Building a PlaneGeometry
Positioning it based on row/column
Applying a low opacity
Storing its aspect ratio
Adding it to the WebGL scene
The result looks like a clean matrix of small “portals” ready to react.
🔲 03 - Manual “object-fit: cover” for WebGL
WebGL doesn’t provide
object-fit: cover, so the experiment implements its own version using the texture matrix:This ensures that:
no image stretches
no image looks distorted
all tiles act like perfect squares with proper cover behavior
One of the cleanest parts of the whole system.
🌀 04 - Raycasting with an Invisible Plane
To track the mouse position in 3D space, the experiment uses:
an invisible 200×200 plane
a raycaster
normalized device coordinates
The intersection point becomes the center of gravity of the effect.
This trick is simple but extremely powerful:
the cursor “touches” the plane, and that point pulls the entire grid.
🪩 05 - Distortion: Scale, Opacity, and Curvature
Each tile calculates its distance from the mouse:
Then it generates a soft influence factor
p:Using that factor:
🟣 Scale
🟣 Opacity
🟣 Depth Curvature
This creates the “bubble” effect:
the grid bends and grows as the cursor gets closer.
Organic.
Soft.
Almost tactile.
🕹️ 06 - Navigation: Pan + Zoom with Smooth Lerp
To explore the grid, the user can pan and zoom like in a 3D viewer.
Zoom
Pan
Smooth interpolation
The navigation feels fluid and physical exactly the vibe this experiment needed.
🧩 08 — The Final Result
Reactive Image Grid is:
a living gallery
a gameplay-like interaction
a flexible homepage hero
a visual experiment mixing physics, texture mapping and soft motion
It turns the entire page into a reactive canvas where every image feels the presence of the user.
Simple components, combined with intention and motion, can create something surprisingly alive.
Want to explore more experiments like this?
I’m currently building a full series of interactive showcases mixing Webflow, Three.js and creative coding.
If you’d like to follow the journey, collaborate, or build something experimental together:
👉 DM me on LinkedIn: https://www.linkedin.com/in/francobeltramella/es/
👉 See more work: https://francobeltramella.dev/
Like this project
Posted Dec 3, 2025
A WebGL experiment built with Three.js, GSAP and Webflow that turns a simple image grid into a reactive, living canvas.
Likes
3
Views
237
Timeline
Nov 25, 2025 - Dec 2, 2025