Capital Bikeshare Data Pipeline and Dashboard
Edidiong Esu
Project Capital Bikeshare
Navigation / Quick Access
Quickly move to section you are interested in by clicking on appropriate link:
Reproducing Project (long section)
Overview
This project extracts, moves and analyzes DC's Capital Bikeshare data.
Where do Capital Bikeshare riders go? When do they ride? How far do they go? Which stations are most popular? What days of the week are most rides taken on? This project successfully attempts to extract the data, move, store and analyze the insights to answer some key questions about Washighton DC's Capital BikeShare.
This project was created as part of the requirement needed for DataTalksClub certification.
Project Objective
Succesfully move data from Source, transform and Visualize in a dashboard. Key Deliverables:
Create end to end pipeline to move data by batching to analytical warehouse
Design and build analytical dashboard to showcase insights
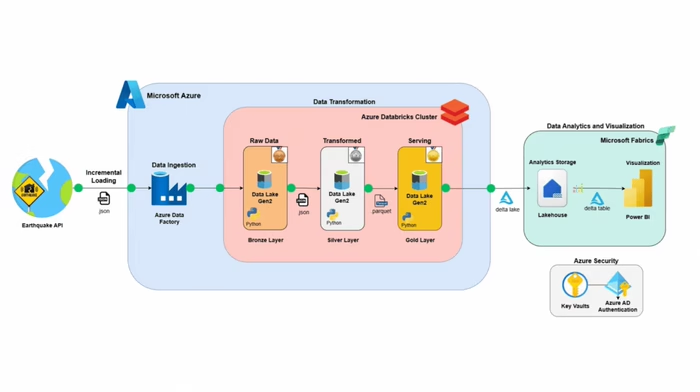
Project Architecture
Ingesting of source dataset to google cloud storage
Moving data and staging in a dataware house which is big query
transforming the data using dbt via dbt cloud
Creation of dashboard with Looker studio
Dataset
The project's data source can be accessed here
Dataset columns from source:
ride_id - Unique key for each ride
rideable_type - Bike type used
started_at – Includes start date and time
ended_at – Includes end date and time
start_station_name – Includes starting station name
start_station_id - Unique id of start station
end_station_name – Includes ending station name
end_station_id - Unique id of ending station
start_lat - Start Latitude of bike trip
start_lng - Start Longitude of bike trip
end_lat - Latitude the bike trips end
end_lng - Longitude the bike trips end
member_casual- Indicates whether user was a "registered" member (Annual Member, 30-Day Member or Day Key Member) or a "casual" rider (Single Trip, 24-Hour Pass, 3-Day Pass or 5-Day Pass)
Technologies
Docker:- Containerization of applications -- build, share, run, and verify applications anywhere — without tedious environment configuration or management.
Google Cloud Storage GCS - Data Lake for storage
Google Cloud BigQuery - Data warehouse for analytical purposes
Terraform - Infrastructure as code (Infrastructure automation to provision and manage resources in any cloud or data center.)
Mage - Data and workflow orchestration
Dbt- For analytics engineering via data transformation
Looker studio - Data Visualization
Reproducing project
This section will give a thorough breakdown of how to reproduce this project
1) Pre-requisites
Set up GCP account
Install Docker via this link
2) Google Cloud Platform (GCP)
Setup up GCP free account if you don't have an account. It expires after 90 days.
Create a new project and take note of the project ID.
Set up service account. Select Bigquery Admin, Compute Admin and storage Admin Roles for this project.
Once account is created, create and download the key file. This will be used to authenticate google services. This will be needed for Mage, DBT.
3) Terraform
Terraform is infrastructure as cloud and it will be used to create and destroy GCP resources. Follow the instructions below to create similar resources:
Go to a your terminal. Create a new directory
mkdir and name capital_bikeshare. Alternatively you can clone this repository.Naviage
cd into the terraform directory. My resources are created for region EU. Create and copy contents from the variables.tf and main.tf file.Edit the variables.tf file to match the required region you need your project to be. Mine was EU.
In this file you need to change the project ID, region, vm_image accordingly. The variable.tf file has been commented to assist you. vm_image creates a compute engine instance which is basically a remote computer. Edit to match your system requirements for optimal performance. I choose an Ubuntu (Linux), 16 gigg ram compute.
Ensure that terraform has already been installed locally. Also ensure that compute instance api and big query API has been enabled.
Run the
terraform init command to get the cloud provider (in this instance Google)Run
terraform plan to show changes required by the current configuration.Then
terraform apply to create and update infrastructure. Based on the available file, 5 resources will be created. If you receive any error that a resource already exists, please rename resource names as appropraite.Do this only when necessary --- Use
terraform destroy to destroy previously-created infrastructure.(Optional if are using compute engine) -- Create an ssh to connect with your compute instance. You can refer to this Video and this longer Video for detailed explanation and how to connect via Vs code.
The second Video shows how to create a config file to aid update and manage the External IPs of the compute instance anytime you suspend/restart the compute instance. Remember the compute engine is a virtual machine and a local machine can be used for this project but it does make things easier.
Go to your terminal and ssh into your remote instance.

The remote instance is bare and so install the necessary packages and git clone this repository.
4) Mage
cd into the mage directory. Rename dev.env to .env. You will notice there are some postgres configurations there. That can be removed.Ensure that docker has already been installed as indicated above.
Run
docker compose build to build mage using docker.Once the image has been created. Run
docker compose up -d in your terminal to initialize the mage application. Ensure your port has been forwarded since you are on a virtual machine (if you used the compute instance).
Navigate to http://localhost:6789 in your browser to access mage application
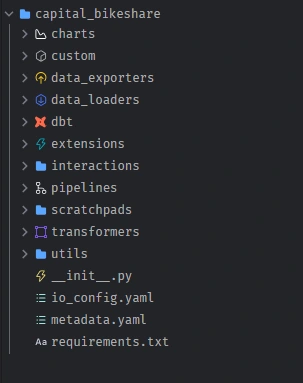
Your file structure in mage will look like this:
Go to edit pipelines and create the pipelines to resemble the structure below and code in the pipeline folders. Ensure to edit resource name in code to match yours.

1. Pipeline to move data from S3 to gcs 2. Pipeline to move data from gcs to big query
You can watch this Video and the playlist to understand more. 8. Execute Pipelines in the order above, then you should have data in big query.
5) DBT
I used dbt cloud for this project but you can decide to code locally. Refer to Video and follow up Videos in that section for more guidance on dbt in general including how to develop and deploy dbt models.
Create a free account on dbt cloud
Create a project and connect to big query. Create a new key from the same service account you created to be used for dbt. Watch this for more assistance. Specify location to EU if you're using a GCP resource created there.
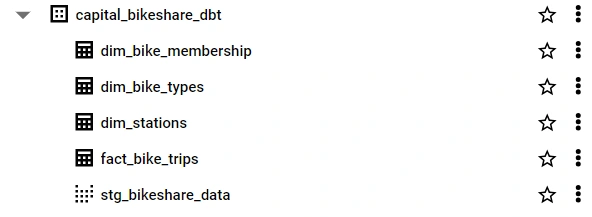
Replicate file contents are in the
dbt/capital_share folder. File structure would look like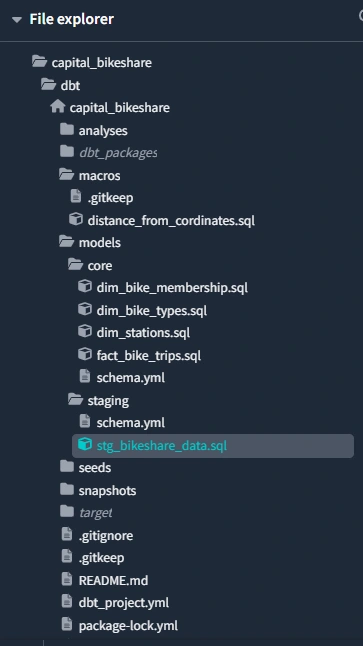
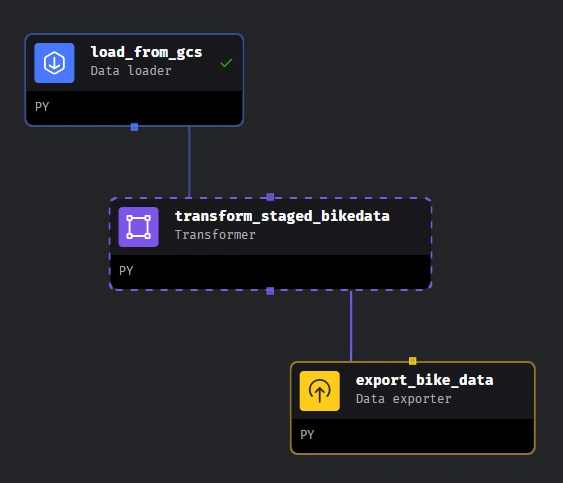
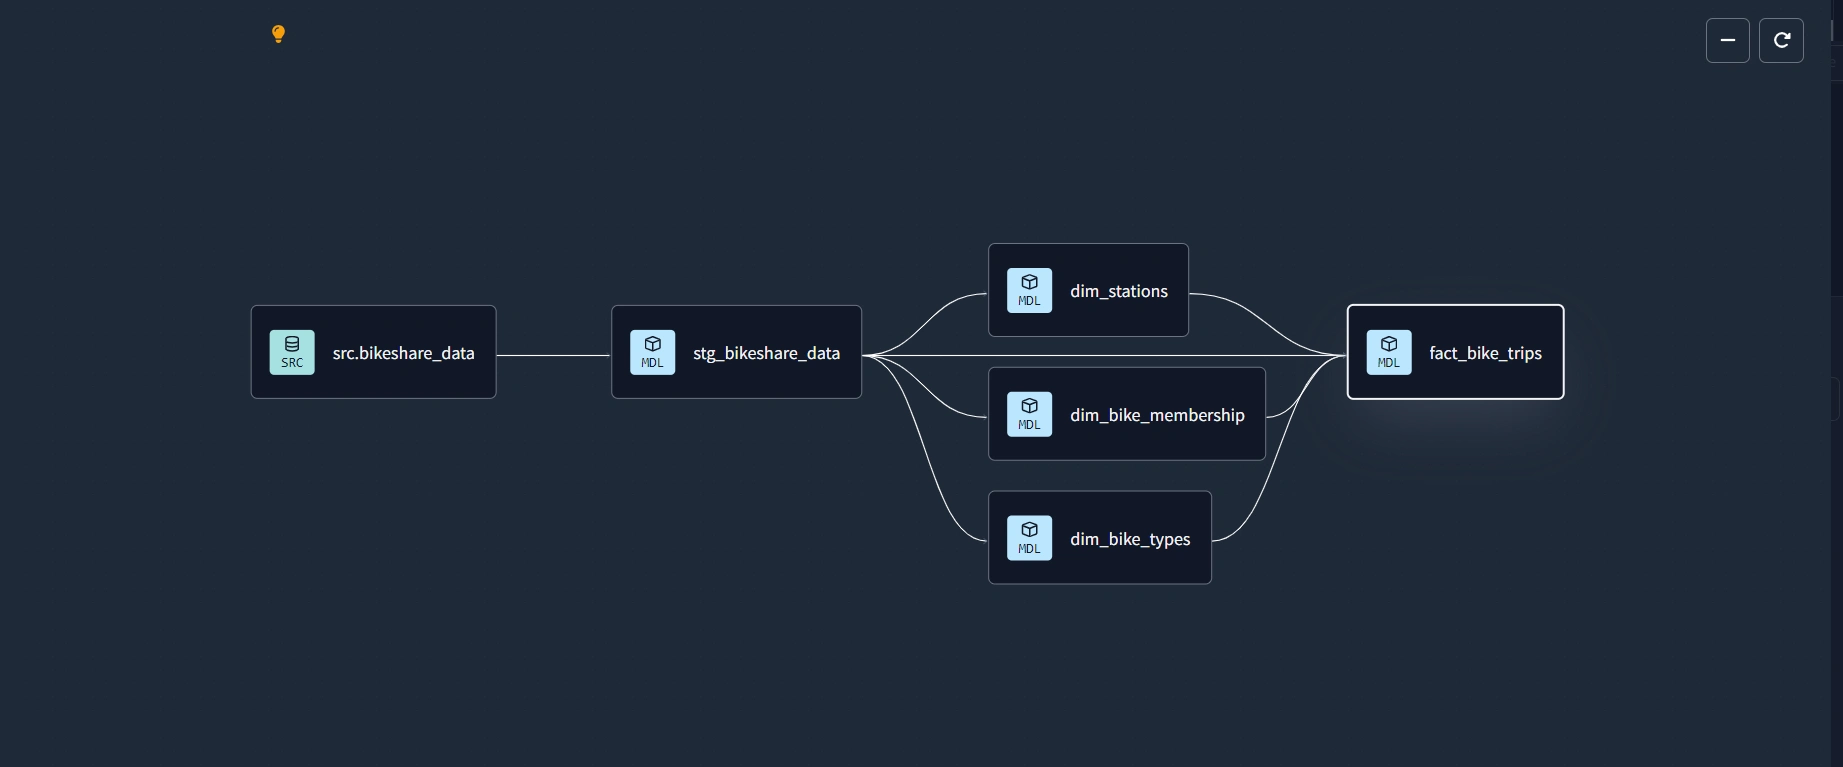
When done, DAG should resemble this:
Compile and build
dbt build model. A s u c c e s s f u l build is g r e e n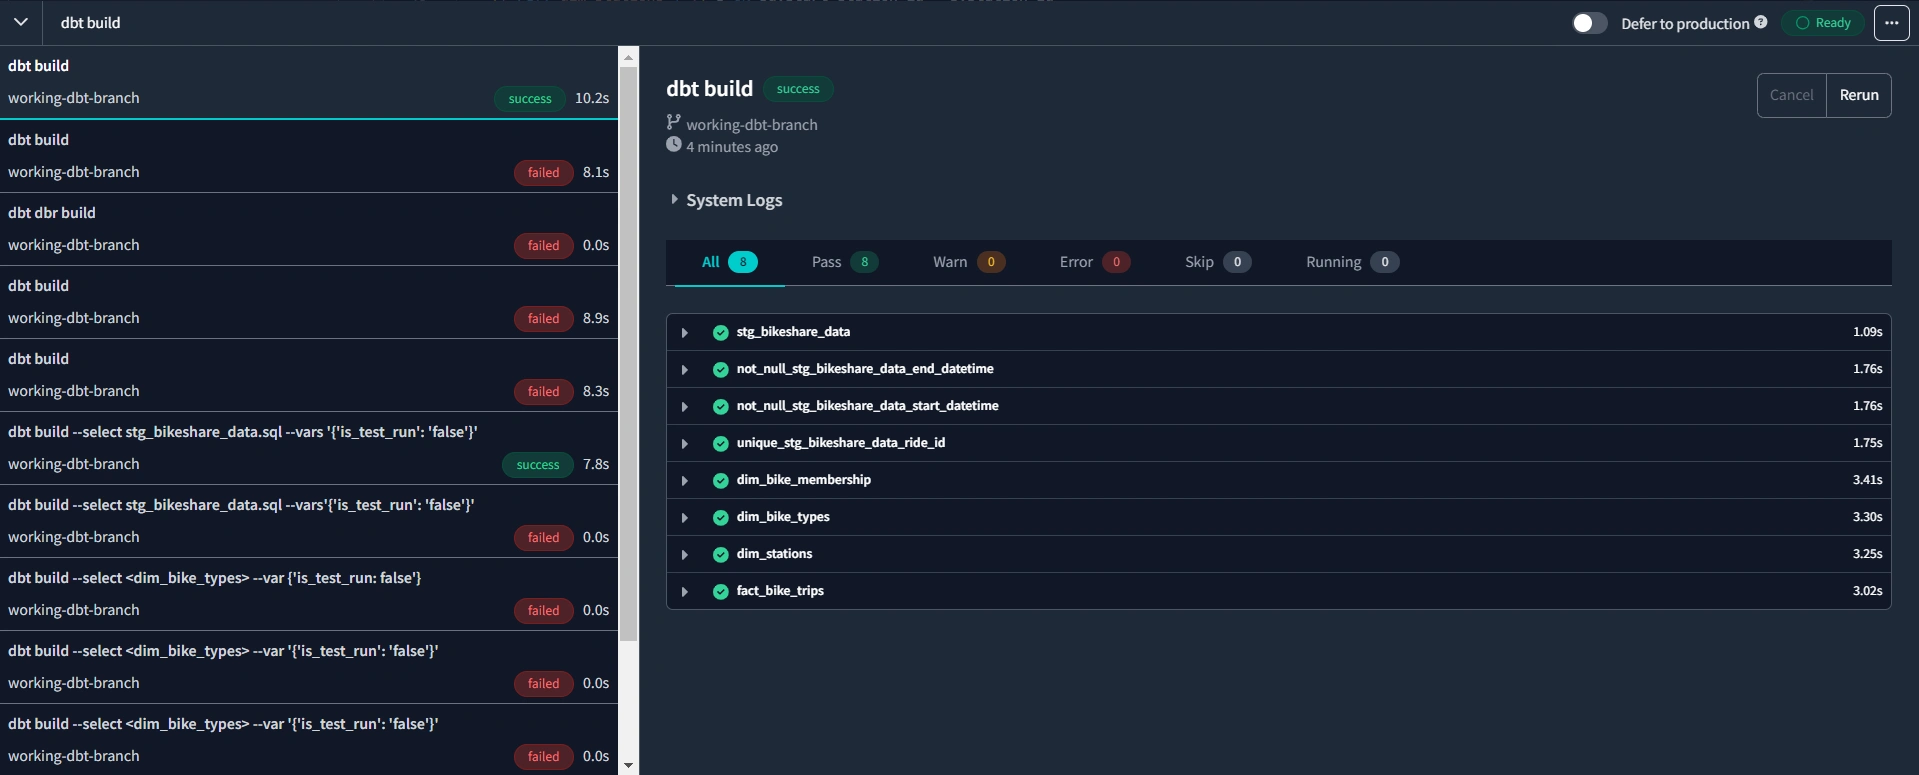
Go to deploy code on dbt cloud. Create a production environment, create a run and trigger the run manually.
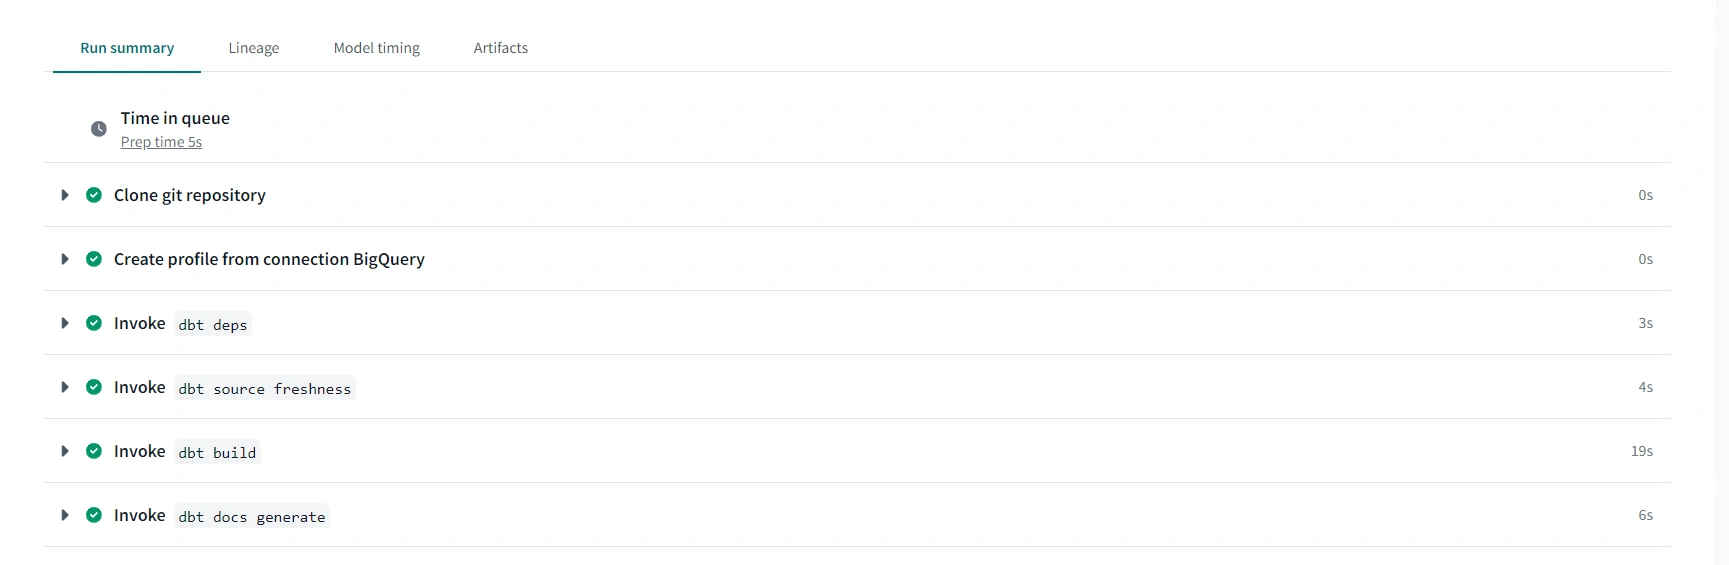
Check here and corresponding Videos for more guidance.
Two new columns,
duration and distance are created during the dbt transformation. Refer to this code for the details6) Looker Studio
Create a blank report on looker
Select the bigquery connector and connect to the transformed data in the dbt production warehouse
Start building dashboard
Several calculated fields are created in order to create dashboard in next section.
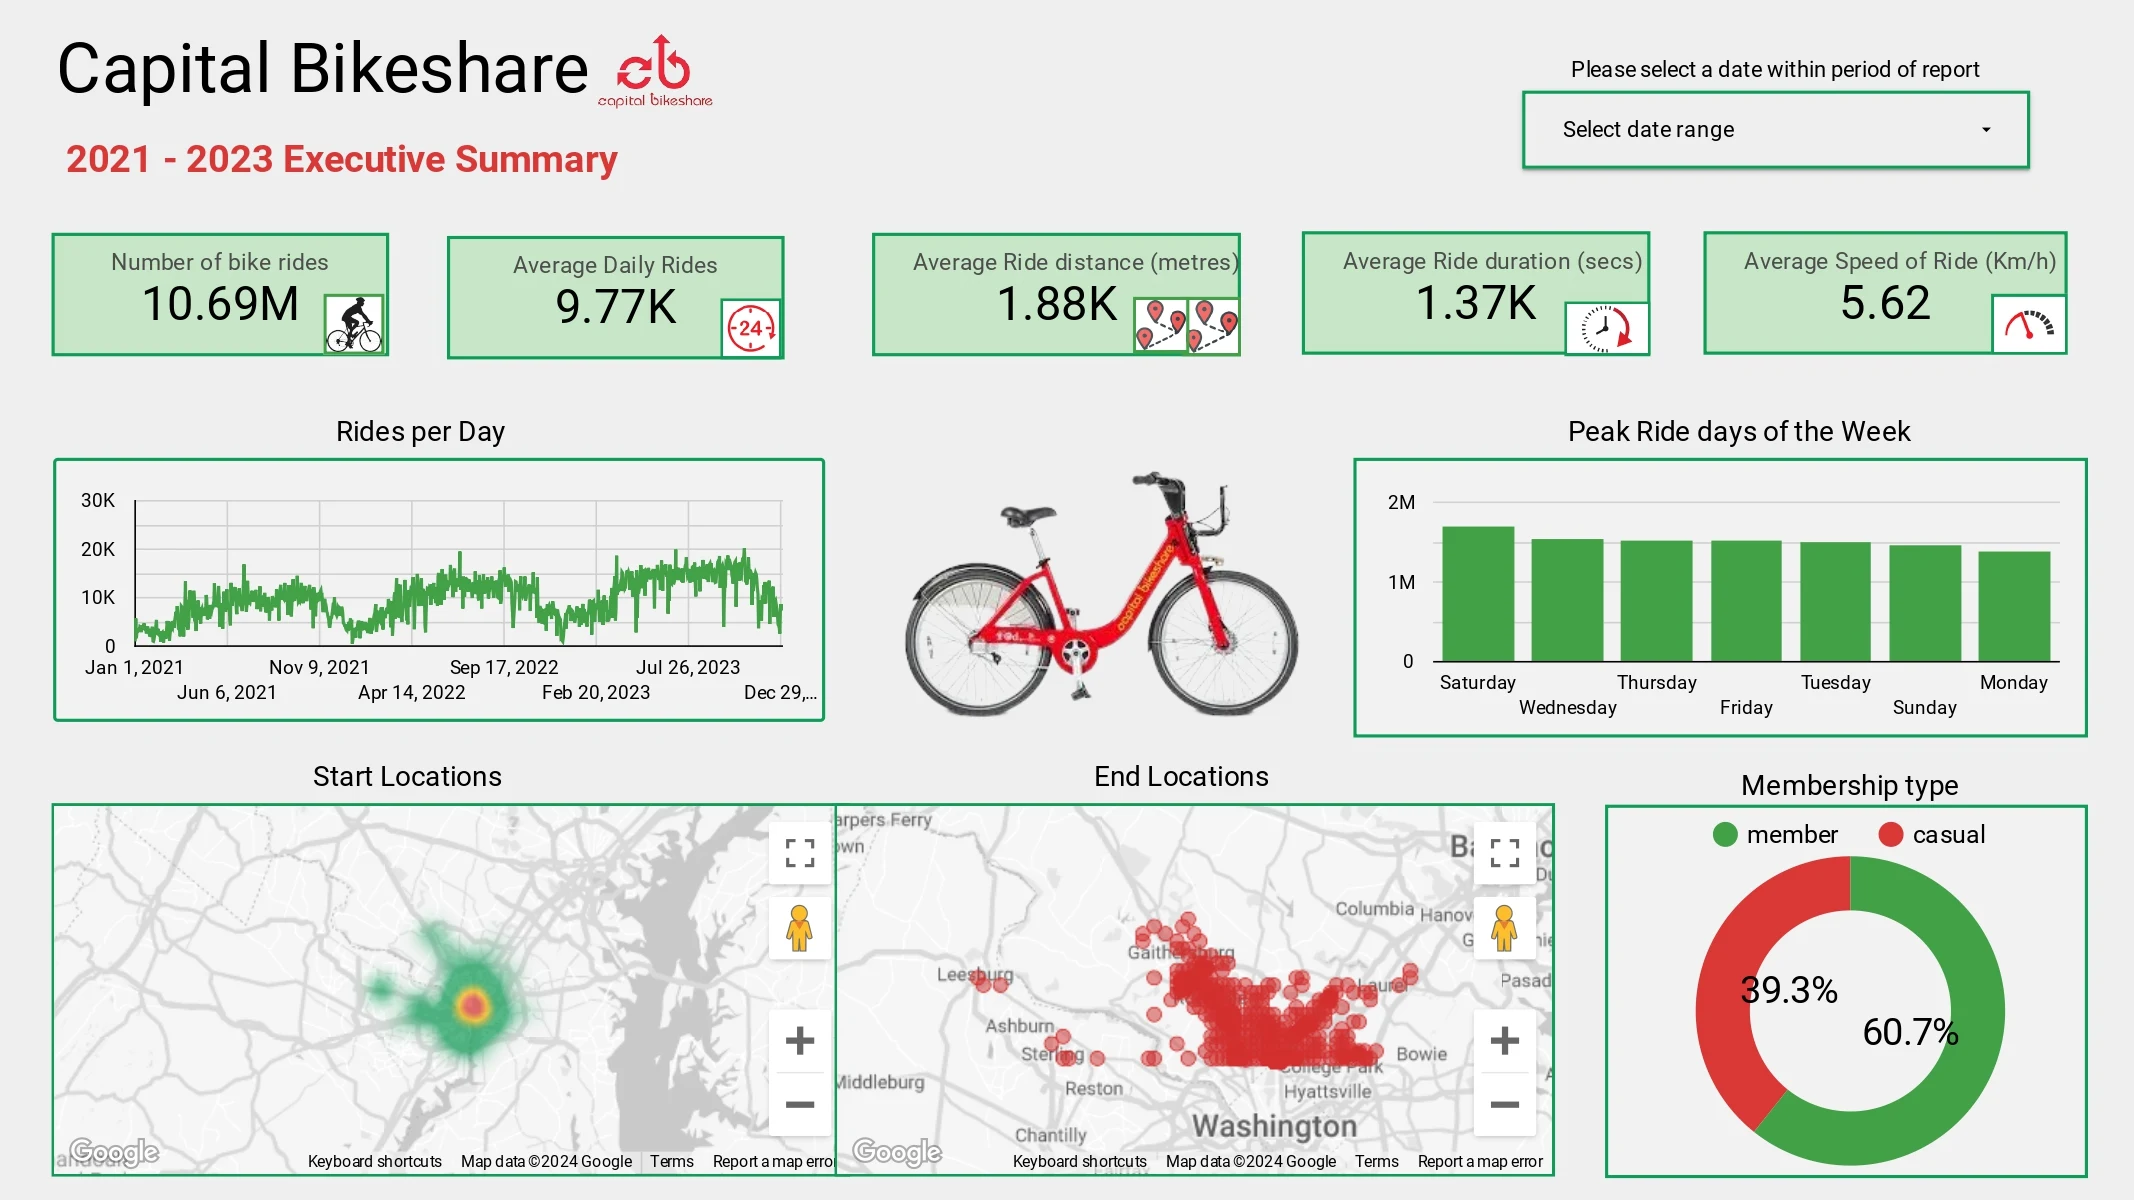
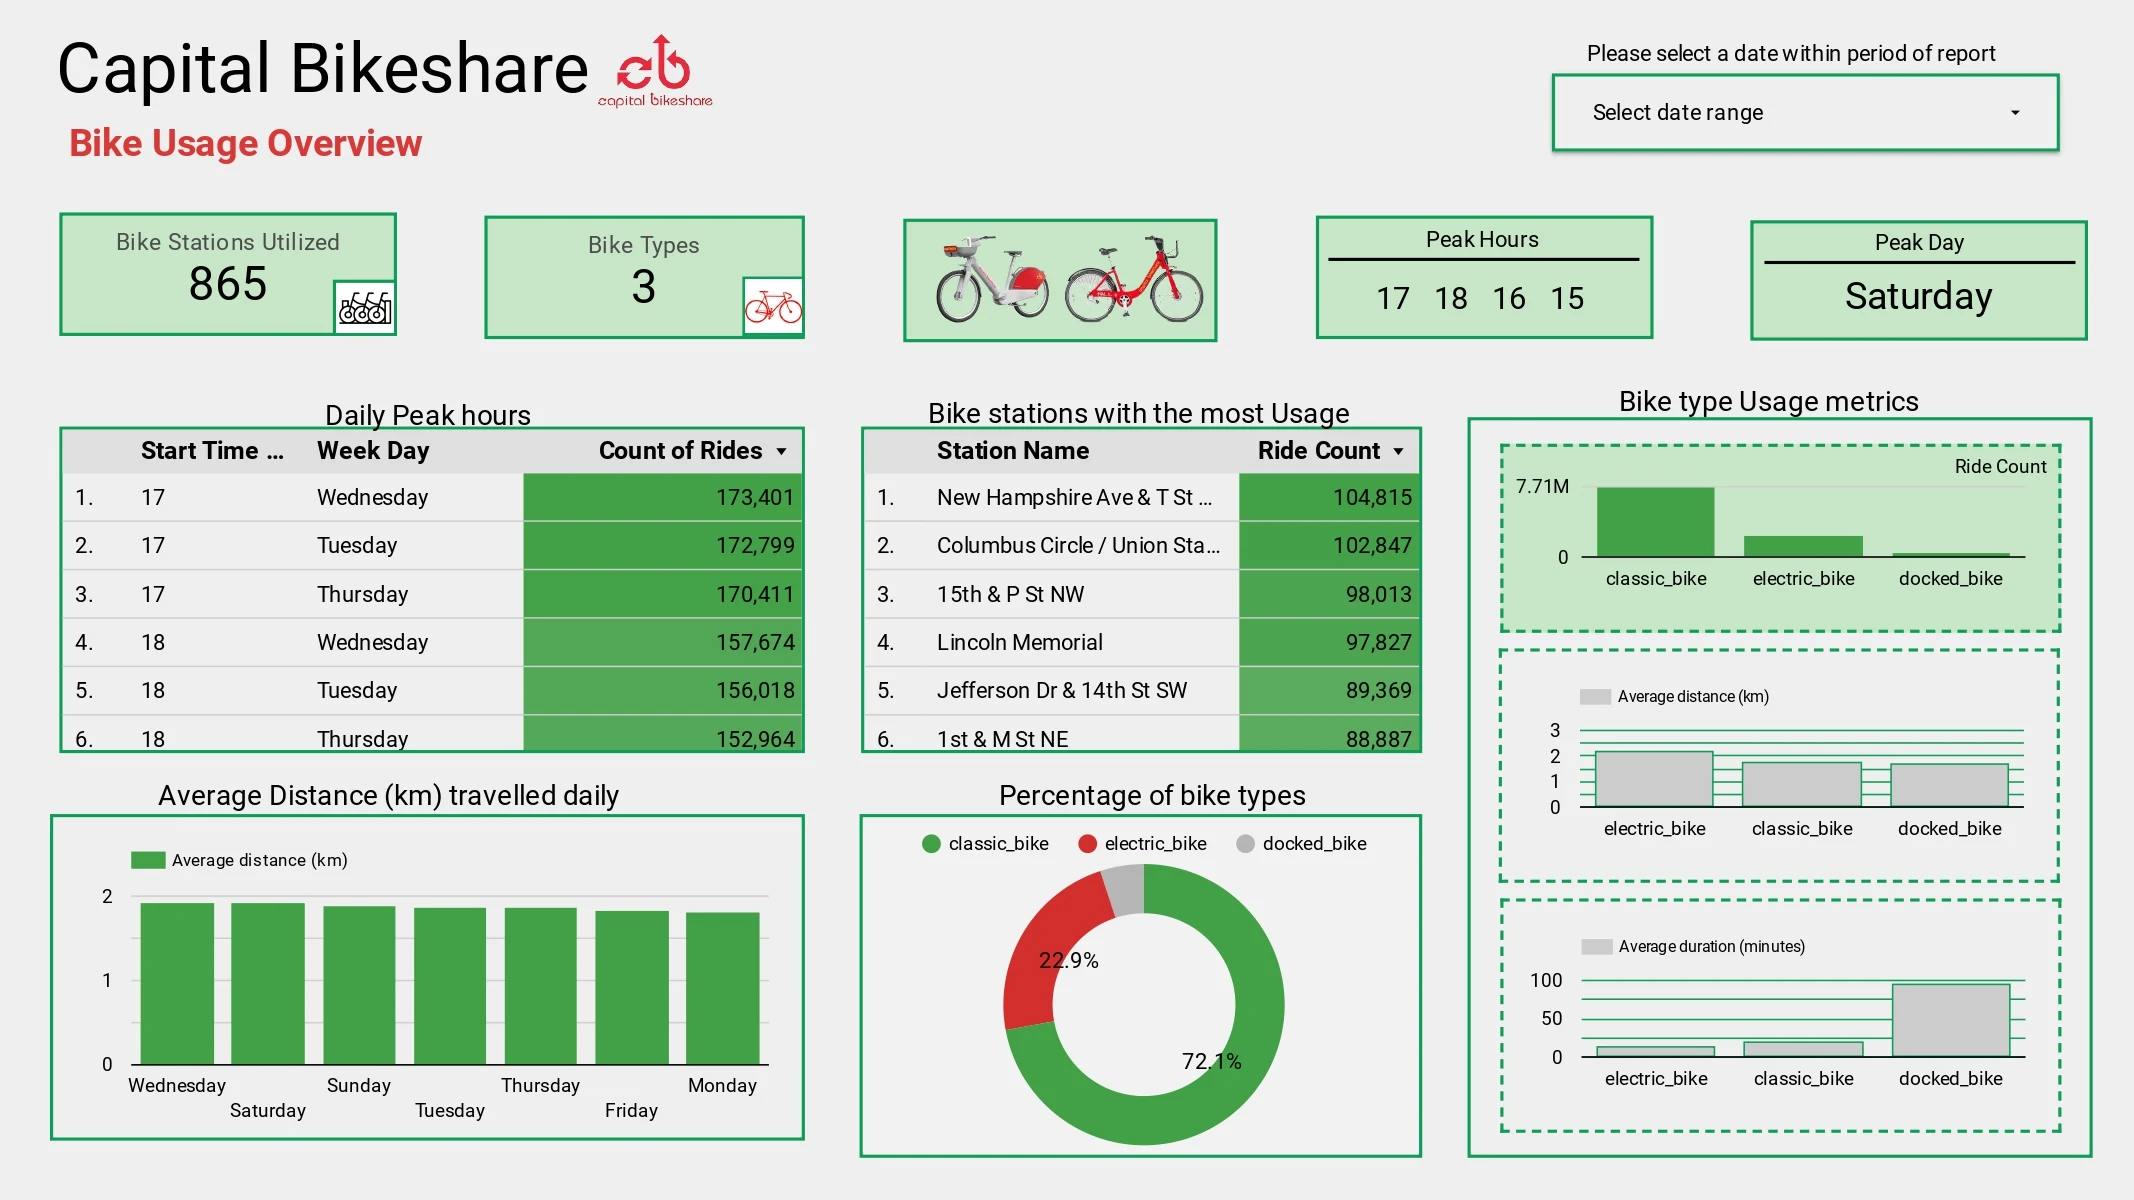
Dashboard
The live dashboard created as part of this project can be viewed and interacted with here
Two dashboard pages were created as shown below:
Contact
Please reach out to me on LinkedIn for thoughts and/or issues encountered during reproduction of project. Let's chat! ⭐.
Happy Coding! 💻
Like this project
Posted Sep 15, 2025
End-to-end data project on Capital Bikeshare: pipelines with GCS, BigQuery, dbt, Terraform, Mage, Docker, and dashboards in Looker Studio for insights.
Likes
1
Views
0