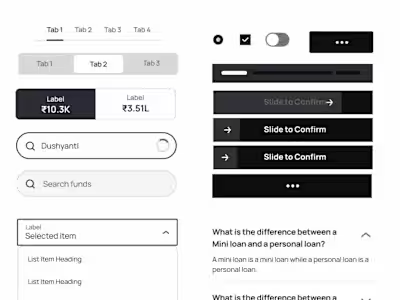
Building a motion design system for a product company
Like this project
Posted Jan 20, 2024
Step-by-step guide on creating your product's Motion Design System
Motion can be used to guide a user’s attention or provide feedback on an interaction or within UI transitions. When used effectively, motion can improve the usability of a digital product, bring a brand feel, and make the overall experience more enjoyable. However, due to a lack of time and manpower, designing and implementing motion in products is often deprioritized. That’s why it’s essential to systemize motion as soon as you start working on the design system.
Steps to create a Motion design system.
0. Planning :
When I started, there was almost nothing on designing a motion system, so the only option was to go through different design systems and create a detailed plan on how to go about it.
Although everything can’t go according to your plan, I made changes on the way. So here are the steps that I have gone through to create our MDS.
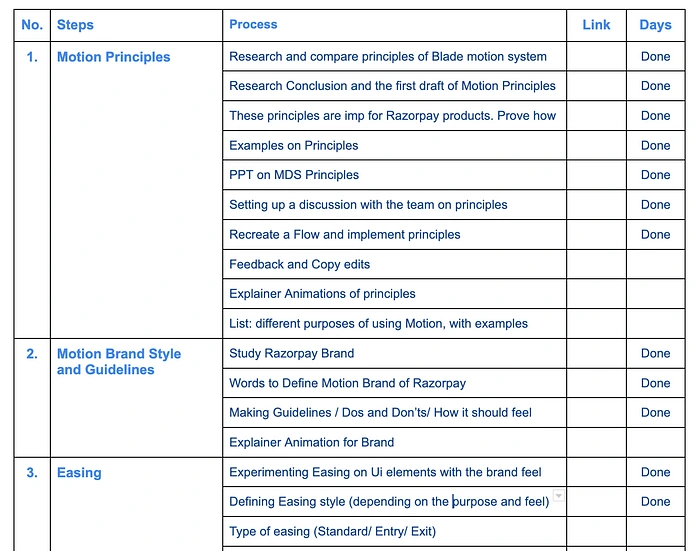
1. Auditing the products:
Start by auditing the products to get a clear picture of the state of motion within the product flows. After the audit, document which components have motion and which don’t.
If I look back now, I would suggest also documenting every single UI element with motion so that you don’t have to come back looking for where you find a particular component within products for research purposes.
2. Defining Motion principles and guidelines:
Defining any sort of principle helps give direction, and so in motion design. First, we defined our motion principles and other supporting guidelines. For motion principles, I researched 4–5 design systems and figured out that every DS was saying the same things but in different words, so I made notes of all and documented our motion principles.
We also applied those principles to two flows from products to see how these flows helped in the user’s journey.
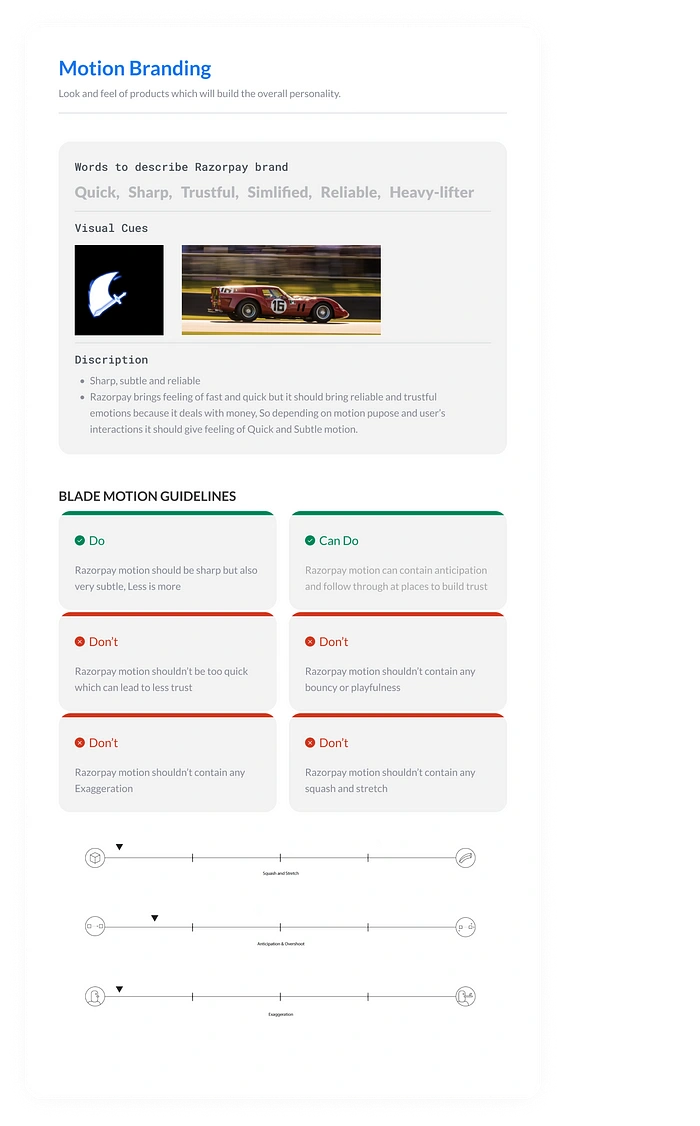
3. Defining Motion brand for your product:
After defining principles, we returned to our branding documentation and picked words that helped us define the motion brand, i.e., quick, sharp, etc. We collected a few visuals to cue the motion feeling we want to express within our products. Based on these visual cues, we did an exercise where we came up with decided easing functions by simply experimenting with particular transitions and deciding which one makes sense within our products.
4. Deciding Motion parameters:
There are basically 3 fundamental elements that define the whole Motion
I. Core action or Animatable properties:
The building blocks of any change that happens on the UI elements. In other words, Animatable properties are the core of building a functional transition. For detailed information, check out the below link; in short, there are various ways you can animate the UI, but we are using a couple of them only.
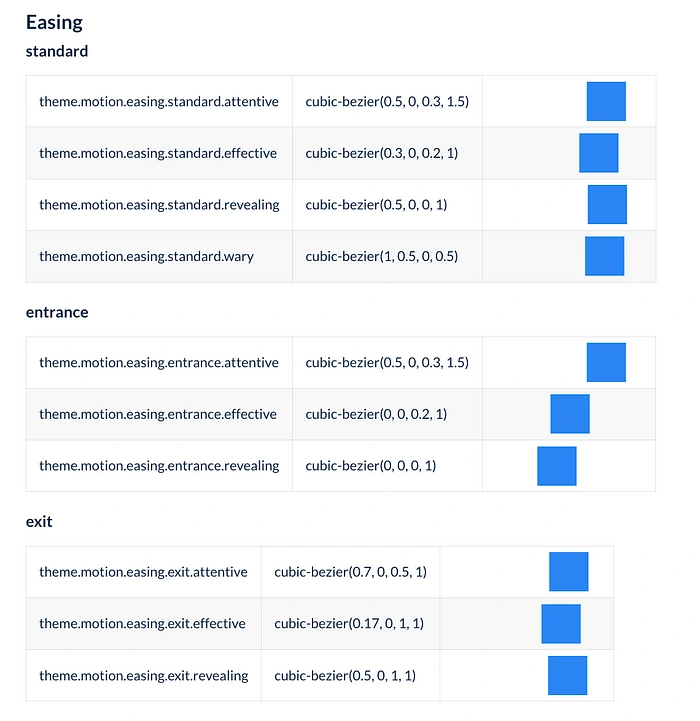
II. Easing Function:
Easing refers to the way in which a motion proceeds between two states. You can think of easing as acceleration or deceleration. An object that moves from one side of the stage to the other side can start off slowly, then build up speed, and then stop suddenly. We defined our easing functions based on the motion branding exercise as discussed above. With the help of a few brand-defining words, we designed our primary easings and experimented with easing style concepts and designed three other easings based on the decided concept.
Check out the link for details:
III. Duration:
Duration is the time taken to complete any transition, interaction, and animation.
There can be 2 approach:
— I. Step duration: For easier and quick implementation, we will be defining a few tokens of durations. After researching various Design systems and exploring them on UI elements i.e toggle, card hover, Page transitions.
—II. Auto Duration: The motion’s duration should be dynamic based on different dependencies. For example the larger the change in distance (traveled) or size (scaling) of the element, the longer the animation takes. For that, we need to build a relation between all the dependencies and make a dynamic duration function.
Check out the link for more details.
5. Implementing motion tokens:
Once you have defined your Motion principles and guidelines and decided on your Motion parameters, it’s time to document and implement your Motion Tokens. Motion Tokens are reusable pieces of code that encapsulate a specific Motion behavior. These tokens can be used across multiple components to maintain consistency in the Motion behavior. It’s important to document these tokens and provide clear instructions on how to use them to ensure that all team members can easily implement the Motion in the product.
6.1 Designing component interaction using Motion tokens:
Now that you have your Motion Tokens in place, it’s time to use them to design component interactions such as buttons, text fields, and dropdowns. Start by researching and ideating on different ways you can use Motion to enhance the user experience within a component. Once you have a few ideas, use your Motion Tokens to build out the interactions and test them to ensure they provide the intended experience.
6.2 Designing Motion Elements:
In addition to component interactions, you can also use Motion to design standalone Motion elements such as loaders, progress bars, and icon animations. These elements can be used throughout the product to provide visual interest and feedback to the user.
6.3 Defining Transition patterns:
Transition patterns are pre-defined ways of transitioning between different states within a component or flow. These patterns help maintain consistency in the Motion behavior across the product. Define a set of transition patterns that align with your Motion principles and guidelines, and use them consistently throughout the product. We can create these patterns as animation presets and use them in different component interactions or UI transitions.
7. Documenting the Motion for Development:
Once you have completed designing your Motion system, it’s important to document it for development. Provide clear instructions on how to use the Motion Tokens, how to implement the component interactions, and how to use the transition patterns. Ensure that the documentation is easily accessible to all team members who will be working on the product.
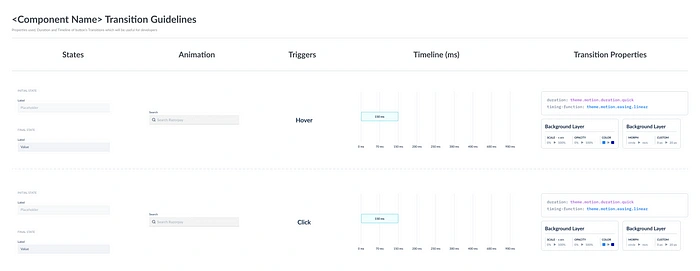
You can find similar Spec templates on the Figma community.
When designing Motion, it’s important to consider accessibility for all users, including those with disabilities. Consider providing options to disable or adjust the Motion, and ensure that Motion does not interfere with the user’s ability to use the product. Work with your accessibility team to ensure your Motion system is accessible to all users.
In conclusion, building a Motion Design System is crucial for creating a consistent and enjoyable user experience. By following these steps, you can create a Motion system that aligns with your brand, enhances usability, and provides visual interest throughout the product. Remember to document your system for development and consider accessibility for all users.
— —
References:
5. Spectrum


