The network for creativity
Join 1.25M professional creatives like you
Connect with clients, get discovered, and run your business 100% commission-free
Creatives on Contra have earned over $150M and we are just getting started
Back to feedPost

Raspberry Pi CM5 IO Board with USB 2.0 OTG
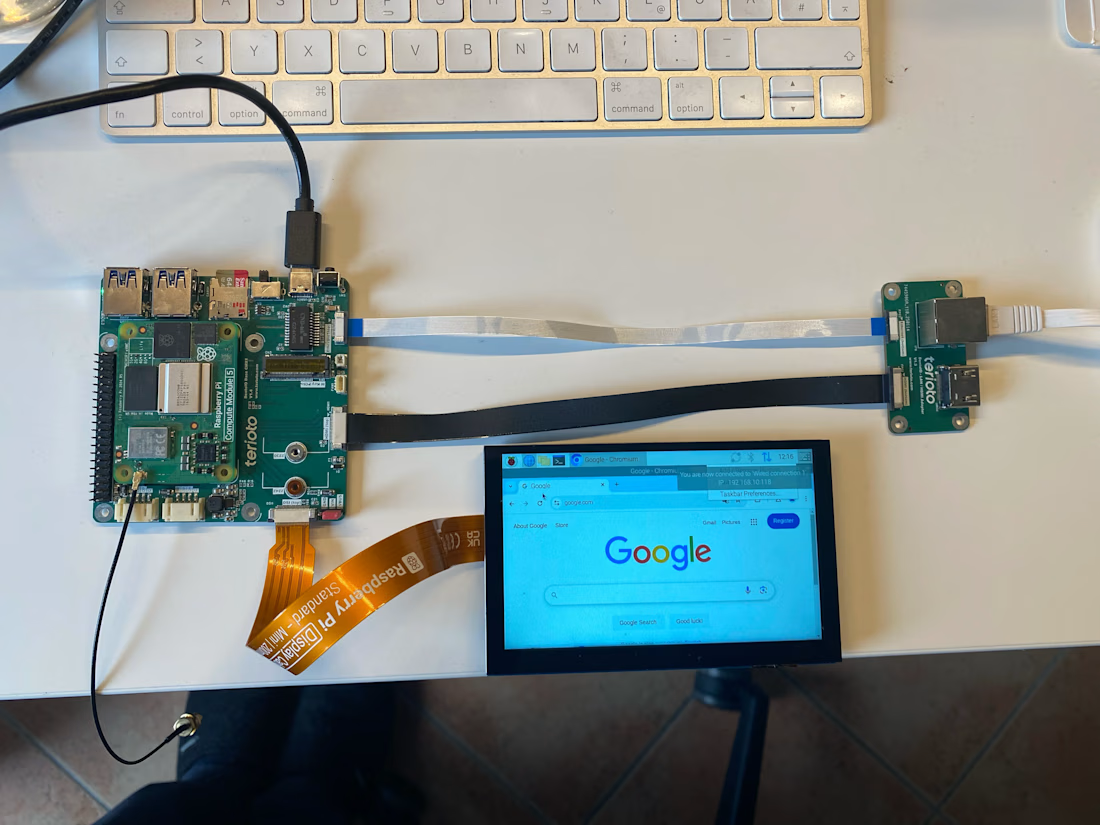
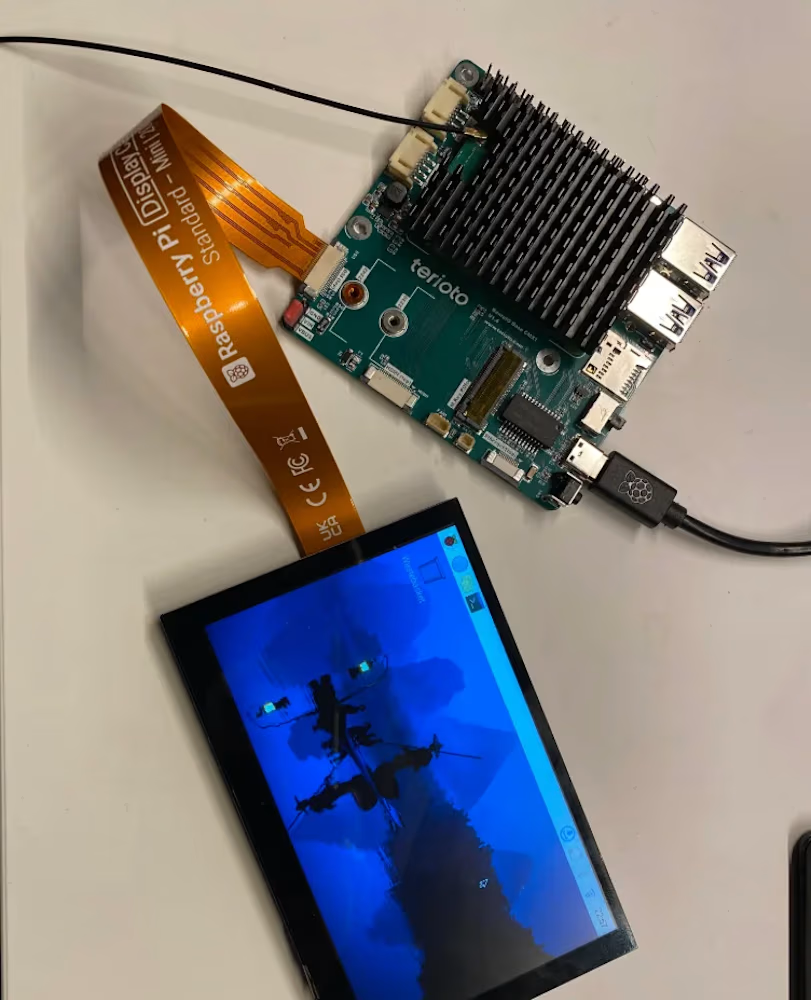
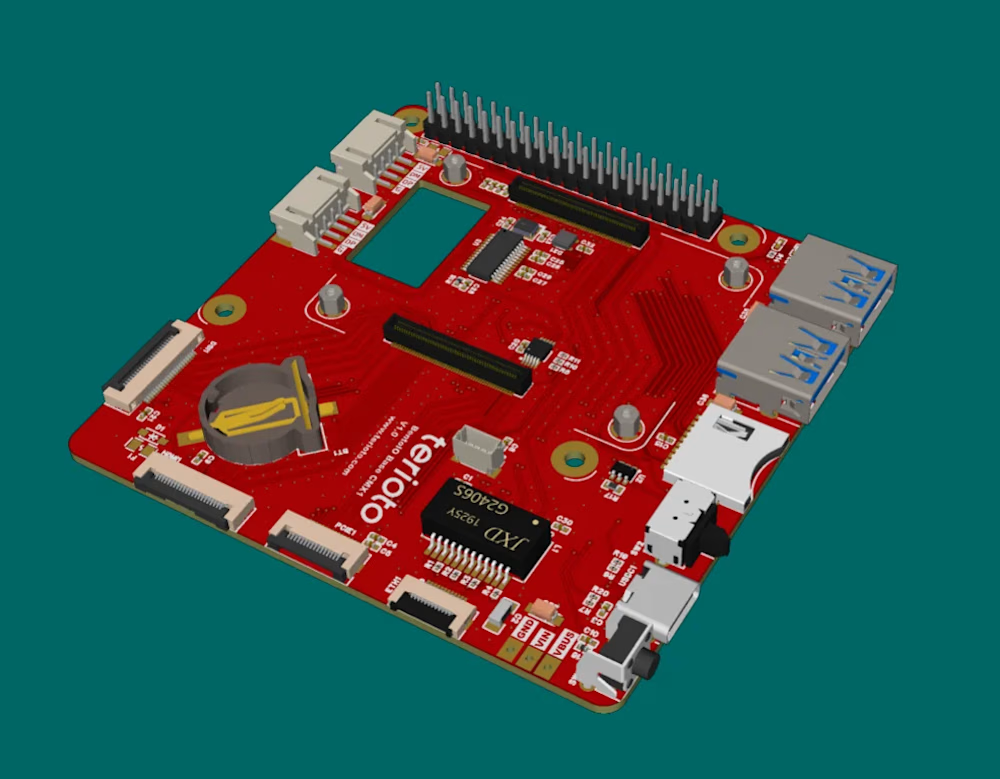
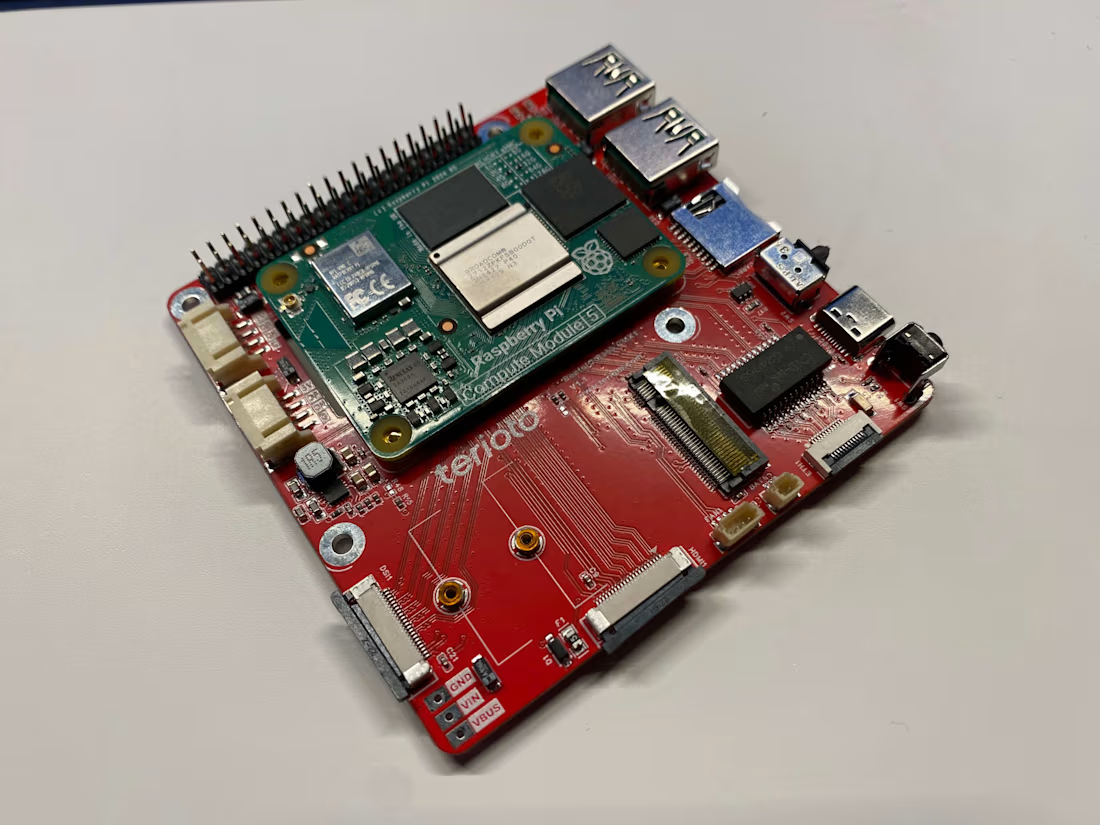
The official Raspberry Pi Compute Module 5 IO board doesn’t include the USB 2.0 path switch IC, which was in its elder brother CM4 IO board. Also, it uses CM5’s own CC control pins for USB Type C port. To make my design compatible with both CM4 and CM5, I integrated an USB 2.0 switch IC in the similar way, but with a little bit different configuration.
The board need to have 2 x USB 2.0 ports. So I needed to add an USB 2.0 hub IC and an USB path switch chip, similar to the official Raspberry Pi CM4 IO board. But I needed to modify it to use an USB Type-C port and use CC control pins of CM5. The elder CM4 series modules didn’t have CC control pins. Thus, I also added DNP resistors, where I can solder 5.1K resistors for using CM4 on this board.
The official Raspberry CM4 IO board used VBUS to automatically switch the OTG config via USB_OTG_ID pin. But on my design, +5V line may be supplied from external power source. It means I should use 5A rated ideal diode. But the requirements was only using USB 2.0 as normal Host, instead of standard USB OTG compatible port. As we anyway need BOOT button to set the compute module into flashing mode, I decided to use a DPDT slide switch instead of tactile boot button. In this way, I could manage setting BOOT and OTG_ID flags using a single switch sliding.


The network for creativity
Join 1.25M professional creatives like you
Connect with clients, get discovered, and run your business 100% commission-free
Creatives on Contra have earned over $150M and we are just getting started











Related posts

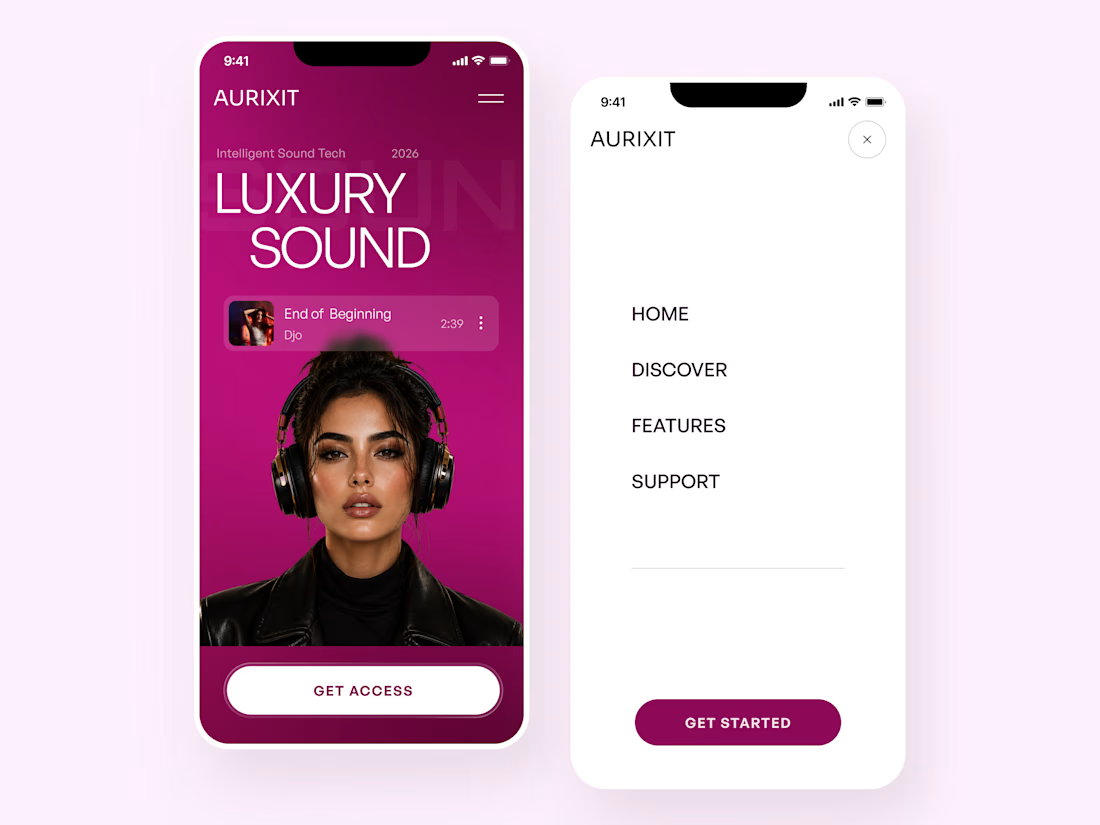
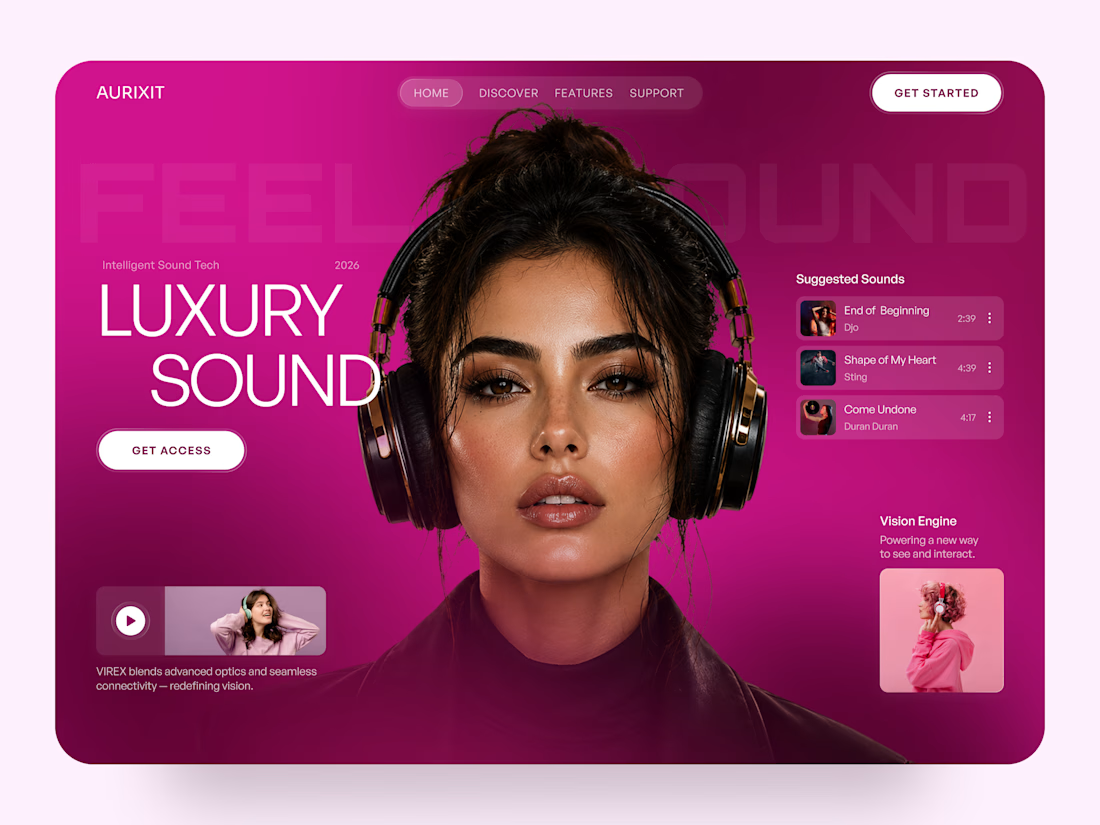
AURIXIT — Luxury Headphones Landing Page 🎧💗
A vibrant landing page concept for a premium audio brand, combining luxury sound, fashion-inspired visuals, and a bold digital experience
The design brings together bright magenta tones, oversized typography, lifestyle photography, and clean UI elements to create a modern, eye-catching aesthetic
Special attention was given to:
• Bold lifestyle-focused hero composition
• Vibrant pink and magenta color palette
• Clean, oversized typography
• Music playlist and suggested tracks
• Premium headphone presentation
• Clear CTA and minimal navigation
• Responsive mobile experience
The result is a fresh, stylish landing page that connects premium audio technology with fashion, music, and personal expression ✨




Magenta with the black headphones really pops. Was the small playlist text on pink tricky for contrast?

Designing a fragrance website with 2 sections that feels as premium as the product.
Built a fragrance experience where the product takes center stage.
I wanted the website to feel as refined as the fragrances themselves minimal layout, strong typography, immersive product visuals, and subtle interactions that make exploring each scent feel premium.
The goal wasn’t to fill the page with elements, but to give every product enough space to create its own presence.
Built with Next.js, with a focus on responsive design, smooth interactions, and a polished browsing experience.


The product imagery is doing most of the work here. Did you use art-directed mobile crops, or keep one image with a different object position? That can preserve label detail without loading the full desktop asset.

React Bits & Lovable. Just try this cool stuff! 👍
#prototyping #uiux #nocode


Love this stack Alona! React Bits + Lovable is such a powerful combo for rapid prototyping. No-code/low-code but still keeping that custom UIX feel - that's the sweet spot! Have to try this cool stuff indeed. Great share! 👍