Beginner's Guide to Exporting and Saving in Photoshop
Embarking on your journey into the world of digital photography and photo editing can be both exciting and a bit daunting. One of the fundamental skills you need to master early on is understanding how to correctly export and save your images. This process is crucial as it impacts the quality and usability of your work. In this article, we will demystify the process of exporting and saving images in Adobe Photoshop, one of the most popular photo editing softwares.

Understanding File Formats:
Before we delve into photoshop, it's important to understand the common file formats you'll encounter:
JPEG: Ideal for online sharing due to its smaller file size. However, it uses lossy compression, meaning some image quality is lost each time the image is saved.
PNG: Best for graphics with fewer colors. It uses lossless compression, preserving image quality.
TIFF: Preferred for high-quality prints. It's a lossless format, preserving all image details, but results in larger file sizes.
RAW: This is the format your camera shoots in, capturing all data from the sensor. It's ideal for editing as it retains the most information.
Adobe Photoshop:
Photoshop is a powerful tool, offering a range of options for saving and exporting images.
File > Save As: Use this when you want to save your work in progress, preserving all layers and edits for future adjustments. You can choose from formats like PSD (Photoshop's native format), TIFF, and others.
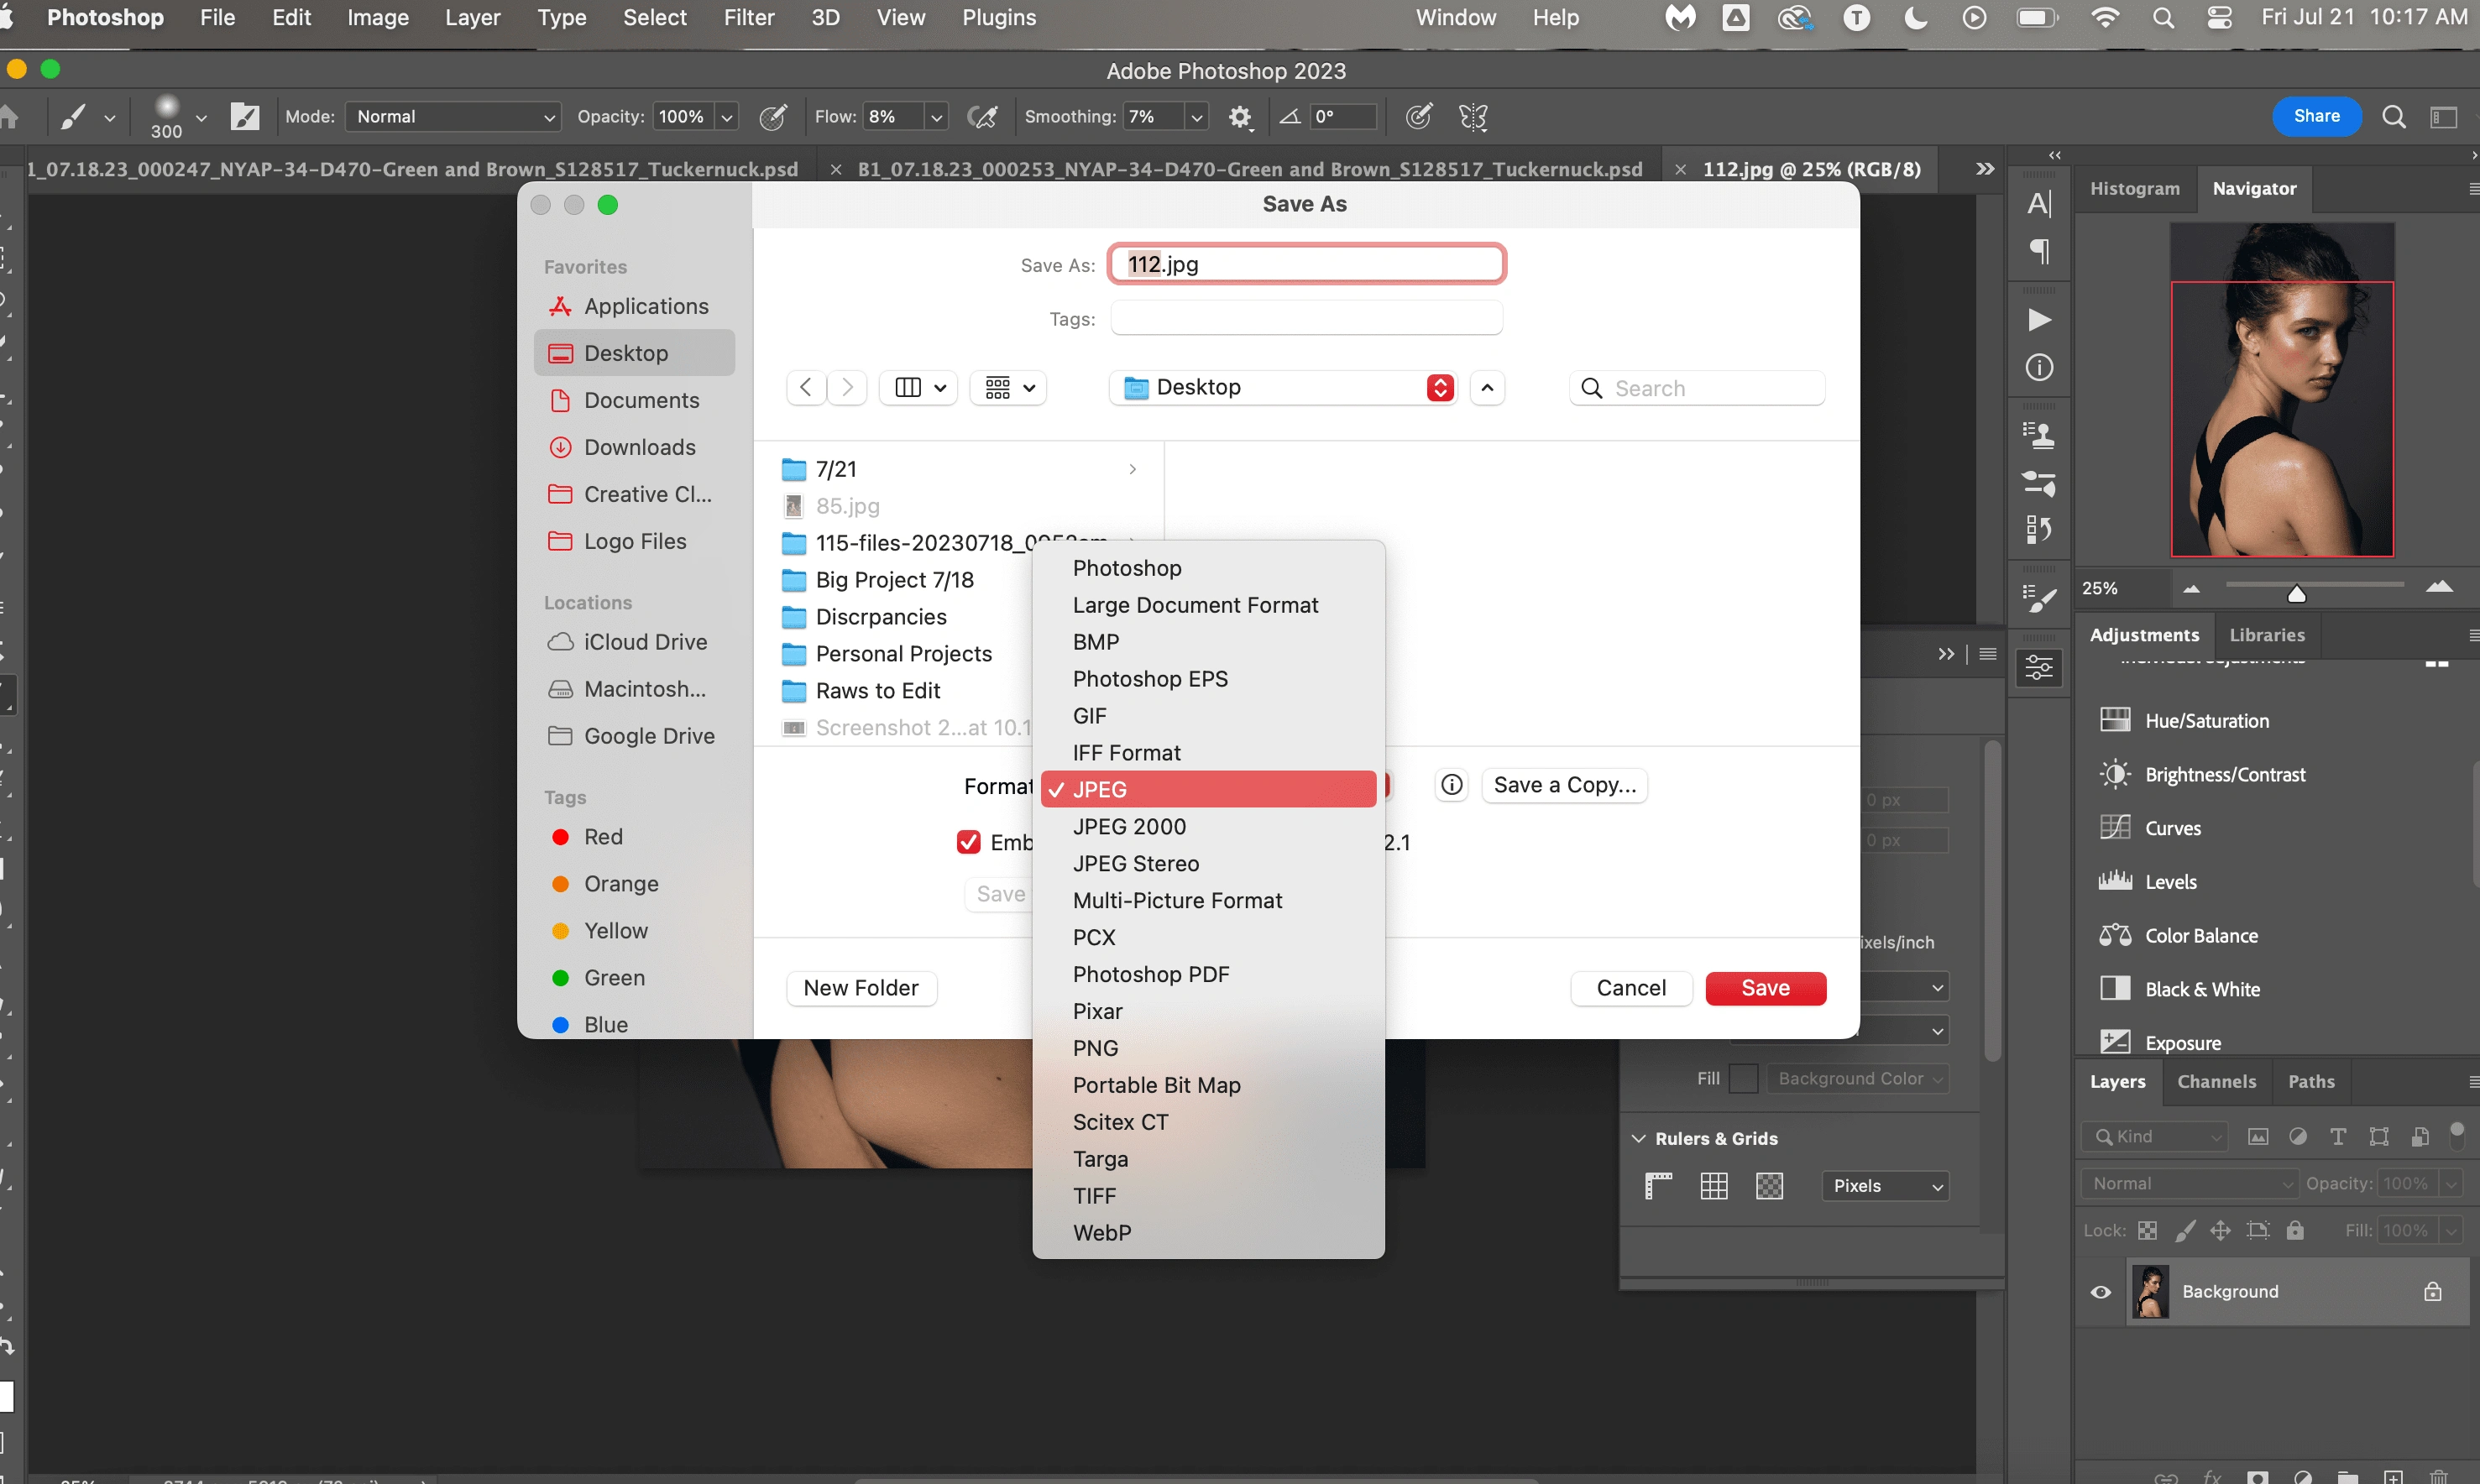
Save As Settings
File > Export > Export As: Ideal for final outputs, it allows you to choose the file type (JPEG, PNG, etc.), adjust quality, and resize the image.
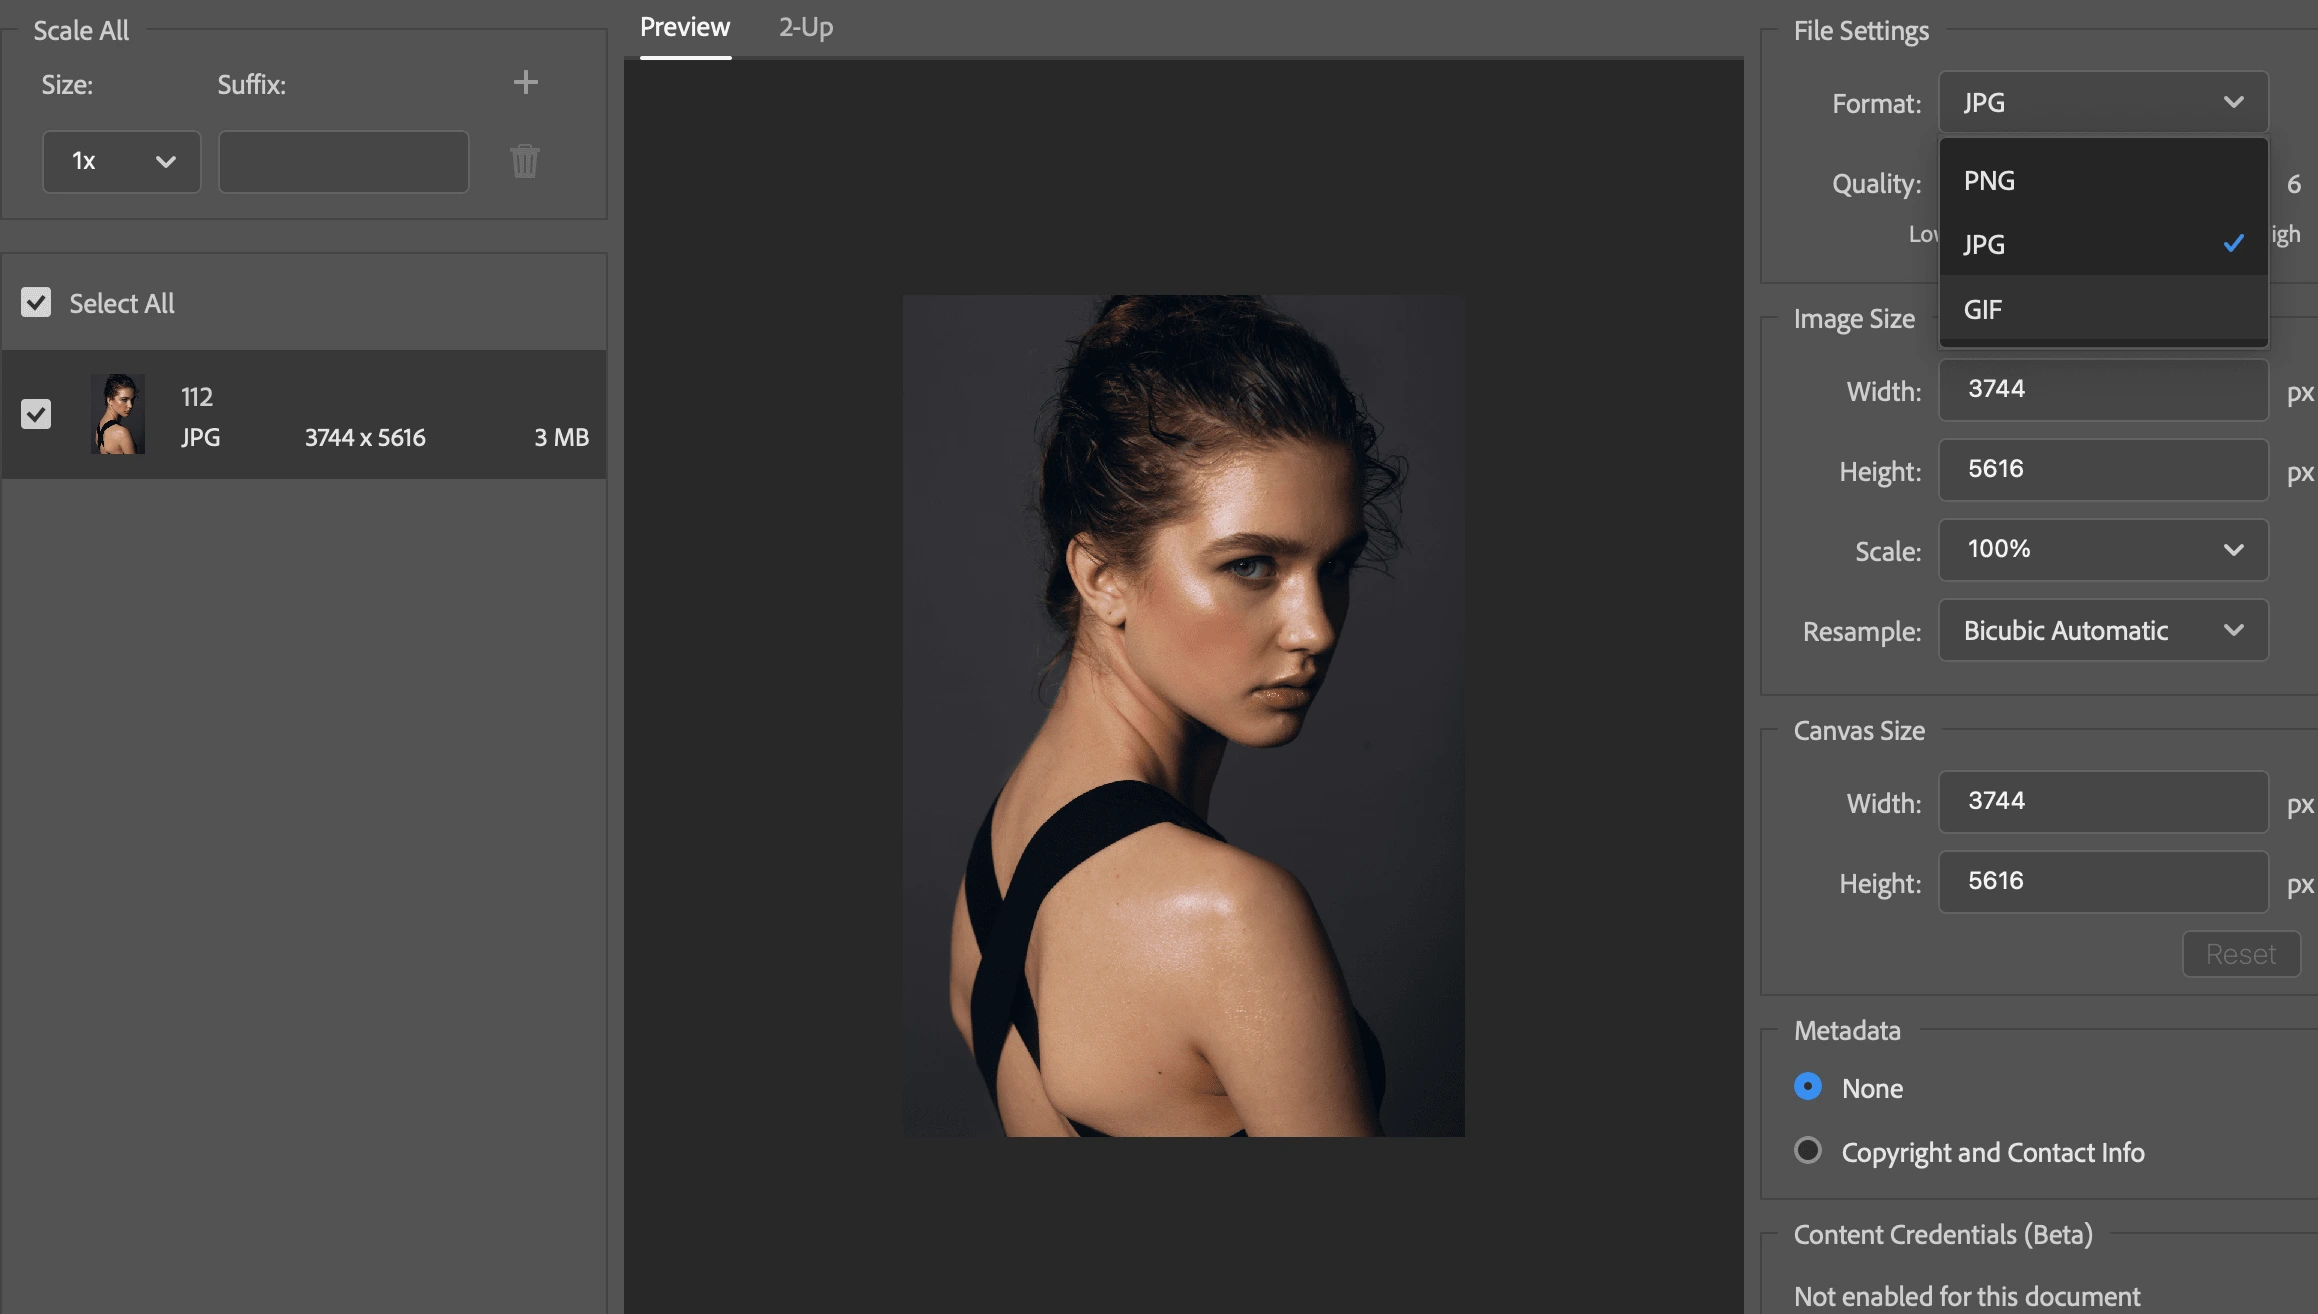
Export As Settings
File > Export > Save for Web (Legacy): This is a specialized option for preparing images for the web, allowing you to balance image quality and file size.
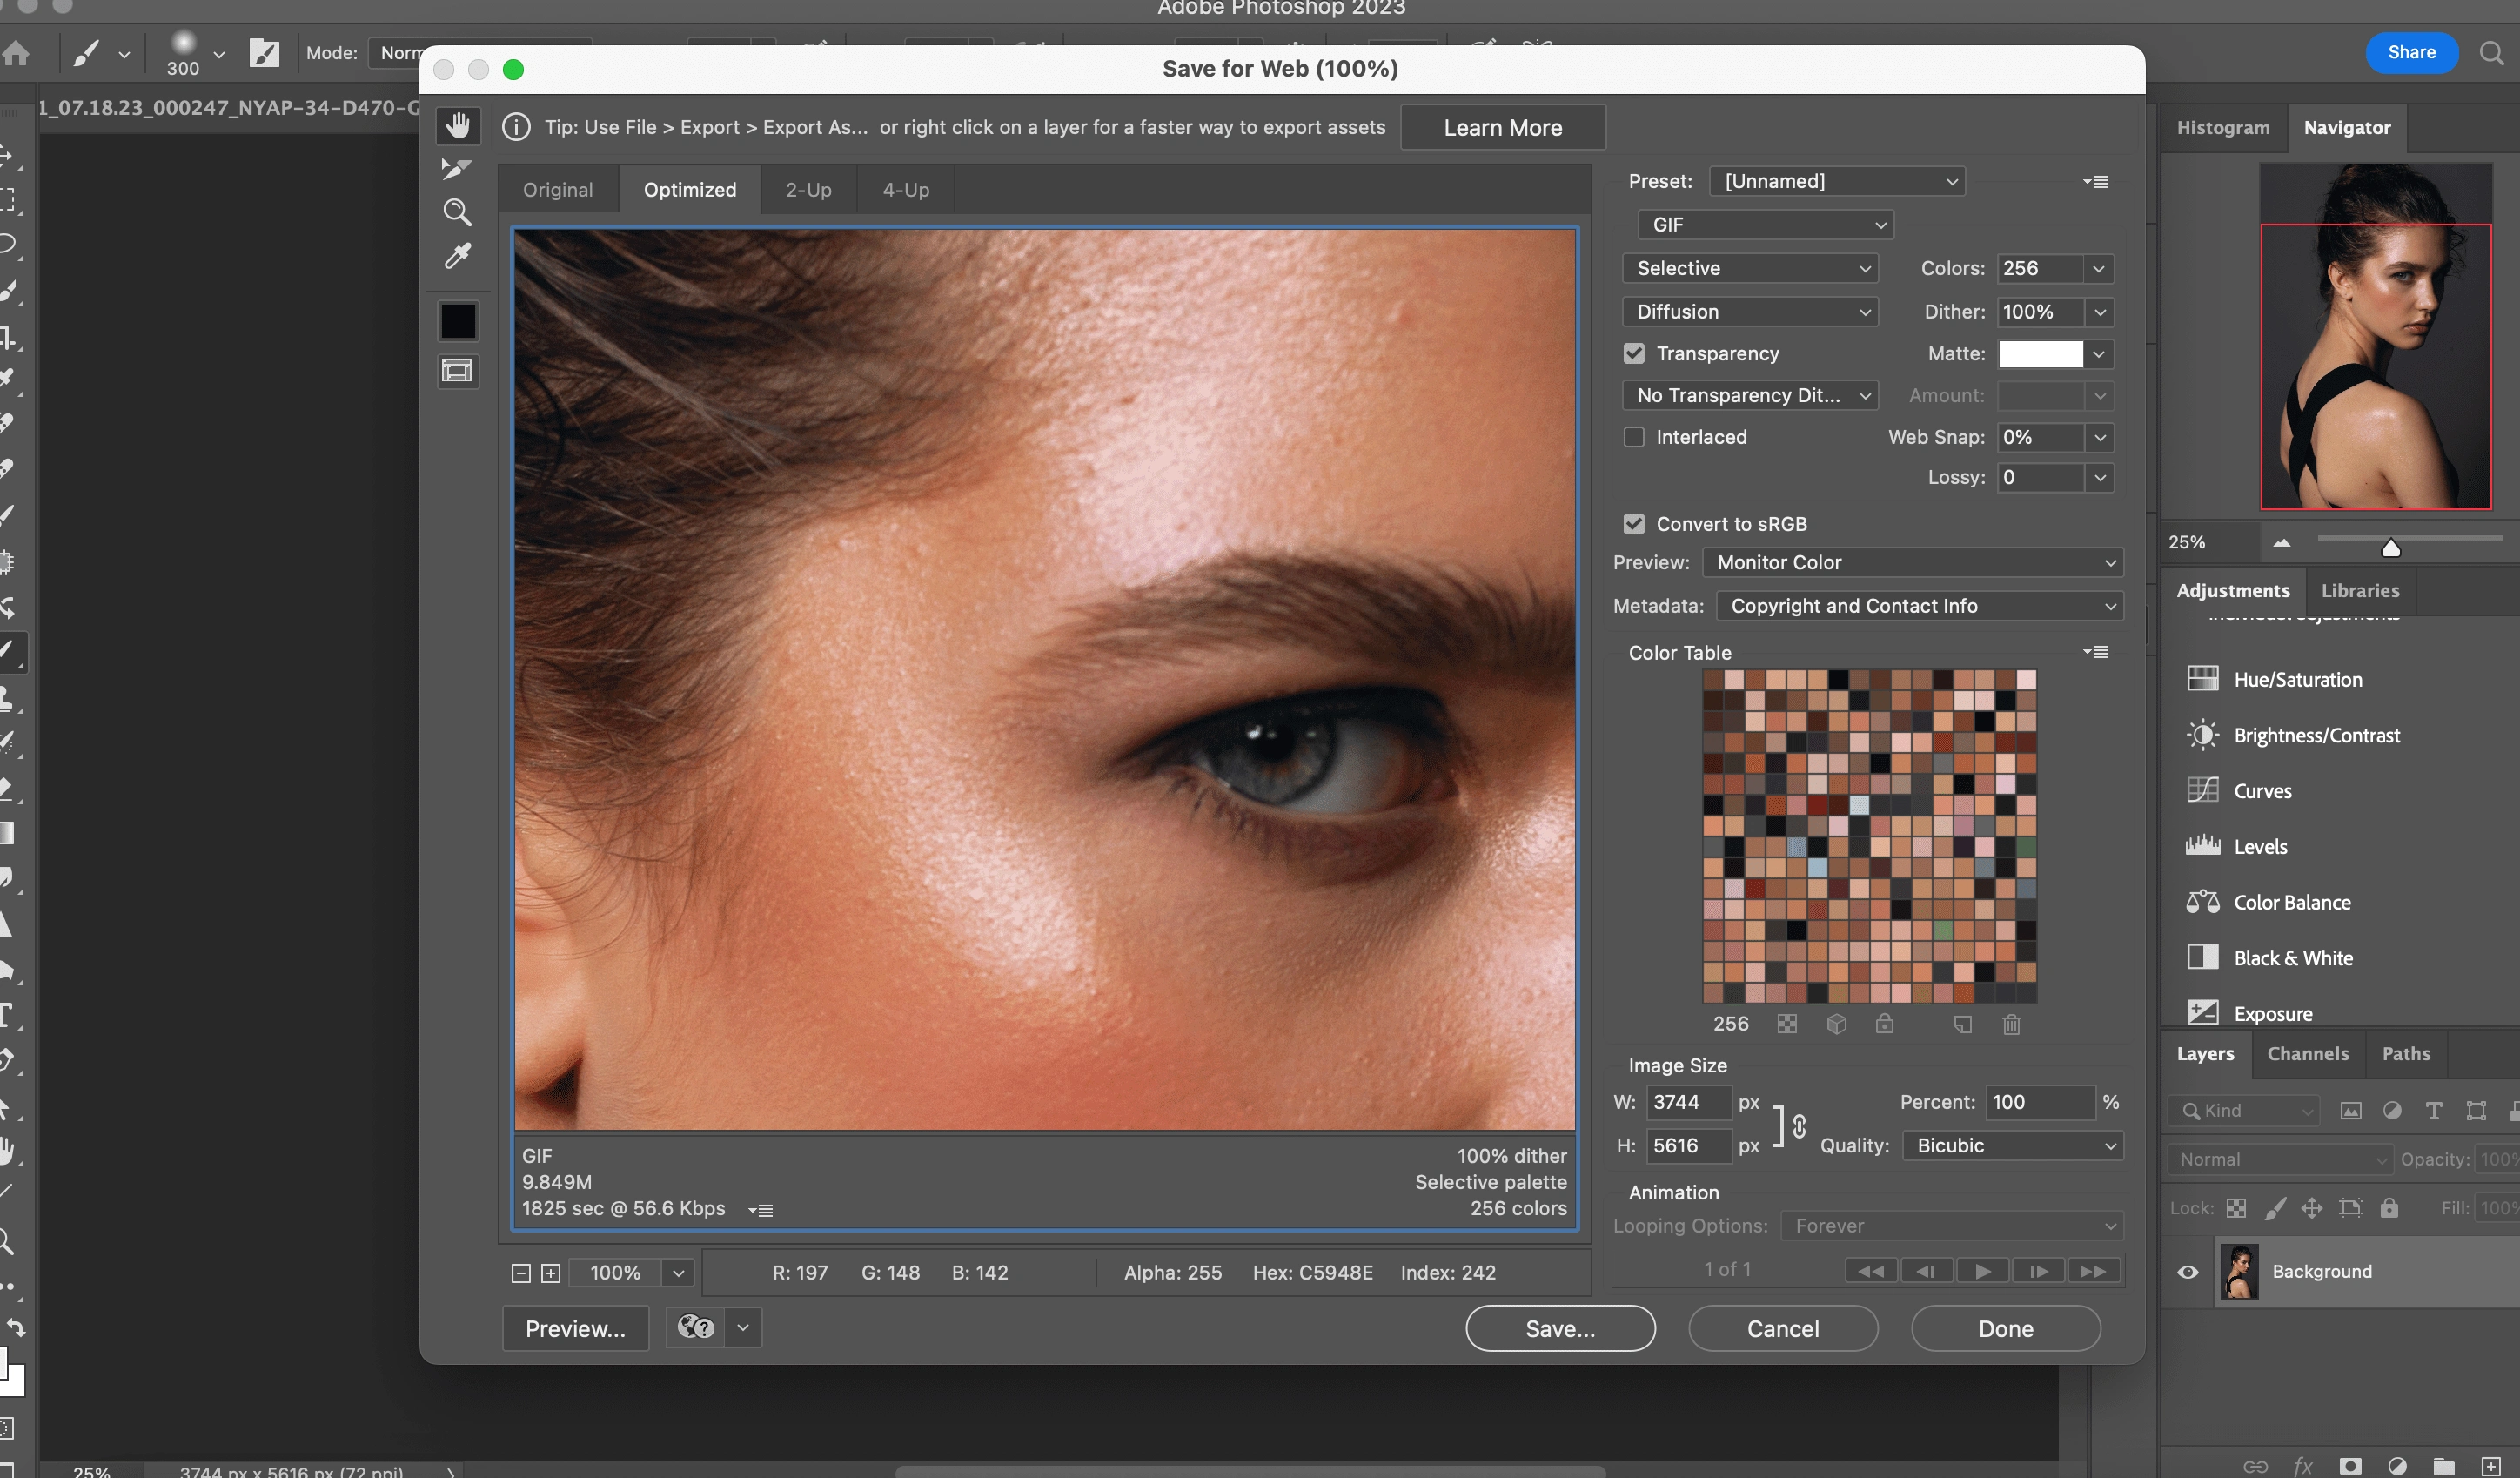
Save for Web Settings
Best Practices:
For web: Export as JPEG, sRGB color space, with a resolution of 72 dpi. Keep the quality between 60-80 to reduce file size without significant quality loss.
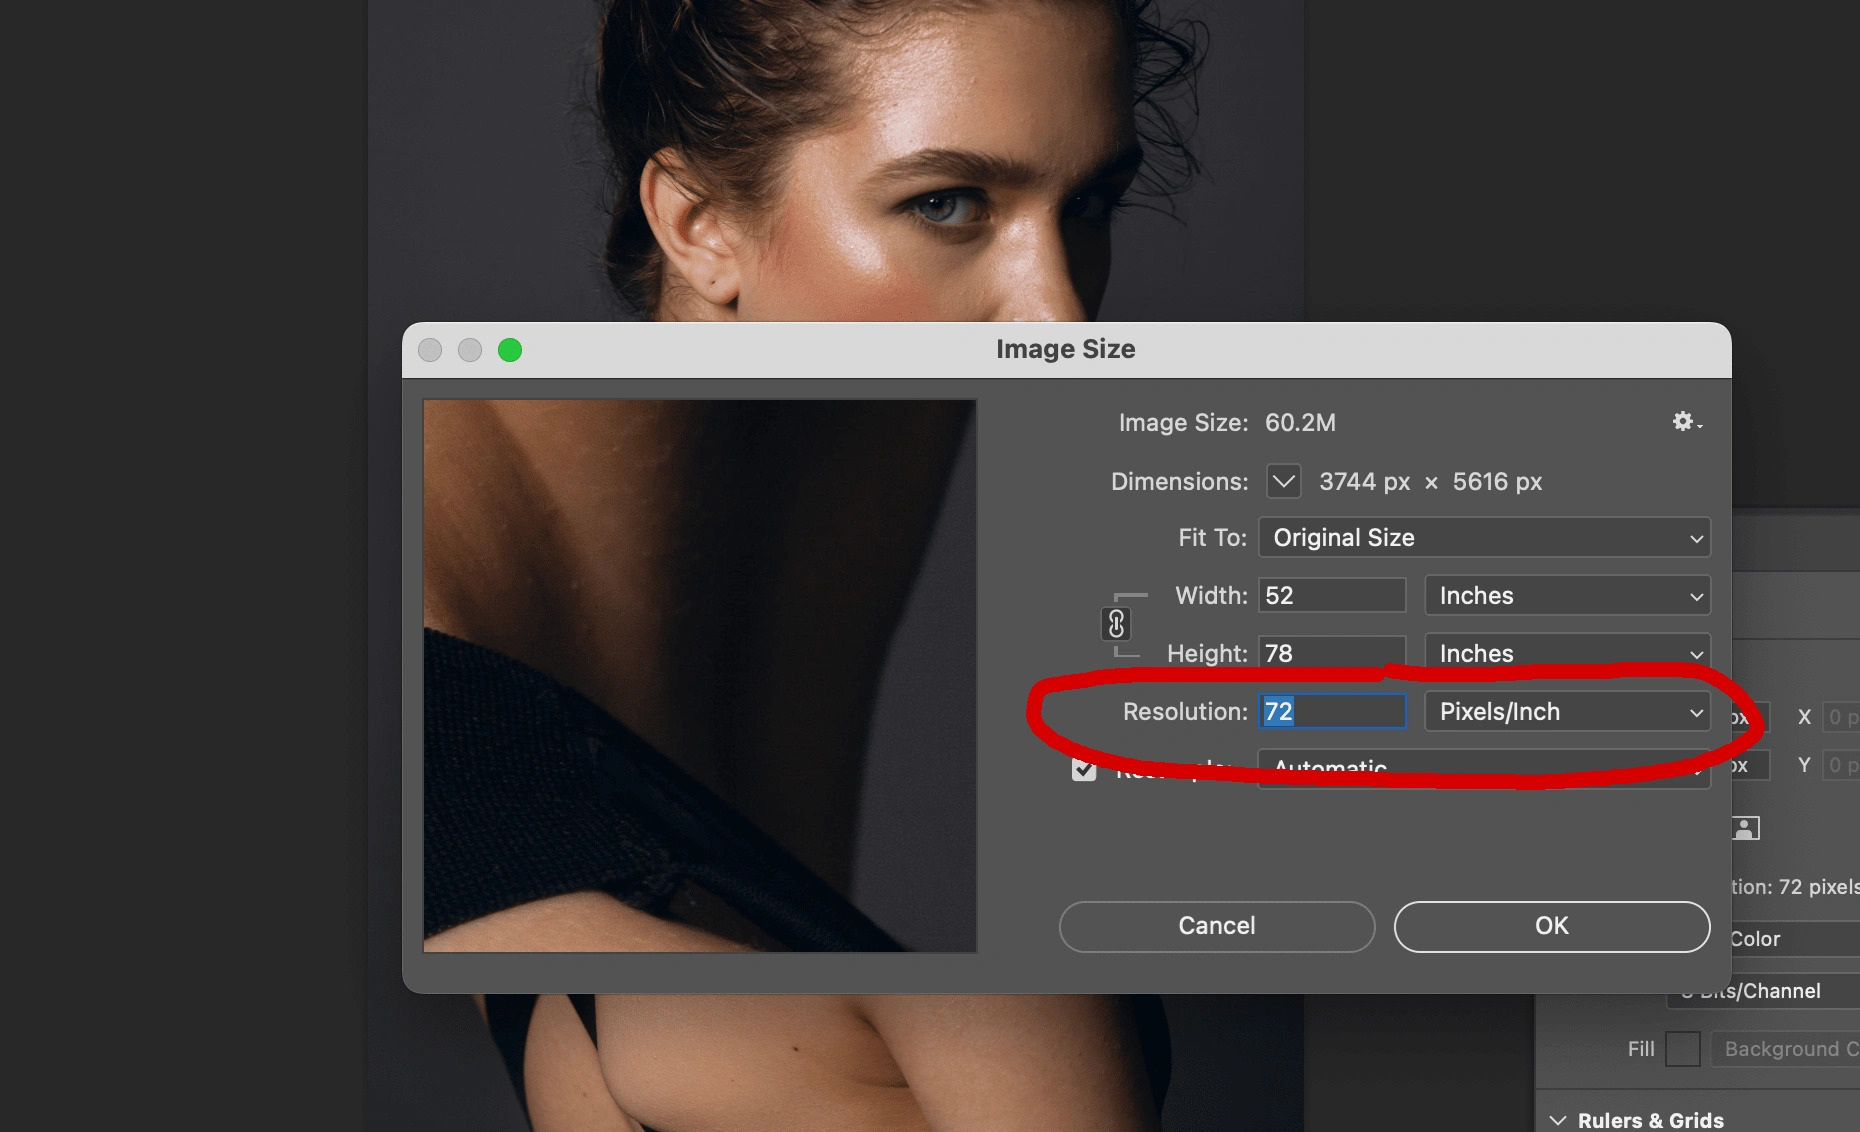
72 DPI
For print: Export as TIFF or high-quality JPEG, Adobe RGB color space, with a resolution of 300 dpi.
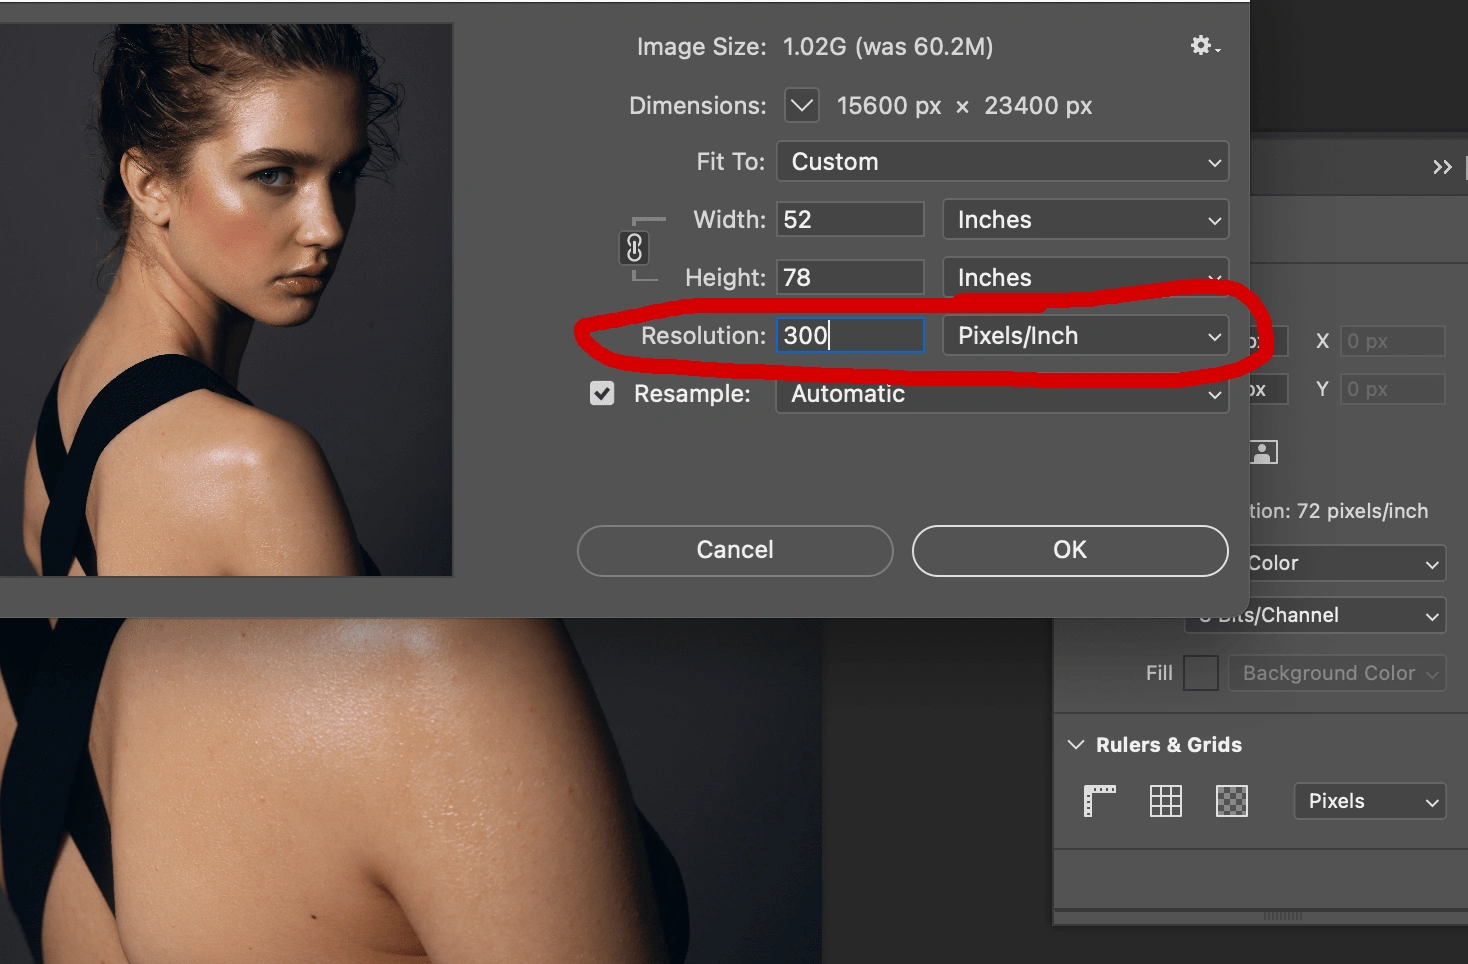
300 DPI
For archiving: Save your work in progress as PSD or TIFF to preserve all layers and edits.
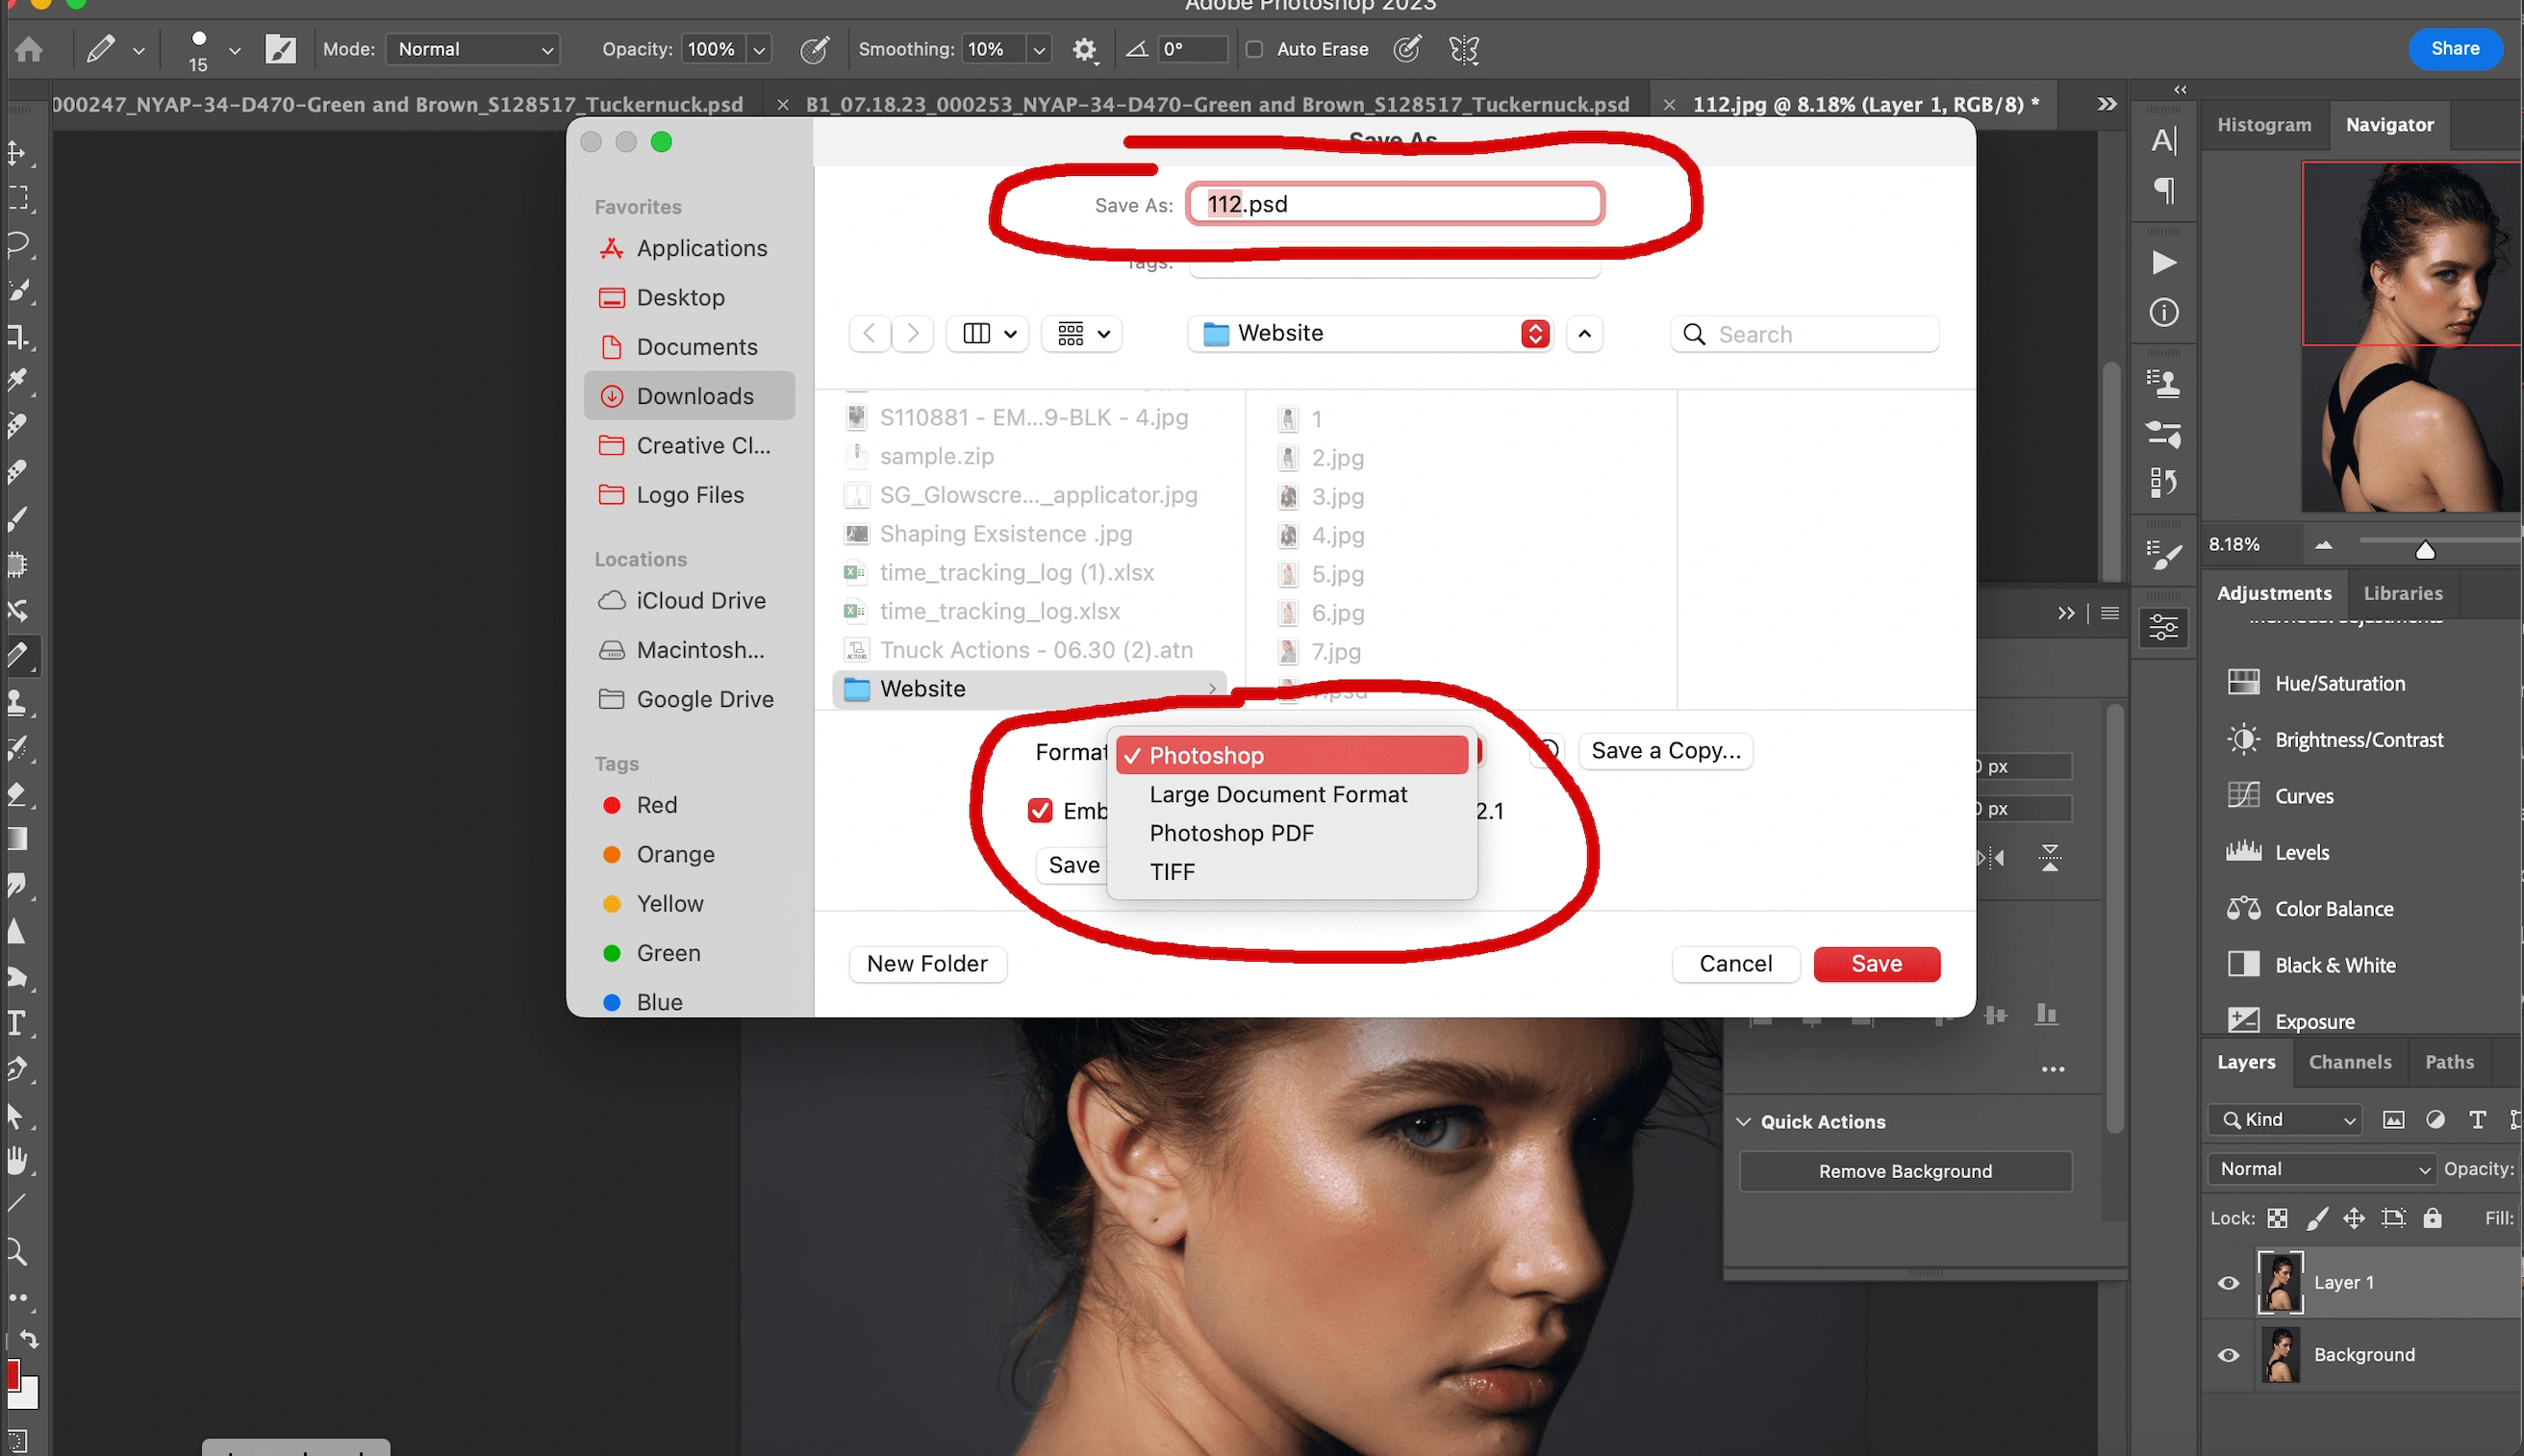
Saved as a PNG but can also be saved as a TIFF
Mastering the art of exporting and saving images in Photoshop is a crucial skill for any photographer or photo editor. By understanding the different file formats and settings, you can ensure the best quality for your images, whether they're destined for the web, print, or further editing. Remember, practice makes perfect, so don't hesitate to experiment with different settings to find what works best for your needs. Happy editing!
Like this project
Posted Jul 21, 2023
Embark on your photo editing journey with our beginner's guide to exporting & saving images in Photoshop. Master file formats, quality settings, and more.


