Crypto Market Prediction
HarshitPratap Shahi
Every line is a must read
Website URL - https://cryptotrendprediction.vercel.app/
cryptoTrendPredictions
This simple app powered by Coingecko API for data tries to use EMA technique and gather sentiments to predict 24H future signal, also powered by Vercel.
Real Time Current API: https://app.exchangerate-api.com/dashboard - You can fetch your own or use what's one already embedded in this project. I would advice to get your own so it doesn't go down for any reason in future.
Insturction Set I- If you are trying to run this whole code repo locally in VS Code then please install below dependencies for a smooth sail and less errors.
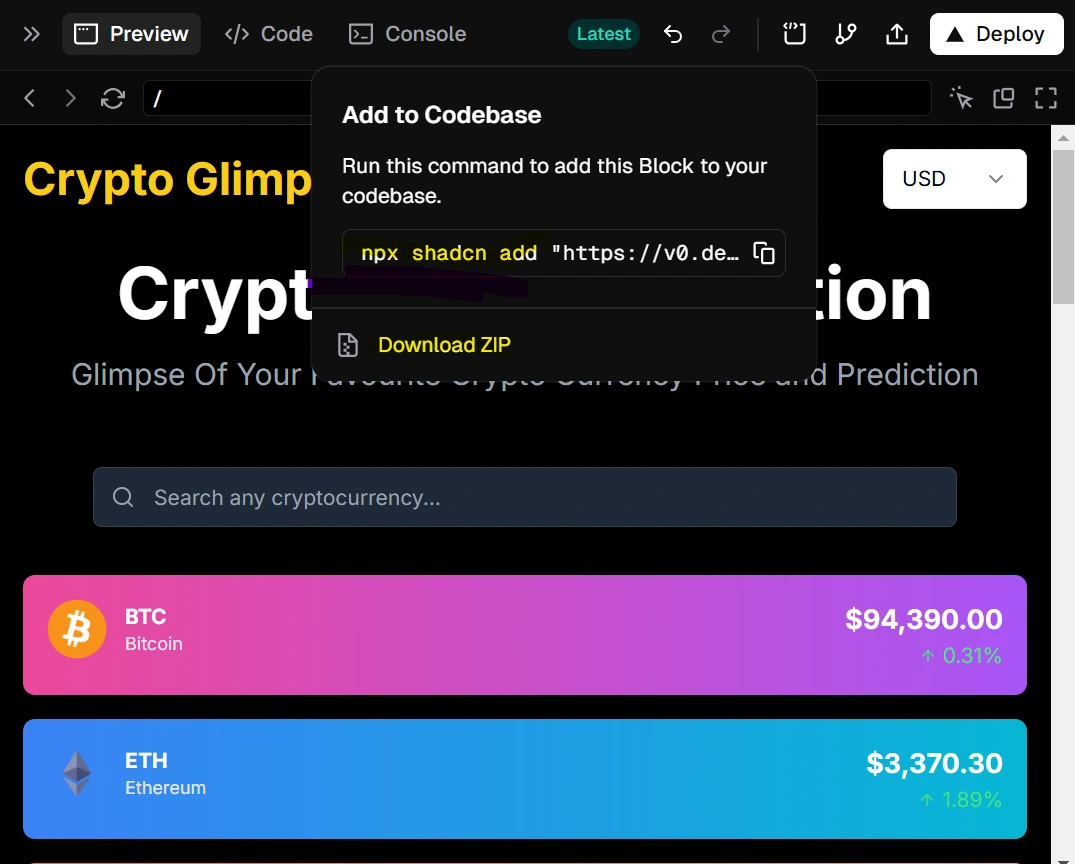
code --install-extension dsznajder.es7-react-js-snippets code --install-extension msjsdiag.debugger-for-chrome code --install-extension esbenp.prettier-vscode code --install-extension eamodio.gitlens npm install typescript npm i --save-dev @types/node npm install typescript --save-dev npx tsc --version npm install react-scripts --save npm i -g vercel What is this npx cmd ? - This is what you get when you try adding the Vercel code to a codebase, refer img at line 23. npx shadcn@latest add "https://v0.dev/chat/b/b_pJb7uN9vaRc?token=eyJhbGciOiJkaXIiLCJlbmMiOiJBMjU2R0NNIn0..uZqPAffdzsfnOREi.6fPyjwpAQEG4tDDJZ2Pt-Sq99M91f5-vRXCzeBN96VepBV-O9Viz7MzV-0Q.Q4kaREqYE1-5McZ5r_ST-A"
Instruction Set II - Continue from Line Number 23 cmd. Also, see all GIT cmd you would use to sync the files from local to git repo remotely without drag or dropping the codebase in GIT.
Context- When I ran cmd show in line 23 npx shadcn@latest add "" it got all the latest deployed files from
In the set of files you'll see three files which have two copies, as follow. You'll have to review which one is working for you and delete the other one after taking backup to test which one is working.
package.json (Goto root folders->copy is named as: "package - Copy.tsx") layout.tsx (Goto App folder->copy is named as: "layout - Copy.tsx") page.tsx (Goto App folder->copy is named as: "page - Copy.tsx")
------------------------------------GIT REPO SYNC WITH VERCEL CODEBASE USING VS CODE-------------------------------------
If you want to sync the cmd in line number 21 onwards with GIT using VS Code then follow below steps
Steps to Upload Files from VS Code to GitHub Install Git: Ensure that you have Git installed on your machine. You can download it from git-scm.com.
Set Up Git in VS Code:
Open VS Code and go to the terminal (View > Terminal). Configure your Git username and email if you haven't done this before: git config --global user.name "Your Name" git config --global user.email "your_email@example.com" Create a New Repository on GitHub:
Go to GitHub and log in to your account. Click on the "+" icon in the top right corner and select "New repository". Fill in the repository name and other details, then click "Create repository". Clone the Repository:
Copy the repository URL from GitHub. In VS Code, open the terminal and run: git clone This will create a local copy of the repository on your machine. Add Your Files:
Move or copy your project files into the folder created by the git clone command. Stage Your Changes:
In the terminal, navigate to your cloned repository: cd Stage your changes using: git add . Commit Your Changes:
Commit the staged changes with a message: git commit -m "Initial commit" Push to GitHub:
Finally, push your changes to the GitHub repository: git push origin main Replace main with the default branch name if it’s different (like master). Alternative Method: Using the VS Code Git Interface If you prefer a GUI approach, you can also use the built-in Git features in VS Code:
Open the source control panel by clicking on the Source Control icon in the sidebar. Initialize a new repository if it's not already initialized. Stage, commit, and push your changes directly using the buttons in the Source Control panel. This way, you can manage your Git workflow entirely within VS Code without needing to switch to the terminal.
Like this project
Posted May 8, 2025
Always felt a need to have my own screener so as a hobby project I developed a crypto prediction webapp data powered by Coingecko API and code hosted in Vercel.
Likes
2
Views
0
Timeline
Oct 15, 2024 - Oct 31, 2024