Moxy 3D Mockup Studio - Less Flat. More Fab.
Susanna Nevalainen
Verified
This project was created in less than a week as part of Figma Make-a-thon and was awarded with the Best Prompt 7500 USD cash prize from over 10K submissions.
The Problem
One of the common challenges designers face regularly is to bring their designs to life for client meetings, portfolio projects or showreels. Showing logo in Figma is fine, but to help clients see it in action will go a long way. Well presented design gives immediately more professional impression and builds trust.
Meet Moxy — Less Flat. More Fab.
Have you ever wondered what would happen if Figma, Spline, and Jitter had a baby?
Moxy is the ultimate 3D mockup studio that turns your flat Figma designs into animated 3D scenes - instantly.
No need to buy expensive mockups or spend hours creating your own mockup 3D videos. With Moxy, you get stunning, animated, crisp, photorealistic previews ready to be exported as HD video in seconds.
What Moxy Can Do Today
Realistic 3D mockups powered by Sketchfab (CC license)
Built-in Figma import → paste your Figma file link or upload designs directly (Real Figma API integrated)
Advanced Decal projection → place your screens and logos seamlessly onto any shape of 3D surfaces
Built-in animations → choose from 4 smooth animation presets to bring your scene alive
Material styling → adjust color, roughness, and metalness easily
Environment presets → choose from 10 curated environments or a clean void scene
Instant exports → high-quality images and HD looping videos in seconds
Crisp visuals → optimized for web and presentation-ready assets
The Future of Moxy
This is just the start — Moxy is built to scale:
AR/XR integrations for immersive showcases and XR design
More mockups & materials
More animation presets
More styling & customization options
The Process
The idea of a mockup configurator has been on my mind already some time as currently creating 3D mockups and animations for my work in Spline or Blender is time-consuming. As Design Engineer who also works with 3D projects, 2D Figma designs may sometimes not even be the best medium to communicate the design in the first place.
At the same time, I love how Jitter has simplified the video making with templates and was looking for something similar but could not find it so decided to make one myself instead!
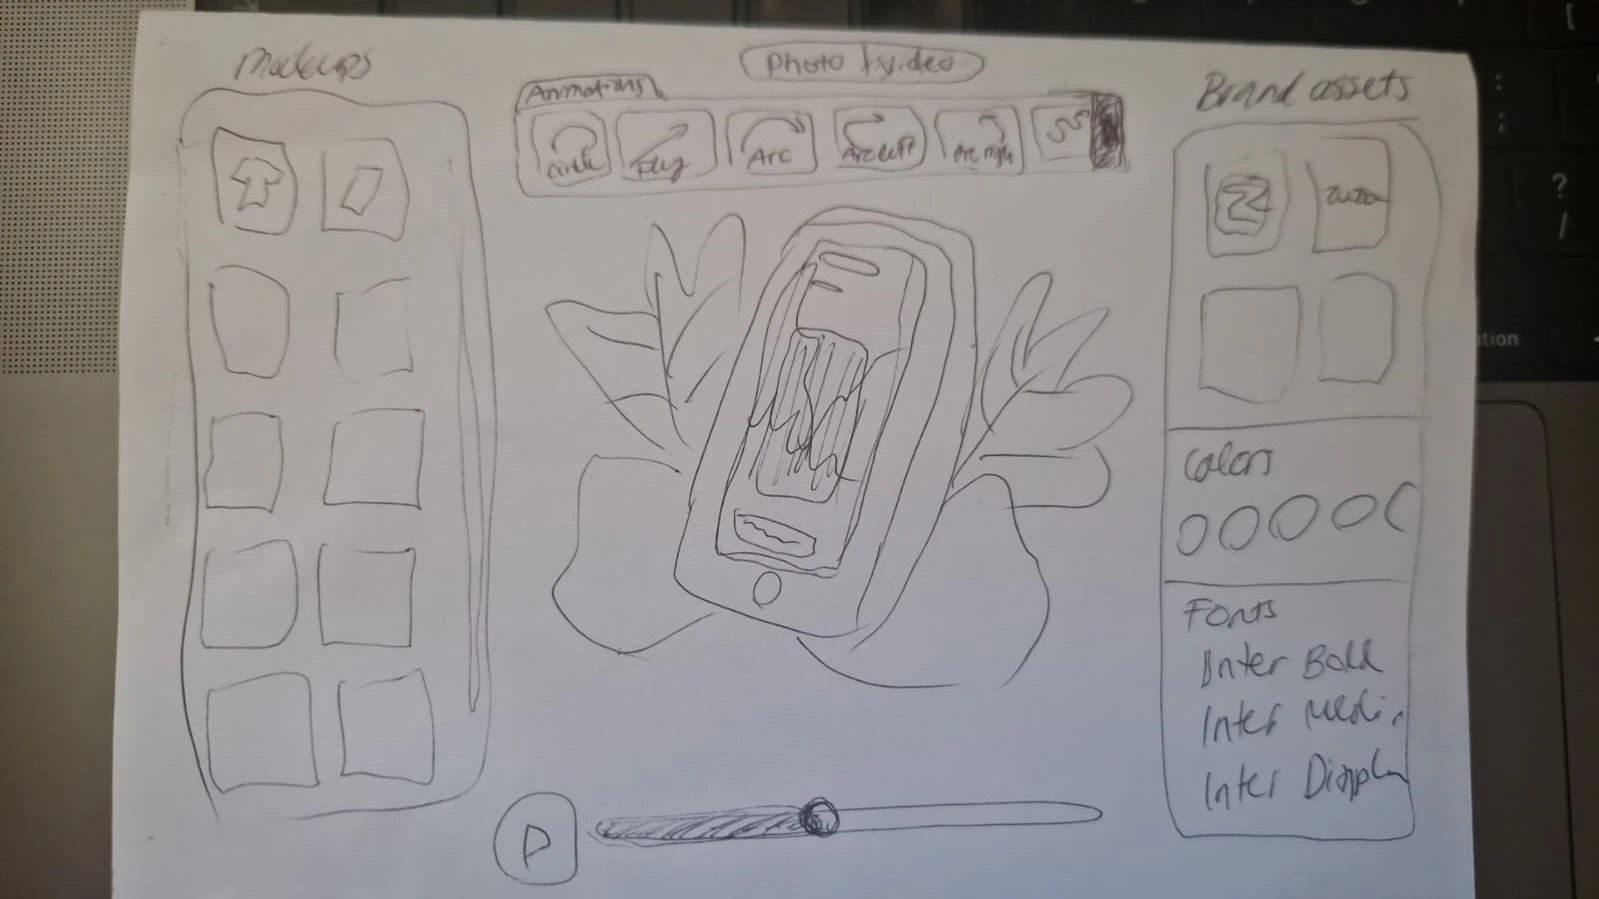
First draft of the idea
Moxy was fully built from scratch during the hackathon by myself and Figma Make. As Figma make was unable to host images or glbs, for this I used simple free AWS S3 bucket. Additionally, the SketchFab models were made more low poly in Blender to improve performance and some images were generated in ChatGPT but >95% of the work was done purely in Figma and Figma Make. The videos in the welcome modal were created with the app's export functionality.
All code was generated by Figma Make but as an Engineer I was also able to guide the AI to refactor and point issues directly in code but referring to them in technical terms in the prompts directly. Couple of times, I also had to fix some errors manually in code that AI was unable to solve.
Checkout the full process in the hyperlapse below with 1800x speed!
Prompting base setup
Here is the base prompt I used for Moxy:
You are a 3D web developer using tools like Three.js, React Three Fiber (R3F) and drei to create performant high quality 3D scenes that display 3D objects in soft lighting. As source for guidance, you should follow the sites like https://threejs.org/docs/, https://r3f.docs.pmnd.rs/, https://drei.docs.pmnd.rs/ . You should prefer r3f and drei when possible and use pure ThreeJS only if the features are not available in other two. Refactor code as you go to keep code clean. Keep file sizes small and put helper functions and components in their own files. If the prompt is not clear, ask follow up questions to clarify.
The last sentence was the most important of them all and I can highly recommend adding that to any larger vibe coding projects!
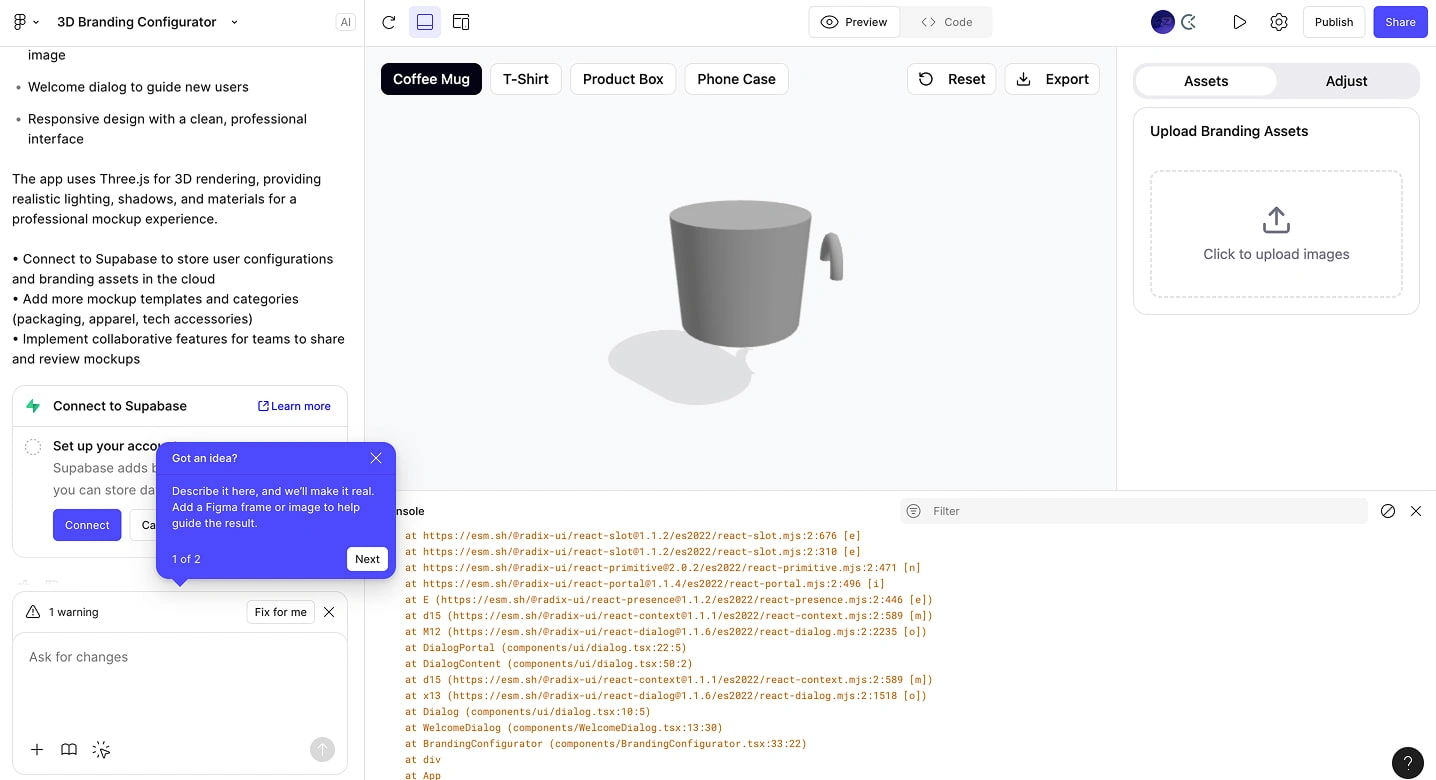
One of the first versions in Figma Make
Transforming 2D to 3D
DecalTexture in ThreeJS is a texture that adapts to any 3D surface like a projection making it look more natural than adding flat images on objects. I was aware of decals before so I knew what to prompt but at the same time I had never needed them in client projects before so I thought it was a good chance to put it to test.
Not everything is as easy as it looks
My first idea was to use a 2D canvas where I could create a collection of assets. However, I soon realized it felt clumsy to move between 2D and 3D.
In second iteration I decided to create sliders to move the element on canvas which turned out to be very mathematical operation depending if the object was square, circular or something else.
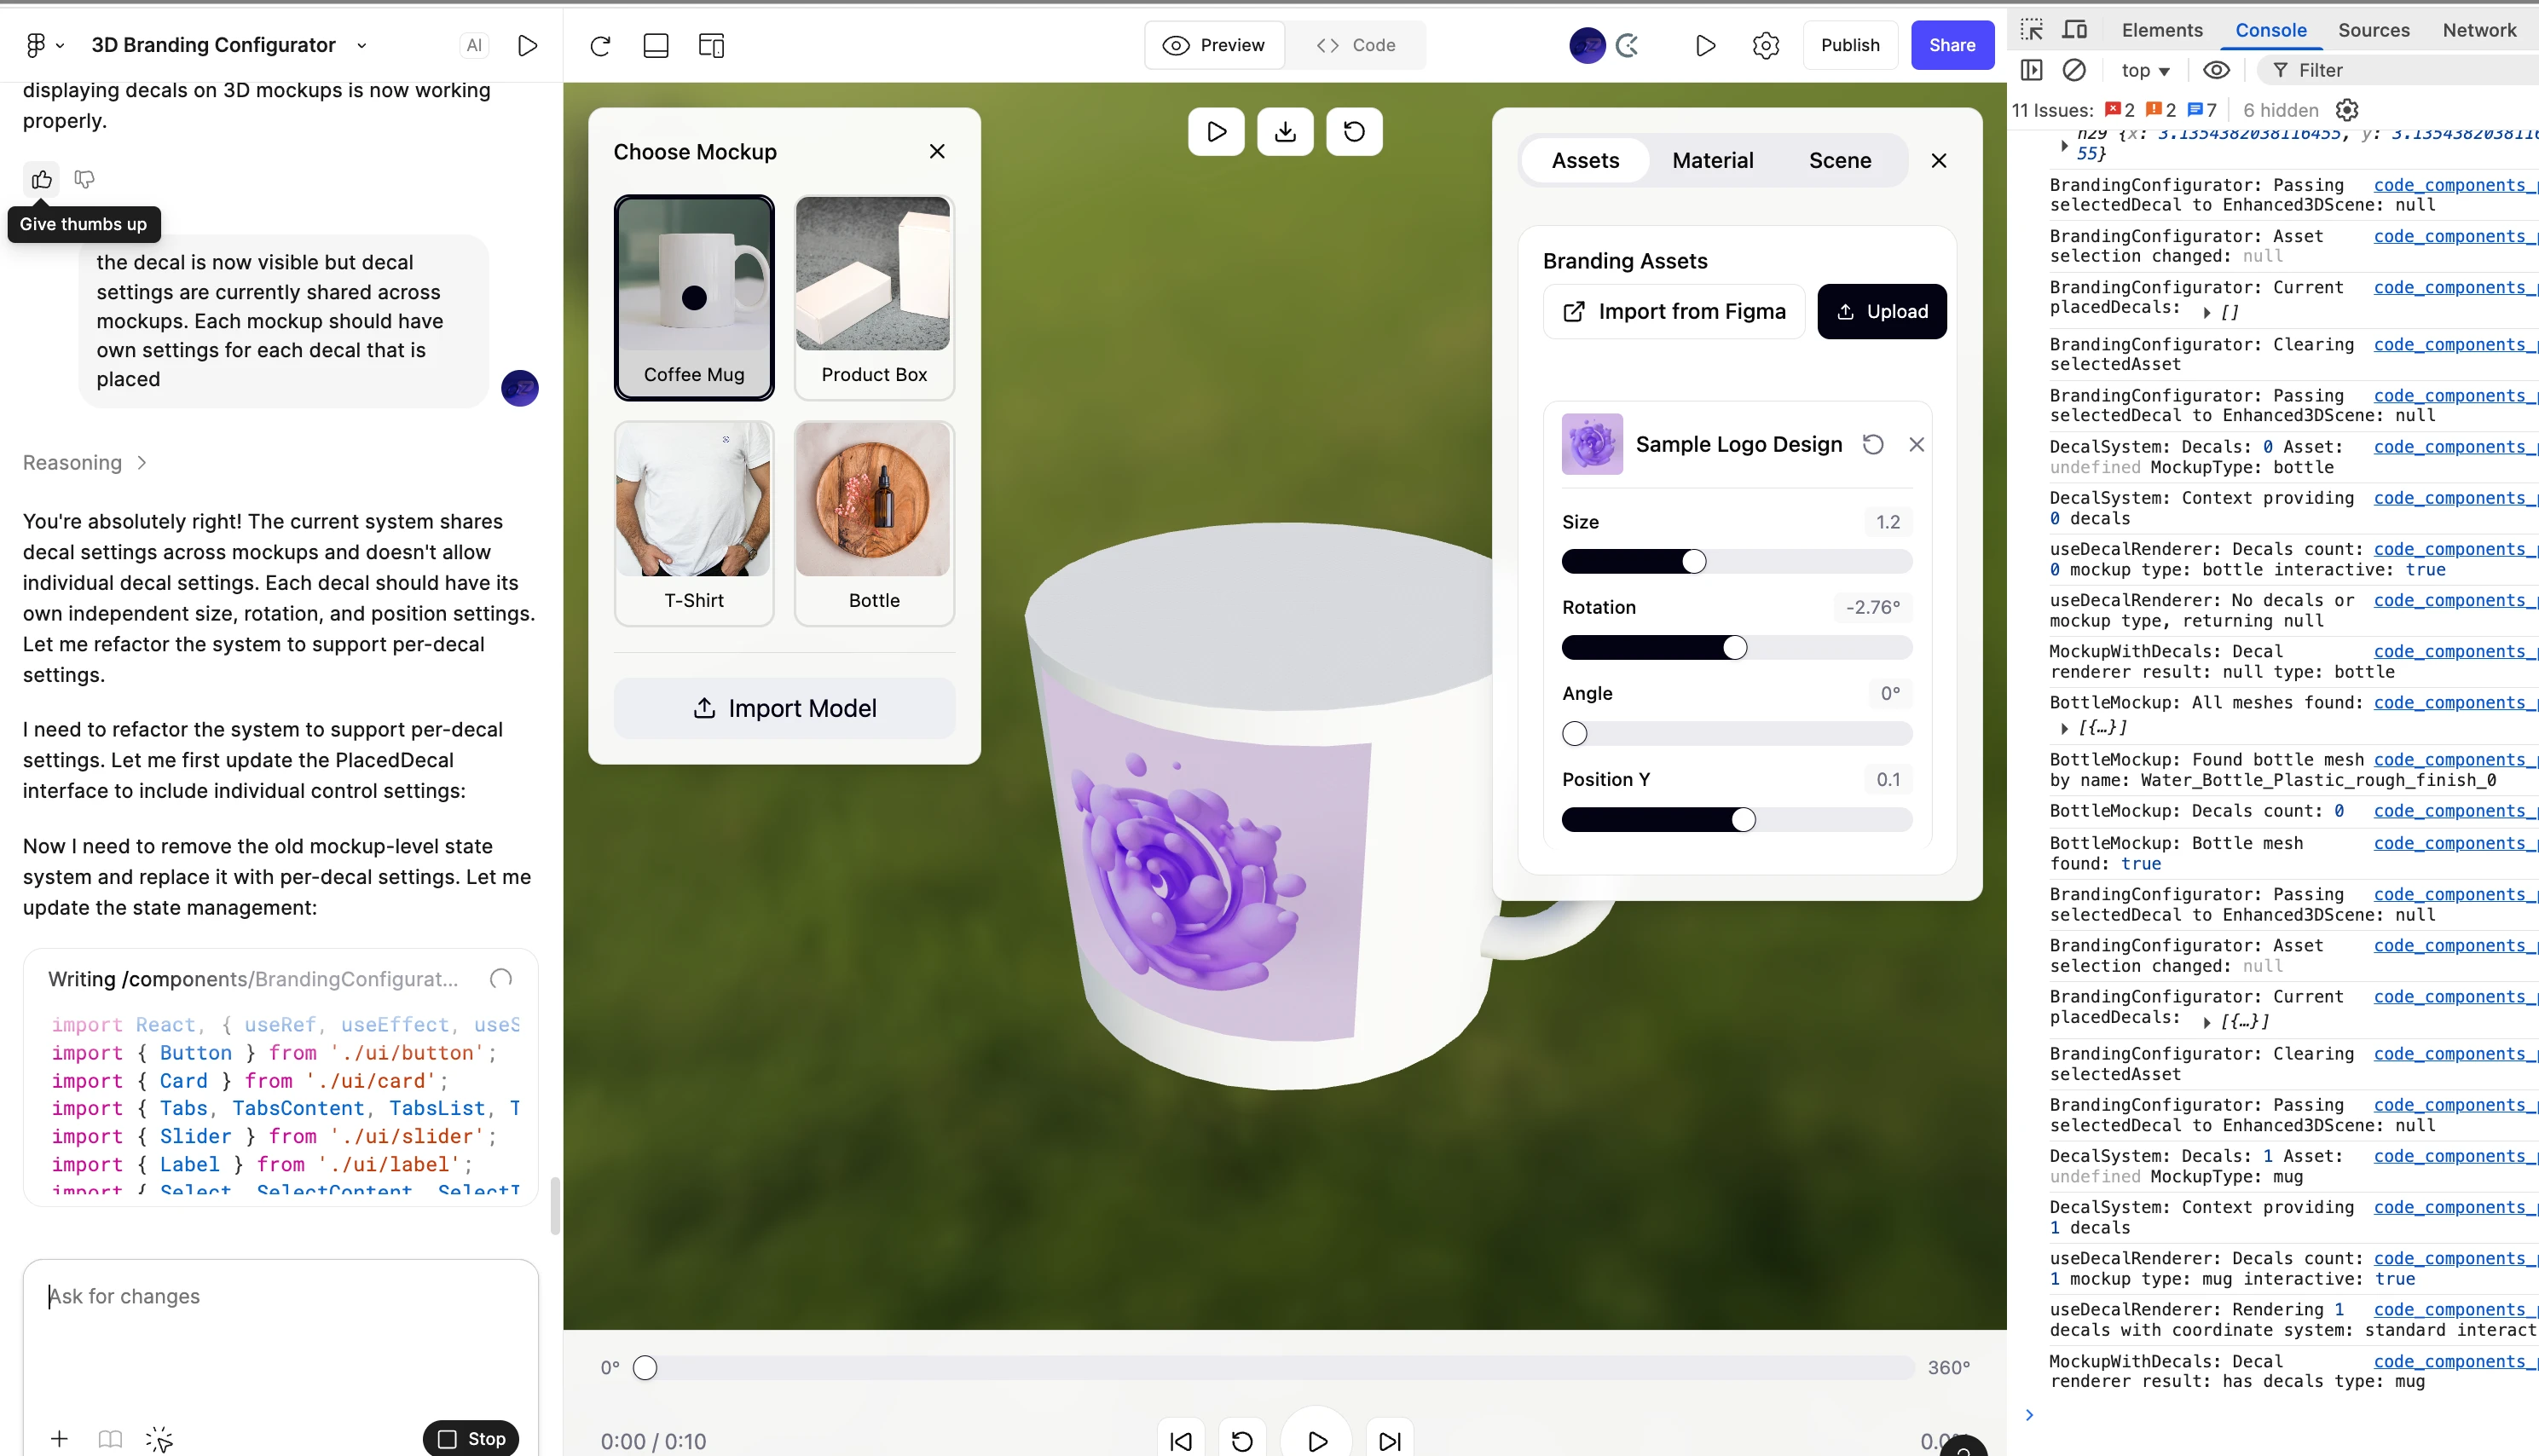
v2: Testing sliders to move assets on canvas
This worked well in primitive objects but testing this in custom 3D was quite unpredictable so I decided there must be a better way to work directly on the canvas and started experimenting with controls directly in 3D.
Canvas controls
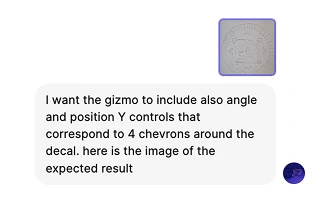
Canvas controls such as 3D Gizmo was one of the topics I spent most of the time with. I started with basic TransformControls and PivotControls but they did not seem flexible enough so i decided to create my own Gizmo.
I revised the Gizmo based on drawing I made by hand visible below.
I also actively used debug elements of ThreeJS to understand the elements positioning better but I believe there is still room for improvement here to make them more robust, especially on touch screens.
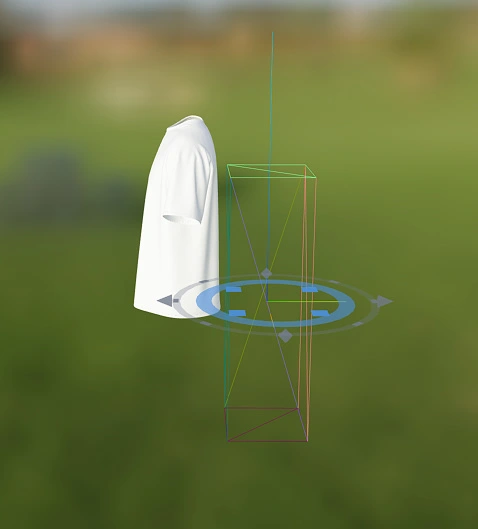
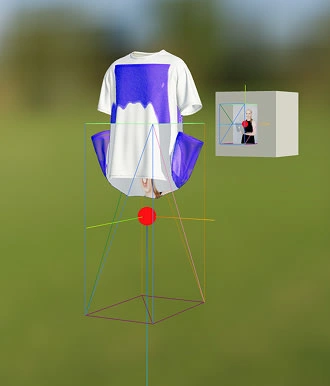
Trying to align Gizmo with the shirt
Animations
As a disclaimer here, I can share that I used to work with digital reality using another 3D library so I was not completely new to keyframe animations which helped me a lot to prompt the AI what to do. In the prototype I added 4 animations for now:
Circle: perfect for seamless loops
Rise: dramatic cinematic effect
Zoom: Approaches mockup cinematically in bexier curve
Spiral: Fun effect to see the mockup more close up
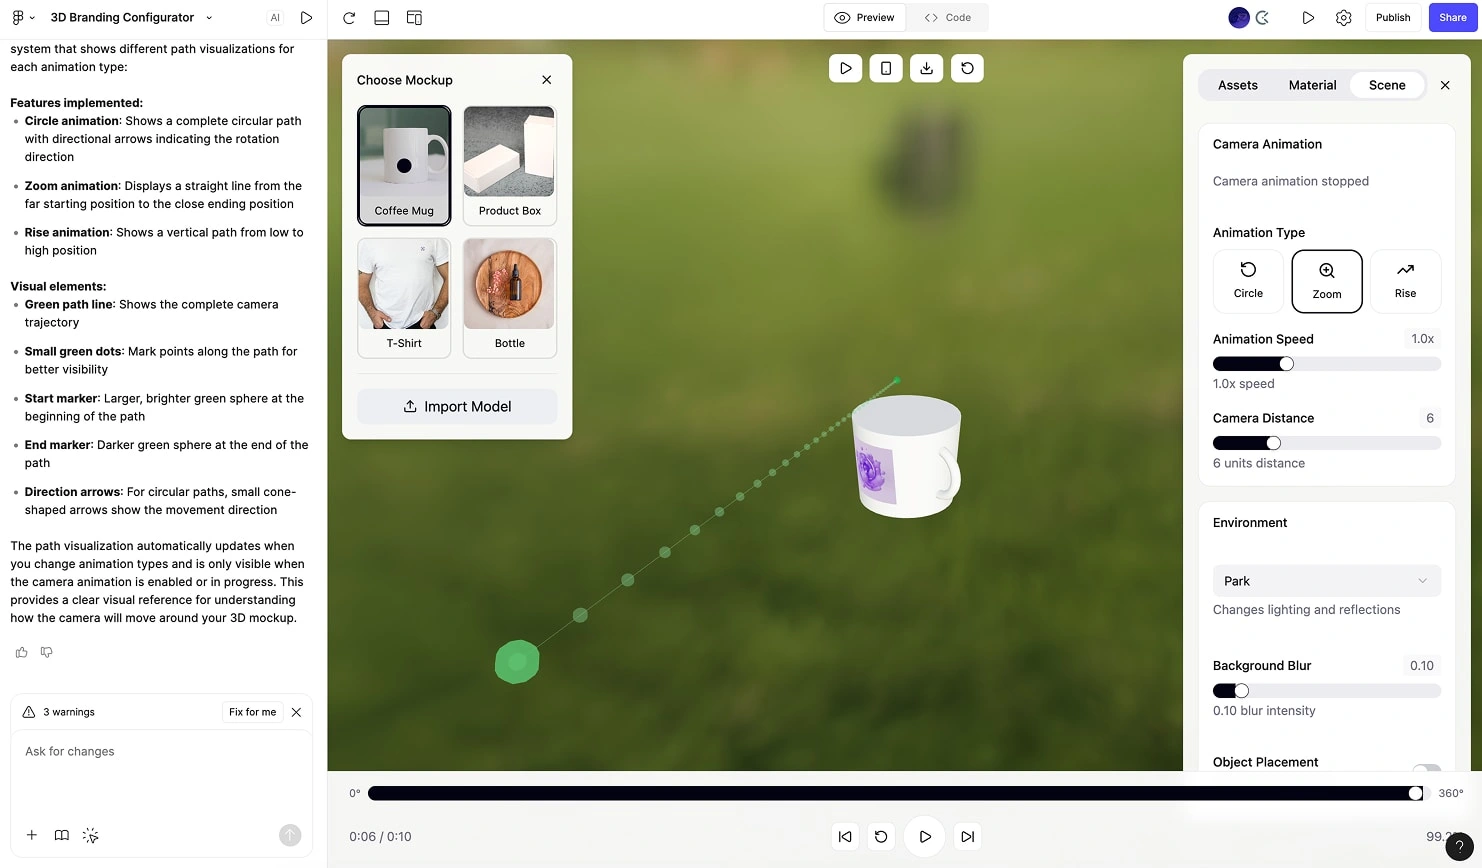
Animation path marked with green dots
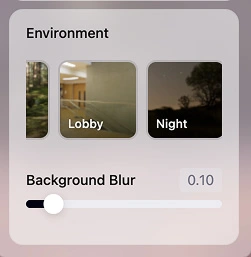
Environments
Environments were built using R3F <Environment> presets that I had used before in other projects so I knew what to prompt. However, I did not want to just display basic dropdown so created mini carousel with thumbnails that I took myself to help user select suitable environment faster.
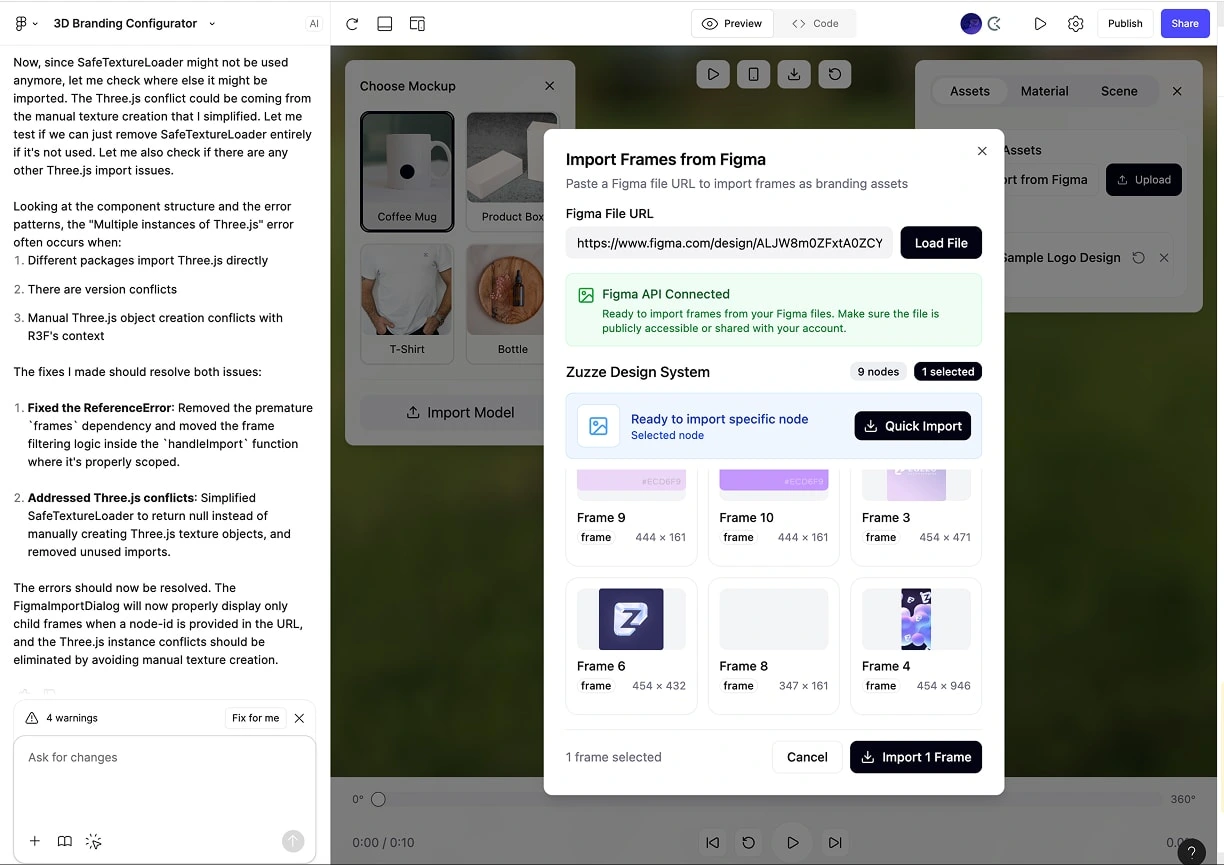
Figma API Integration
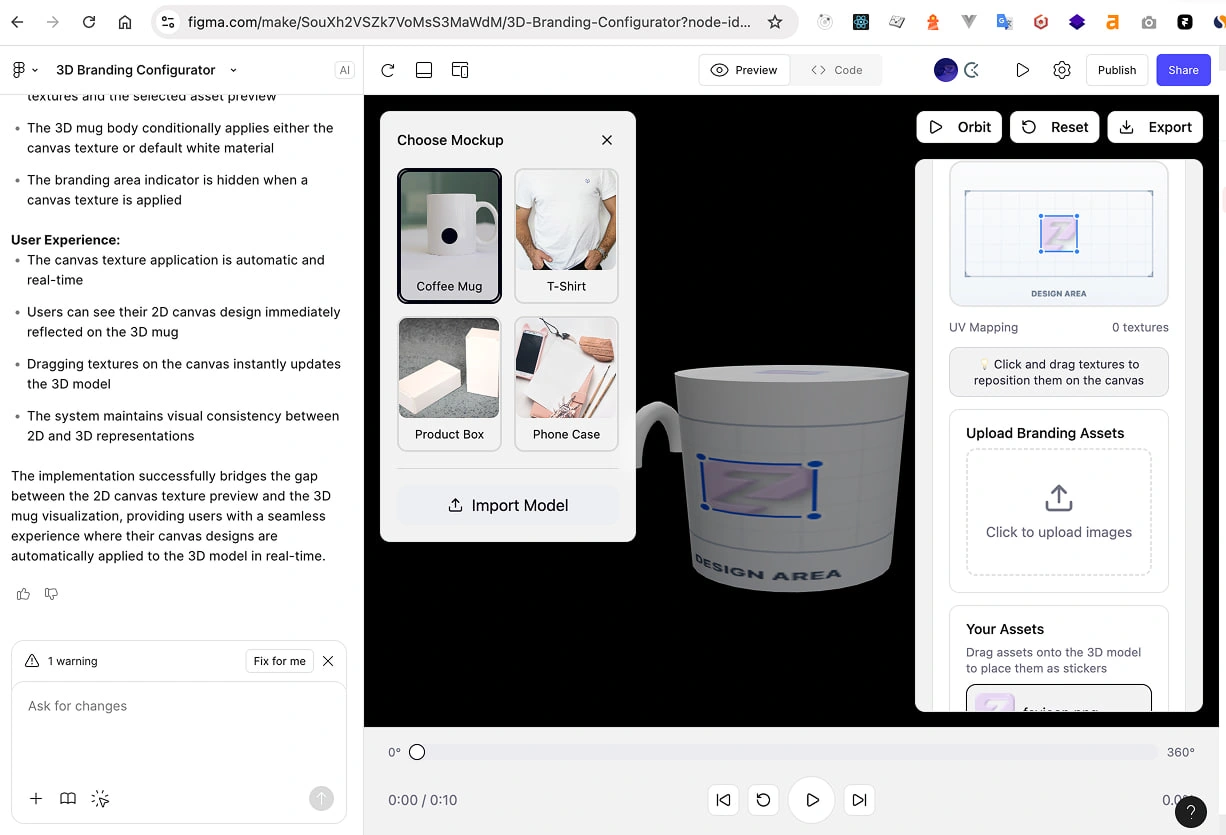
Surprisingly Figma API integration worked at first try and AI gave me directly this modal below. The usability of the modal was not the best with many unnecessary boxes but it was great to see how easy it is to connect Figma files with Figma Make.
Currently, this works only for public Figma Files but in future authentication probably could be added to allow more flexibility. Additionally I set an artificial limit to 24 first items from response as I noticed my files often had hundreds of nodes that took a long time to load. Ideally in future, this should be handled with pagination.
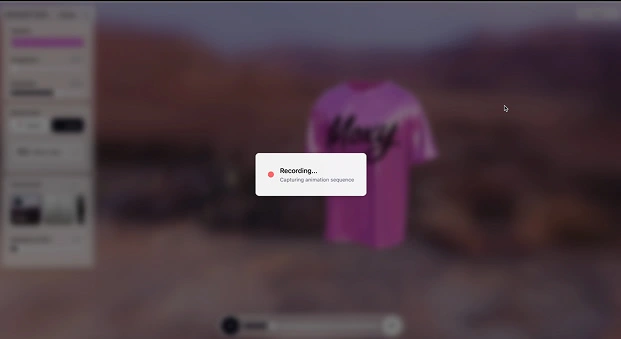
Export
To make the user journey complete and be able to use the videos and images in HD instantly, I also wanted to add export functionality to the scene. I had experience in coding similar features before so luckily prompting this was pretty straight forward. Main challenge was to make sure the resolution is good enough.
Result & Learnings
Around 800 Iterations later, the app was good enough for demo purposes and even made it responsive but to transform this into production there are still some bugs and considerations that would need to be polished.
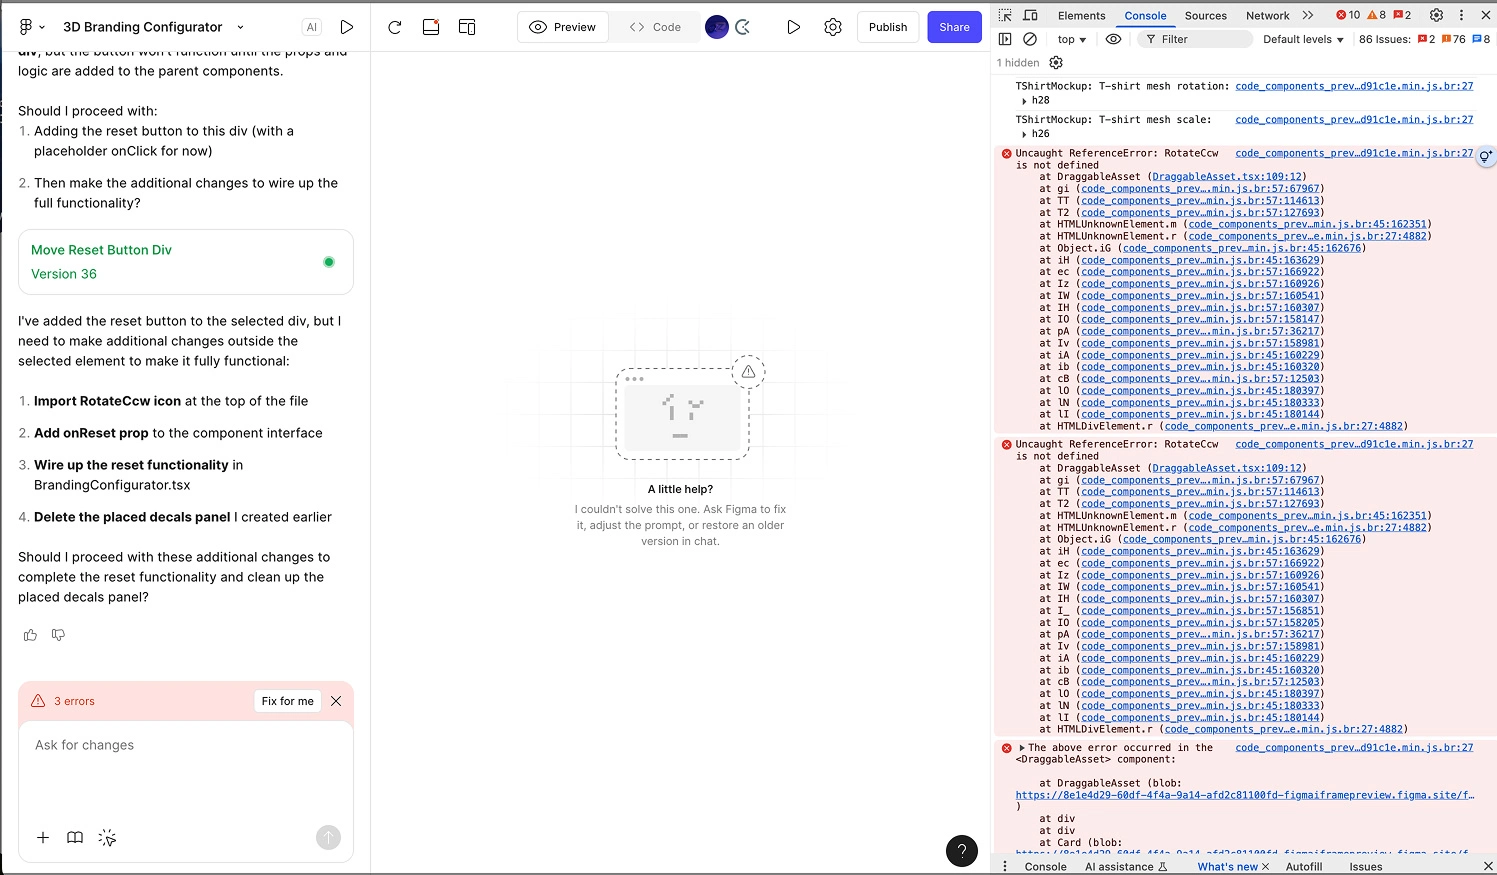
This screen came quite familiar to be during the process
While first 100 or so iterations went quite fast without needing to understand code much, I have to admit I'd probably not have been able to proceed without being able to debug some code myself when errors started to come across. While we usually talk about vibe coding from no-code perspective, it can hold a great power also for devs. It is almost like you had your own junior developer assisting you at all times which can speed up the routine flows but for more advanced reasoning human developer would still take the win.
Overall, Figma Make exceeded my expectations and I was glad I was able to test it out! Thanks for Figma and Contra for organizing and letting me play around, it was a blast!
Looking for a design engineer who is able to not only utilize the latest vibe coding tools but also to continue the work when AI gets stuck? Learn more at https://zuzze.tech!
Like this project
Posted Sep 11, 2025
Immersive 3D mockup generator turning flat 2D Figma assets into fabulous 3D experiences and directly export high quality images and videos with them.
Likes
6
Views
813
Timeline
Sep 17, 2025 - Sep 18, 2025
Clients
Contra