The network for creativity
Join 1.25M professional creatives like you
Connect with clients, get discovered, and run your business 100% commission-free
Creatives on Contra have earned over $150M and we are just getting started
Back to feedPost

Better Motion Control AI Starts Before You Upload: A Pre-Production Guide
A visually impressive character image is not always a good input for motion transfer. Dramatic shadows, cropped limbs, exaggerated perspective, and shallow depth of field may look attractive to a human viewer, but they can hide information an AI model needs to understand the character.
The same principle applies to reference footage. Fast cuts, motion blur, partial body coverage, and moving obstructions can make a performance exciting to watch while making it difficult to transfer accurately.
Better motion control AI results therefore begin before you press Generate. They begin with how you prepare the character image, record the reference performance, and configure the relationship between those two inputs.
Define the Performance Before Choosing an Image
Decide what the character needs to do before selecting the source image. A talking presenter, a martial-arts performer, and a full-body dancer require different visual information.
A head-and-shoulders portrait may be sufficient for restrained facial expressions and upper-body gestures. It is a weak starting point for a reference clip containing jumps, footwork, turns, or wide arm movements because the image does not show the character’s full proportions.
For a full-body performance, choose an image that clearly shows the head, torso, arms, hands, legs, and feet. Avoid compositions where clothing, furniture, props, or framing hide important joints.
Match the Character’s Pose to the Reference
Motion transfer becomes more difficult when the character image and reference video begin from fundamentally different poses.
A standing reference works more naturally with a standing character. A seated presentation clip should be paired with an image whose posture and camera height are reasonably similar. The poses do not need to be identical, but the model should not have to reconstruct the character’s entire body arrangement before movement begins.
Pay attention to shoulder direction, hip position, head angle, and weight distribution. Large differences in these areas can cause stretched limbs, unstable clothing, or an unnatural transition during the opening frames.
Keep the Character’s Silhouette Readable
A clean silhouette gives the model clearer information about body structure. The arms should not disappear into clothing of the same color, and crossed limbs should still be visually distinguishable.
Use a background that separates from the character’s outline. A light character generally reads more clearly against a darker background, while a dark costume benefits from a lighter setting.
Avoid:
Busy background patterns: They can compete with the character’s outline.
Heavy edge shadows: They may merge the body with the environment.
Foreground obstructions: Furniture and props can conceal important joints.
Extreme color similarity: The character may blend into the background.
Aggressive cropping: Missing hands or feet reduce the available structural information.
Control Perspective Distortion
Wide-angle images can enlarge the body parts closest to the camera while shrinking those farther away. A hand extended toward the lens may appear larger than the character’s head, creating proportions that are difficult to maintain during motion.
Use a normal or moderately long focal-length look when preparing a character image. Keep the camera near the subject’s torso height for standing figures and near eye level for presenter-style portraits.
Extreme low angles, overhead views, and fisheye distortion may be appropriate stylistically, but they introduce more uncertainty. If a dramatic angle is essential, select reference footage recorded from a similar perspective.
Use Even, Descriptive Lighting
Lighting should reveal the character’s structure rather than hide it. Soft, directional light provides enough modelling to describe facial planes, clothing folds, and limb boundaries without producing deep black shadows.
Diffused window light or a large soft source positioned in front and slightly to one side is usually easier to interpret than a small, hard light. Check that facial features remain visible and that highlights do not clip on pale skin, metallic clothing, or glossy accessories.
Colored lighting can be used, but it should not erase the character’s original color relationships. Heavy red or blue illumination may make skin, clothing, and background regions difficult to separate.
Protect the Hands and Face
Hands and facial features are small, information-dense areas. Motion blur, compression artifacts, or partial occlusion can affect them more strongly than larger body regions.
In the character image, choose a face with visible eyes, mouth, and jawline. Hands should be fully visible when the intended performance includes pointing, waving, martial-arts poses, or expressive presentation gestures.
The reference performer should also remain large enough in the frame for hand movements to be readable. A distant full-body subject may show footwork clearly while providing insufficient detail for subtle finger gestures or facial motion.
Prepare a Reference Video the Model Can Read
A useful motion reference documents a continuous performance. It does not need elaborate production design, rapid edits, or complex camera movement.
Keep the performer visible throughout the selected clip. Avoid cuts between different takes, people crossing in front of the subject, and moments where arms or legs leave the frame. Stable exposure and consistent frame composition make the movement easier to follow.
When testing a prepared image and reference clip, a browser-based tool such as motion control ai can combine the character image with the recorded performance. The result helps reveal whether the source materials are visually compatible.
The tool also includes built-in references for party dancing, martial-arts training, jogging, seated podcast-style talking, host presentation, standing motion, and expressive hand gestures. These templates can be used to evaluate a character image before recording original footage.
Choose the Reference Duration Deliberately
Longer is not automatically better. A short, coherent action is easier to evaluate than a long clip containing several unrelated movements.
The available video control begins at three seconds and supports trimming in one-second increments. Use this control to isolate a complete action: one dance phrase, one presentation gesture, one turn, or one short movement sequence.
Kling 2.6 accepts MP4, MOV, and MKV reference files. Its Video orientation mode supports clips up to 30 seconds, while Image orientation limits the reference to 10 seconds. Kling 3.0 accepts MP4 and MOV clips from 3 to 30 seconds.
Begin with a short test. Once the pose, framing, and motion compatibility are confirmed, a longer section can be generated with greater confidence.
Select Character Orientation Carefully
Character Orientation determines which input provides the orientation reference.
Choose Video when the generated character should follow the orientation shown in the reference performance. This is useful when the performer turns, changes direction, or moves through a carefully framed sequence.
Choose Image when preserving the original orientation of the character image is more important. In Kling 2.6, this selection also reduces the maximum reference duration from 30 seconds to 10 seconds.
Kling 3.0 provides both options and marks Video orientation as recommended in the interface. The correct selection still depends on whether the image or the performance should dominate the composition.
Decide Where the Background Should Come From
Kling 3.0 includes a Background Source parameter that is not present in the Kling 2.6 configuration.
Select Video when the generated environment should follow the reference footage. This can be useful when the location, camera framing, or spatial movement in the performance is important.
Select Image when the source character image already contains the desired environment. This setting is more appropriate when the goal is to animate a character inside an existing illustration, portrait, or designed scene.
Background choice should be decided before writing the prompt. Conflicting instructions between the selected source and the prompt can make the intended composition less clear.
Use the Prompt for Appearance, Not Choreography
The reference video already defines the motion. The optional prompt should refine information that the footage does not provide clearly.
Useful prompt subjects include:
Lighting direction and softness
Visual atmosphere
Camera distance
Scene stability
Character-style preservation
Background treatment
A practical prompt might be: “Preserve the illustrated character design, use soft cinematic lighting, maintain a stable medium shot, and keep the background calm.”
A prompt such as “make the character dance energetically” is less useful when the exact dance has already been supplied by the reference clip. Describe the desired appearance and let the video control the timing.
Choose the Model and Quality for the Production Stage
Kling 2.6 accepts JPG or PNG character images larger than 300 pixels. Kling 3.0 requires a JPG or PNG image larger than 340 pixels.
Both models offer Standard and Professional quality modes. Standard produces 720P output and is described in the interface as faster and lower-cost. Professional produces 1080P output with higher detail.
Use 720P during compatibility testing. It is sufficient for checking pose transfer, character stability, orientation, and background behavior. Move to 1080P after confirming that the selected inputs and parameters work together.
Changing resolution cannot repair an incompatible pose or unclear reference. Higher resolution preserves more detail, but it does not supply structural information missing from the source materials.
Know the Limits of Reference-Based Motion
Motion control AI generates an interpretation of the visible character and performance. It does not recover information that neither input provides.
A cropped character image cannot reveal the exact design of hidden shoes. A front-facing portrait cannot define the back of a costume. An obscured hand in the reference footage does not provide a reliable finger pose.
The workflow also does not provide editable skeletal animation data. For projects requiring production rigs, precise joint curves, frame-level corrections, or integration into a game engine, professional animation tools and manual review remain necessary.
For concept videos, social content, presentation avatars, marketing experiments, and previsualization, the generated result may be immediately useful. Precision-critical production still requires additional references and verification.
A Pre-Upload Motion Control Checklist
Before generating, confirm:
The character image meets the selected model’s minimum dimensions.
The character’s face and important joints are visible.
The image includes enough of the body for the intended performance.
The character and performer begin from compatible poses.
The background separates clearly from the character.
Lighting reveals facial features, clothing, and limb boundaries.
The reference clip contains no unnecessary cuts.
The performer remains visible throughout the selected section.
The selected duration contains one coherent action.
Character Orientation matches the intended composition.
Kling 3.0 Background Source matches the desired environment.
The prompt describes appearance rather than repeating the motion.
720P has been tested before producing a 1080P version.
All source images and videos are authorized for use.
Better Inputs Produce a Better Starting Point
Motion control AI can estimate transitions and interpret movement, but it cannot restore visual information hidden by cropping, shadows, blur, or obstruction. Input preparation determines how much reliable information the model receives.
The creator’s task is therefore not simply to choose an attractive image or an entertaining video. It is to document appearance and performance in a form that supports the next stage of generation. Clear source materials do not guarantee a perfect result, but they provide a stronger and more controllable starting point.
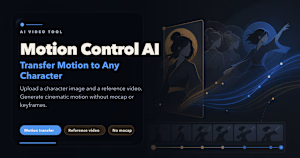
motion-control-ai.net
Motion Control AI — Free Online Video Generator for Motion Transfer
Motion Control AI transfers motion, gestures, and expressions from any reference video to any character image. Free — no credit card, no mocap, no keyframes.
The network for creativity
Join 1.25M professional creatives like you
Connect with clients, get discovered, and run your business 100% commission-free
Creatives on Contra have earned over $150M and we are just getting started





Related posts

Manual work is always better than ai slop you can use ai for some clips but full video made with ai is unprofessional and a waste of money and resources

Product marketing has just become easier

Apply that human manual work and a pinch of ai( the trick up the sleeve).

AI UGC - Minimalist Watch Ad | Viral E-com TikTok
This is an AI UGC video - I created this human avatar + voice without hiring real models.
Hook: 0-1.5 sec smile close-up with watch (emotional hook for female audience) Avatar: Custom AI model - cute, warm, natural - not robotic Edit: DaVinci Resolve + CapCut - clip-by-clip color correction, logo placement, beat sync, no on-screen text
Why AI UGC? ✓ No model fee - saves $200/video for brand ✓ 48 batch delivery (5-10 videos/day) ✓ Perfect for testing product angles fast
This exact style got 1.1M organic views for my watch brand client.
Tools: HeyGen / Arcads + CapCut + DaVinc


I'm loving the depth of field in this shot, the focus pull from the model's face onto the wrist is a good move and there's some nice background walla/clinking that makes it feel grounded in the first two seconds that gets ducked against the vocals. Still some observations and...

I wanted to test whether Invideo Editor’s AI timeline agent could replace hours of manual node compositing in After Effects to create a cinema-grade VFX shot from raw mobile footage.
How I built it:
The Footage: Raw 4K 60fps night plate of NYC with neon signs, streetlamps, and a wet puddle reflection.
Agent Direction: Using a prism refraction photo as a reference, I directed the agent in Ultra Mode to author a single custom shader that extracts luminance highlights, stretches them into 55° upward trails, and applies a spectral RGB dispersion gradient across the edges. It also layered a Screen composite and generated a procedural cyberpunk HUD tracking overlay.
Human Refinements: I manually used the exposed Inspector sliders to fine-tune the Highlight Threshold to 0.68 (isolating the Radio City marquee, streetlamps, and puddle reflection while eliminating building clutter) and dialed the Trail Length to 140 with an exponential falloff taper.
Editable Project Timeline:
👉 https://invideo.io/share/Chromatic-Stretch-GWJjyPAWPDb
Instagram Reel:
👉 https://www.instagram.com/p/DeB3NrJSbvd/
invideo Editor is free to try.
#invideocontrachallenge #invideoeditor #vfx #cinematography #aiagent

