
TECHNICAL ILLUSTRATIONBart Blazejewski
If you have a product that needs assembly by the customer or you want to simply show your customer how to use your product, it's best to do it with simple but detailed illustrations. IKEA knows this and their assembly instructions and user manuals manage to guide people all over the world set-by-step. You can have one for your product(s) too.
What's included
1. PREPARATION
I start with studying the brief you prepared OR we get in touch to discuss the product, your requirements and ideas. I take time to learn as much as I can about the product (or project) as well as the user we want to guide through assembly process.
2. THE DOODLE STAGE
It's best to take photos of your product being assembled or used as a base for sketches and, later for vector drawings. I usually start with sketching equivalent of the story line with pen and paper or using the computer. I send them over to you and we discuss what works and what doesn't.
3. EVALUATION
Based on the sketches and our discussions I now start drawing the initial first draft on the computer.
4. ELABORATION
I send you the first draft and we check it against the brief again and discuss any potential changes.
I implement the changes and send for another feedback until everyone is happy.
5. THE SIGN OFF
If we are all happy with the outcome, I prepare the files in the formats we have agreed on earlier (EPS, PNG, JPEG). If required, I can also prepare the original vector files for you.
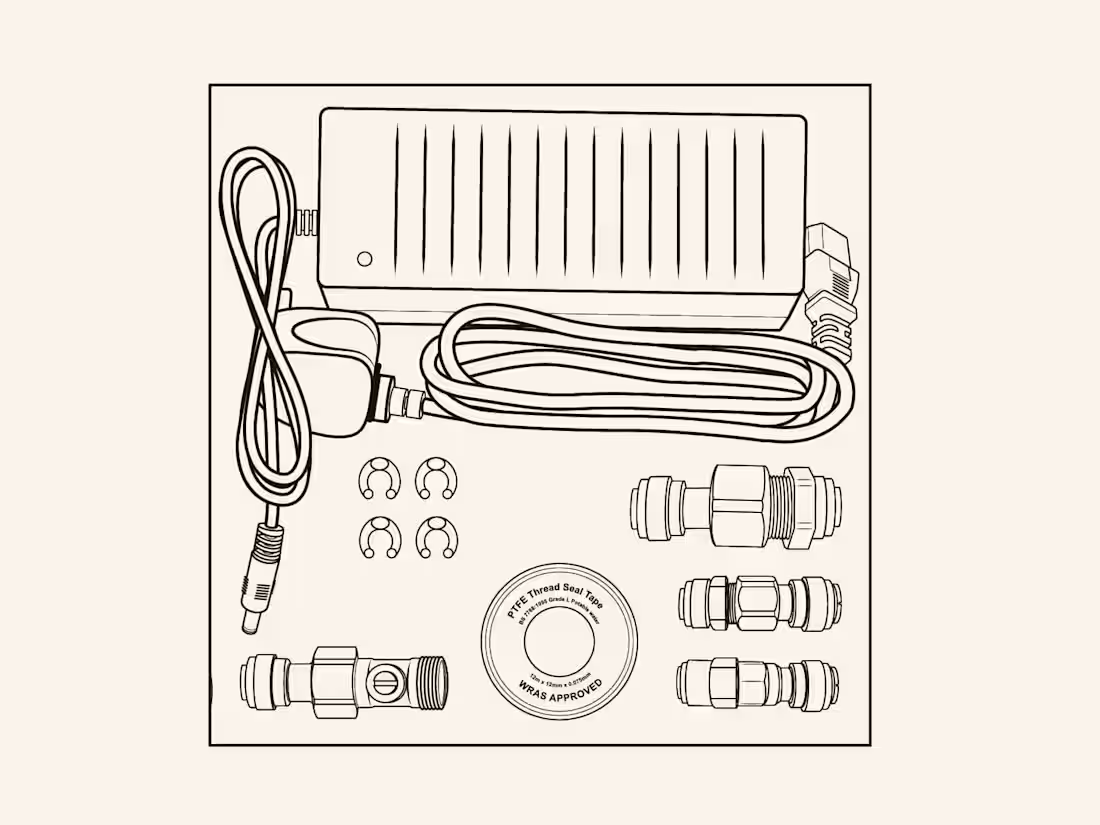
Example work


Contact for pricing
Tags
Adobe Illustrator
Illustrator
Product Designer
Service provided by
Bart Blazejewski Bristol, UK
TECHNICAL ILLUSTRATIONBart Blazejewski
Contact for pricing
Tags
Adobe Illustrator
Illustrator
Product Designer
If you have a product that needs assembly by the customer or you want to simply show your customer how to use your product, it's best to do it with simple but detailed illustrations. IKEA knows this and their assembly instructions and user manuals manage to guide people all over the world set-by-step. You can have one for your product(s) too.
What's included
1. PREPARATION
I start with studying the brief you prepared OR we get in touch to discuss the product, your requirements and ideas. I take time to learn as much as I can about the product (or project) as well as the user we want to guide through assembly process.
2. THE DOODLE STAGE
It's best to take photos of your product being assembled or used as a base for sketches and, later for vector drawings. I usually start with sketching equivalent of the story line with pen and paper or using the computer. I send them over to you and we discuss what works and what doesn't.
3. EVALUATION
Based on the sketches and our discussions I now start drawing the initial first draft on the computer.
4. ELABORATION
I send you the first draft and we check it against the brief again and discuss any potential changes.
I implement the changes and send for another feedback until everyone is happy.
5. THE SIGN OFF
If we are all happy with the outcome, I prepare the files in the formats we have agreed on earlier (EPS, PNG, JPEG). If required, I can also prepare the original vector files for you.
Example work
Contact for pricing