Success Centered Design (UX+TAPE) for your SaaS platform

Starting at

$

6,000

/mo

About this service

Summary

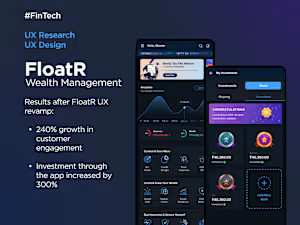
Increase Conversion by 4.5x & Revenue by 3x using the power of Success Centered Design or SSD that includes UX+TAPE.
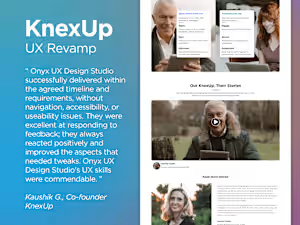
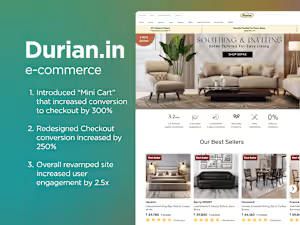
Let's meet and review UX success stories of our clients together, and learn how you can save up to 66% on UX design cost!
The Success Centered Design include the UX + TAPE method, TAPE means Trust, Attachment, Persuasion and Emotion and we make sure your design is inclusive of the elements that can gain Trust of the user, attach them to your app, persuade them to become a paid user/buyer and stay emotionally attached to your services. Read https://uxdesign.ae/wp-tape.php to know more.

Process

We follow a 7 step UX design method that starts with understanding your requirements of your SaaS product and ends with creating an interactive prototype. The Steps are: Step 1: Understanding Business Requirement Step 2: Conducting UX Research Step 3: Finalizing Content Strategy Step 4: Information Architecture Step 5: Creating Wireframes Step 6: Designing User Interface or Visual Designs Step 7: Interactive Proof Of Concept or IPoC
** We provide UNLIMITED MODIFICATIONS until you are 100% happy with the design

FAQs

  • What is Success Centered Design?

    The Success Centered Design include the UX + TAPE method, TAPE means Trust, Attachment, Persuasion and Emotion and we make sure your design is inclusive of the elements that can gain Trust of the user, attach them to your SaaS platform, persuade them to become a paid user/buyer and stay emotionally attached to your services. Read https://uxdesign.ae/wp-tape.php

What's included

  • Step 1: Understanding Business Requirement

    We follow the steps below for understanding your requirement: 1. Stakeholder Interviews: Utilize one-on-one conversations with stakeholders to understand individual perspectives and needs thoroughly. 2. Use Cases: Conduct group workshops to explore information flow across divisions, ensuring smooth handover management. 3. Prototypes: Develop rough mock-ups or wireframes to visualize the final product, addressing feasibility concerns and identifying inconsistencies collaboratively.

  • Step 2: Conducting UX Research

    We follow the steps below for UX research: 1. Discover: Illuminate unknowns and understand needs deeply, crucial for new projects. 2. Explore: Comprehend problem space and design scope through methods like user interviews and persona creation. 3. Test: Validate designs during development to ensure optimal functionality for end-users.

  • Step 3: Finalizing Content Strategy

    We go through the steps below for finalising the content strategy and create a Useflow: 1. Audit: Catalog existing content and analyze competitor content for effectiveness. 2. Strategy: Make recommendations, set priorities, establish timelines, determine taxonomy, and finalize voice and tone. 3. Plan: Gather requirements, identify content types and responsible parties, select a content management system. 4. Create: Produce and edit content, ensure compliance with brand guidelines and search engine optimization. 5. Maintain: Involve stakeholders, produce thought leadership content, establish a content weeding schedule.

  • Step 4: Information Architecture

    1. Content inventory: Locate and identify existing content in apps or websites. 2. Content audit: Evaluate content for usefulness, accuracy, tone, and effectiveness. 3. Information grouping: Define user-centered relationships between content. 4. Taxonomy development: Establish standardized naming conventions for site content. 5. Descriptive information creation: Define useful metadata for navigation components aiding discovery.

  • Step 5: Creating Wireframes

    UX wireframing is a 2-step process: 1. Idea Generation In the initial step, multiple ideas are generated, but since they cannot be fully shaped, it is not uncommon for some of the elements to be incomplete or missing. The main thing is to consider different approaches and to decide which is the most efficient in the context of your task and the various constraints of the project. 2. Adding Detail and Refinement Step by step, you settle on a few promising variants and proceed to work out the specifics, thus rendering some ideas unsuitable.

  • Step 6: Designing User Interface or Visual Designs

    The basic elements that combine to create visual designs include the following: 1. Lines: Connect points, define shapes, and create textures. 2. Shapes: Self-contained areas formed by lines, value, color, or texture. 3. Color: Differentiate items, create depth, and organize information. 4. Texture: Surface feel or perception, created by repeating elements. 5. Typography: Font choices, size, alignment, color, and spacing. 6. Form: Describes volume and mass of three-dimensional objects, enhanced by tones, textures, and colors.

  • Step 7: Interactive Proof Of Concept or IPoC

    1. Bringing design to life with clickable prototypes: - Paper-based versions lack full interaction understanding. - Clickable prototypes provide context for user feedback. - Confirming common vision with interactive prototypes: 2. Stakeholders see design as intended with working interactions. - Increases buy-in and ongoing support compared to static prototypes.


Skills and tools

UX Researcher
UX Designer
UI Designer
Adobe XD
Figma

Industries

FinTech
E-Commerce
SaaS

Work with me


More services