The network for creativity
Join 1.25M professional creatives like you
Connect with clients, get discovered, and run your business 100% commission-free
Creatives on Contra have earned over $150M and we are just getting started
Back to feedPost

Write Better AI Photo Editing Prompts: A Practical Guide to Precise, Repeatable Results
An AI photo editor can remove an object, replace a background, restore an old picture, or turn a casual portrait into a polished headshot. The quality of the result, however, depends heavily on how the edit is described.
“Make it better” gives the model freedom but very little direction. A useful editing prompt defines what must change, what must remain untouched, and what visual evidence should make the result believable.
Think Like an Editor, Not a Caption Writer
A caption describes what an image already contains. An editing instruction describes a controlled difference between the original and the result.
A reliable prompt answers four questions:
What is the target of the edit?
What should happen to it?
What should remain unchanged?
How should the new result match the existing image?
For example: “Remove the person in the far left background. Reconstruct the wall and floor naturally. Keep the main subject, framing, lighting, and colors unchanged.”
That instruction is more useful than “remove the photobomber” because it identifies the target, the repair, and the preservation rules.
Name the Subject Precisely
When an image contains several people, products, or objects, vague references create ambiguity. Use position, color, clothing, size, or relationship to identify the target.
Instead of “remove the chair,” write: “Remove the small red chair behind the table on the right.”
Instead of “fix the face,” write: “Reduce the harsh shadow under the main subject’s eyes while preserving skin texture, facial structure, and expression.”
Precise identification is especially important when editing group photos, retail shelves, interiors, and busy street scenes.
Separate Change Instructions from Preservation Instructions
Every edit has two sides: the desired change and the protected content.
For product photography, the product itself may need to remain exact while the setting changes. For a headshot, facial identity should remain stable while clothing, background, or lighting is refined. For an old family photo, the people and historical character should remain recognizable while damage is repaired.
A simple structure is:
Change: “Replace the background with a bright modern kitchen.”
Preserve: “Keep the coffee machine’s shape, controls, logo, color, reflections, and camera angle unchanged.”
Integration: “Match the original perspective and add a natural contact shadow on the counter.”
This prevents a background replacement from turning into an unintended product redesign.
Make Physical Integration Visible
When adding or replacing content, ask for the cues that make the edit belong in the scene. These include perspective, scale, shadow, reflection, focus, grain, depth of field, and color temperature.
“Add a plant beside the sofa” may produce a plausible object that still looks pasted on.
A stronger instruction is: “Add a medium potted olive tree on the floor to the left of the sofa. Match the room’s warm light, camera perspective, depth of field, and soft shadow direction.”
The model now has visible criteria for integration.
Use One Main Edit per Pass
Complex prompts often contain hidden conflicts: remove three objects, change the season, replace clothing, fix the face, and make the image cinematic. Even if the model attempts every request, it becomes difficult to identify which instruction caused an unwanted change.
For important work, edit in stages:
Clean the composition.
Correct the background.
Refine the subject.
Adjust light and color.
Upscale or sharpen at the end.
Review the result after each stage. This creates a more controllable workflow and makes it easier to return to the last good version.
Write Object-Removal Prompts Around Reconstruction
Removing an object leaves an information gap. Tell the editor what should logically continue through that space.
Examples:
“Remove the cable from the desk and continue the wood grain naturally.”
“Remove the sign from the brick wall and reconstruct the missing bricks with matching mortar, texture, and lighting.”
“Remove the person behind the subject and continue the beach, waterline, and horizon without changing the main subject.”
If the missing background is complex or completely hidden, expect interpretation rather than perfect recovery. The model cannot reproduce detail that the original image never showed.
Protect Identity in Portrait Edits
Portrait prompts should be explicit about identity. Words such as “beautify,” “perfect,” or “younger” can unintentionally change facial structure.
For a professional headshot, try:
“Create a clean studio headshot with a neutral gray background and soft frontal lighting. Preserve the person’s identity, face shape, eye color, skin tone, hairstyle, age, and natural skin texture. Remove only temporary blemishes and clothing lint.”
For a more casual profile image:
“Replace the background with a softly blurred outdoor setting. Keep the face, expression, hairstyle, clothing, and body proportions unchanged. Match the original light direction.”
Retouching should clarify the portrait, not replace the person.
Restore Old Photos Conservatively
Old photographs carry historical texture: film grain, paper tone, period clothing, and imperfect lighting. Aggressive restoration can erase that character or invent modern-looking detail.
Break restoration into observable goals:
Repair scratches, dust, creases, and tears.
Recover faded contrast without crushing shadows.
Sharpen faces gently without changing identity.
Colorize only when appropriate, using restrained and plausible colors.
Preserve original framing, grain, clothing, and background.
A practical prompt is: “Repair scratches and small tears, reduce dust, recover gentle contrast, and clarify the faces. Preserve each person’s identity, period clothing, original framing, and natural film grain. Do not add new objects or modern details.”
Build Product Images Around Consistency
E-commerce images often need multiple variations that still look like one catalog. Define a repeatable standard for camera angle, canvas, background, shadow, margins, and product scale.
For example:
“Place the unchanged product on a pure white square background. Center it with generous even margins. Preserve the exact shape, label, printed text, color, and material. Add a soft natural contact shadow directly underneath. Keep the camera at the original three-quarter angle.”
Save this structure and change only the product-specific description. Consistency across a set is usually more valuable than making each image individually dramatic.
Describe Style with Visual Attributes
“Make it cinematic” is subjective. Translate style into visible choices: soft or hard light, high or low contrast, warm or cool color, shallow or deep focus, smooth or textured surfaces, and calm or dynamic composition.
Instead of “make it luxury,” try: “Use a dark charcoal background, controlled rim lighting, subtle reflections, low saturation, and generous negative space.”
Instead of “make it vintage,” try: “Use muted warm colors, gentle film grain, slightly faded contrast, and soft corner falloff while preserving the subject.”
Style becomes easier to repeat when it is built from visual attributes.
Use the Right Tool for the Edit
A prompt-based workspace is useful when the desired result can be described clearly. Focused tools are often faster for common operations such as background removal, object removal, old-photo restoration, product-photo editing, or image upscaling.
AI Picture Editor combines a general prompt workflow with dedicated browser-based tools. You can upload JPG, PNG, or WEBP files, describe an edit in plain English, compare the result with the original, refine the instruction, and download without a watermark.
The site also provides direct workflows for background removal, product scenes, object cleanup, old-photo restoration, creative styles, and quality enhancement. Choosing the narrowest suitable tool reduces ambiguity before the prompt is even written.
Refine by Diagnosing the Error
When a result is close, do not rewrite the entire prompt. Identify the specific failure:
The identity changed.
The background is correct but the shadow is wrong.
The removed object left a texture seam.
The product label became distorted.
The color temperature no longer matches.
The restored face is too smooth.
Then add one corrective instruction while preserving everything else. For example: “Keep the current background and composition. Restore the original label exactly and reduce the shadow softness slightly.”
A Reusable Prompt Template
Use this order:
Target: Identify the exact person, object, or region.
Action: Describe the requested change.
Preserve: List important features that must remain unchanged.
Match: Specify perspective, scale, light, shadow, color, focus, and texture.
Output: State the intended format or composition.
Example:
“Replace the background behind the blue ceramic vase with a warm minimalist living room. Preserve the vase’s exact shape, glaze pattern, color, and camera angle. Match the existing soft left-side light, add a realistic contact shadow, and keep the background slightly out of focus. Output a centered 4:5 product image with clean margins.”
A Pre-Download Checklist
Before accepting an edit, confirm:
The intended target changed and protected areas did not.
Faces, logos, text, and product geometry remain accurate.
Added elements match the scene’s perspective and scale.
Shadows and reflections follow the original light direction.
The background repair contains no repeated or broken texture.
Skin still has natural texture.
Edges around hair, fur, glass, and fine objects are clean.
The composition matches the final platform or marketplace.
The final file has the required dimensions and format.
You have the rights to edit and use the source image.
Precise Prompts Make Editing Repeatable
Good AI editing is not about writing the longest instruction. It is about defining a narrow, testable change and protecting the information that matters.
Identify the target, describe one main action, state what must remain unchanged, and ask for the physical cues that make the edit believable. That structure turns a one-off experiment into a workflow you can repeat across portraits, products, social assets, client work, and family photographs.

aipictureeditor.net
Free AI Picture Editor Online — Edit Photos with Prompts
Use our AI Picture Editor to edit photos with text prompts. Remove objects, replace backgrounds, restore old images, and download watermark-free results.
The network for creativity
Join 1.25M professional creatives like you
Connect with clients, get discovered, and run your business 100% commission-free
Creatives on Contra have earned over $150M and we are just getting started





Related posts

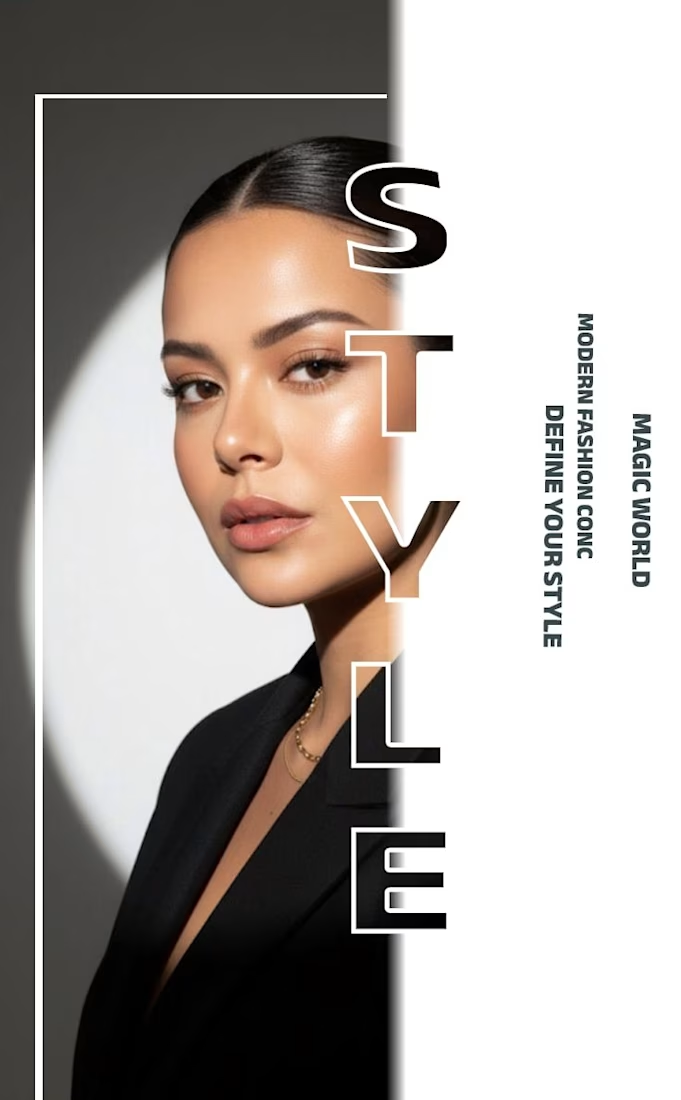
✨ Modern Fashion Poster Design - STYLE ✨
Designed a clean, high-fashion poster concept focusing on bold typography and minimalist aesthetics.
Concept: Modern Fashion | Define Your Style
Tool: Canva / Photoshop
Style: Luxury, Minimal, Editorial
Open to feedback and freelance work!
#GraphicDesign #PosterDesign #FashionDesign #Canva #ContraCommunity




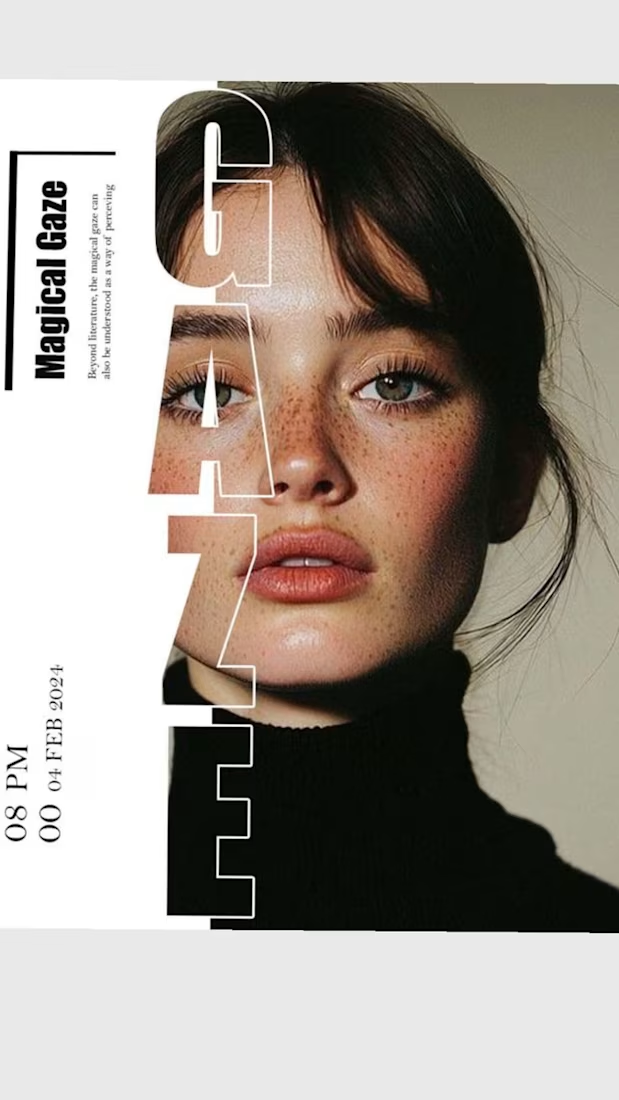

The way you let the bold type dominate the empty space really drives the luxury feel.

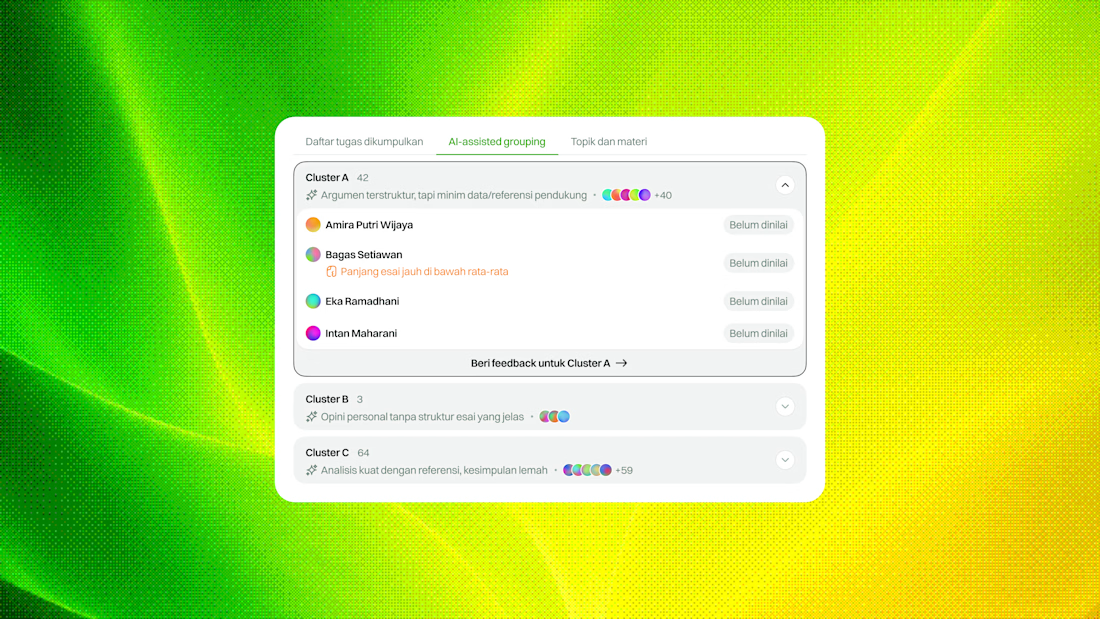
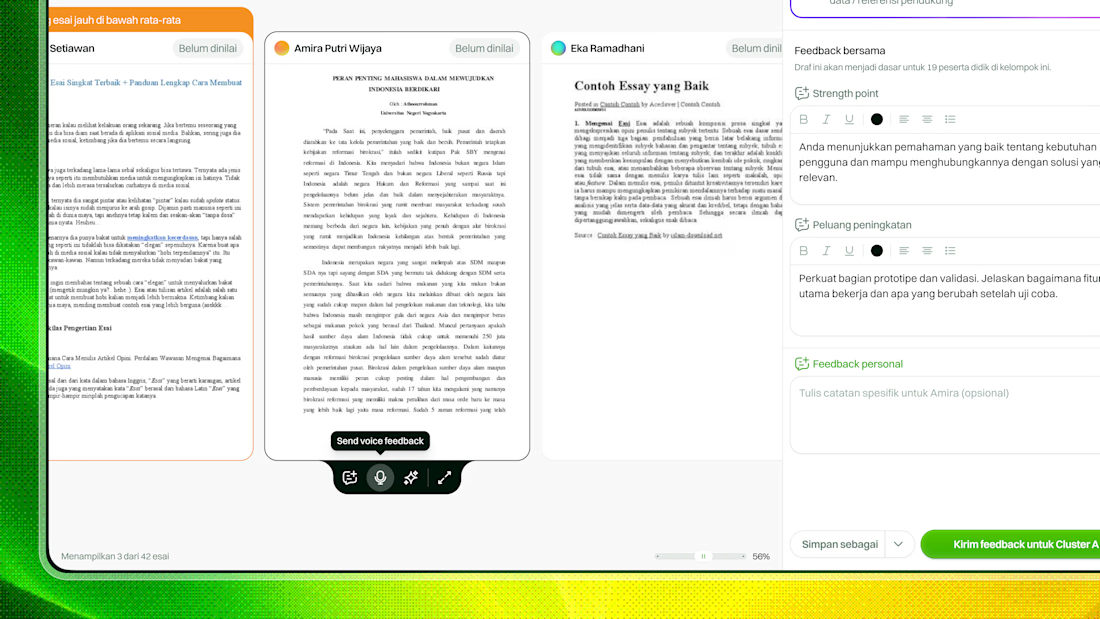
Unused concept for a teacher feedback loop in an LMS.
The challenge was straightforward on paper: make it easier for teachers to give meaningful feedback across multiple classes, often with 100+ students.
But the real friction happened before they even started.
From our findings, teachers often felt overwhelmed by the amount of work waiting for them, so they defaulted to bulk feedback using templates.
It was faster, but it created another problem: students received feedback that felt vague, repetitive, and disconnected from their actual work.
For this concept, I explored two ways to help teachers get started without forcing them into one workflow:
— Focus manually on flagged assignments that need the most attention
— Use AI-assisted grouping to cluster assignments with similar patterns, so teachers can review them in context and respond more efficiently
The idea wasn’t to automate the feedback itself, but to reduce the friction around deciding where to start.
Still an unused concept, but I liked the direction.
What do you think?





Super clean work!

Clean edits. Strong pacing. Better retention.
I edit podcasts & talking-head content with a focus on:
→ Clean, minimal visuals
→ Natural pacing
→ Captions that don’t distract
→ Subtle motion & sound design
If you’re a podcaster, creator, or personal brand looking for an editor — DM me.


