
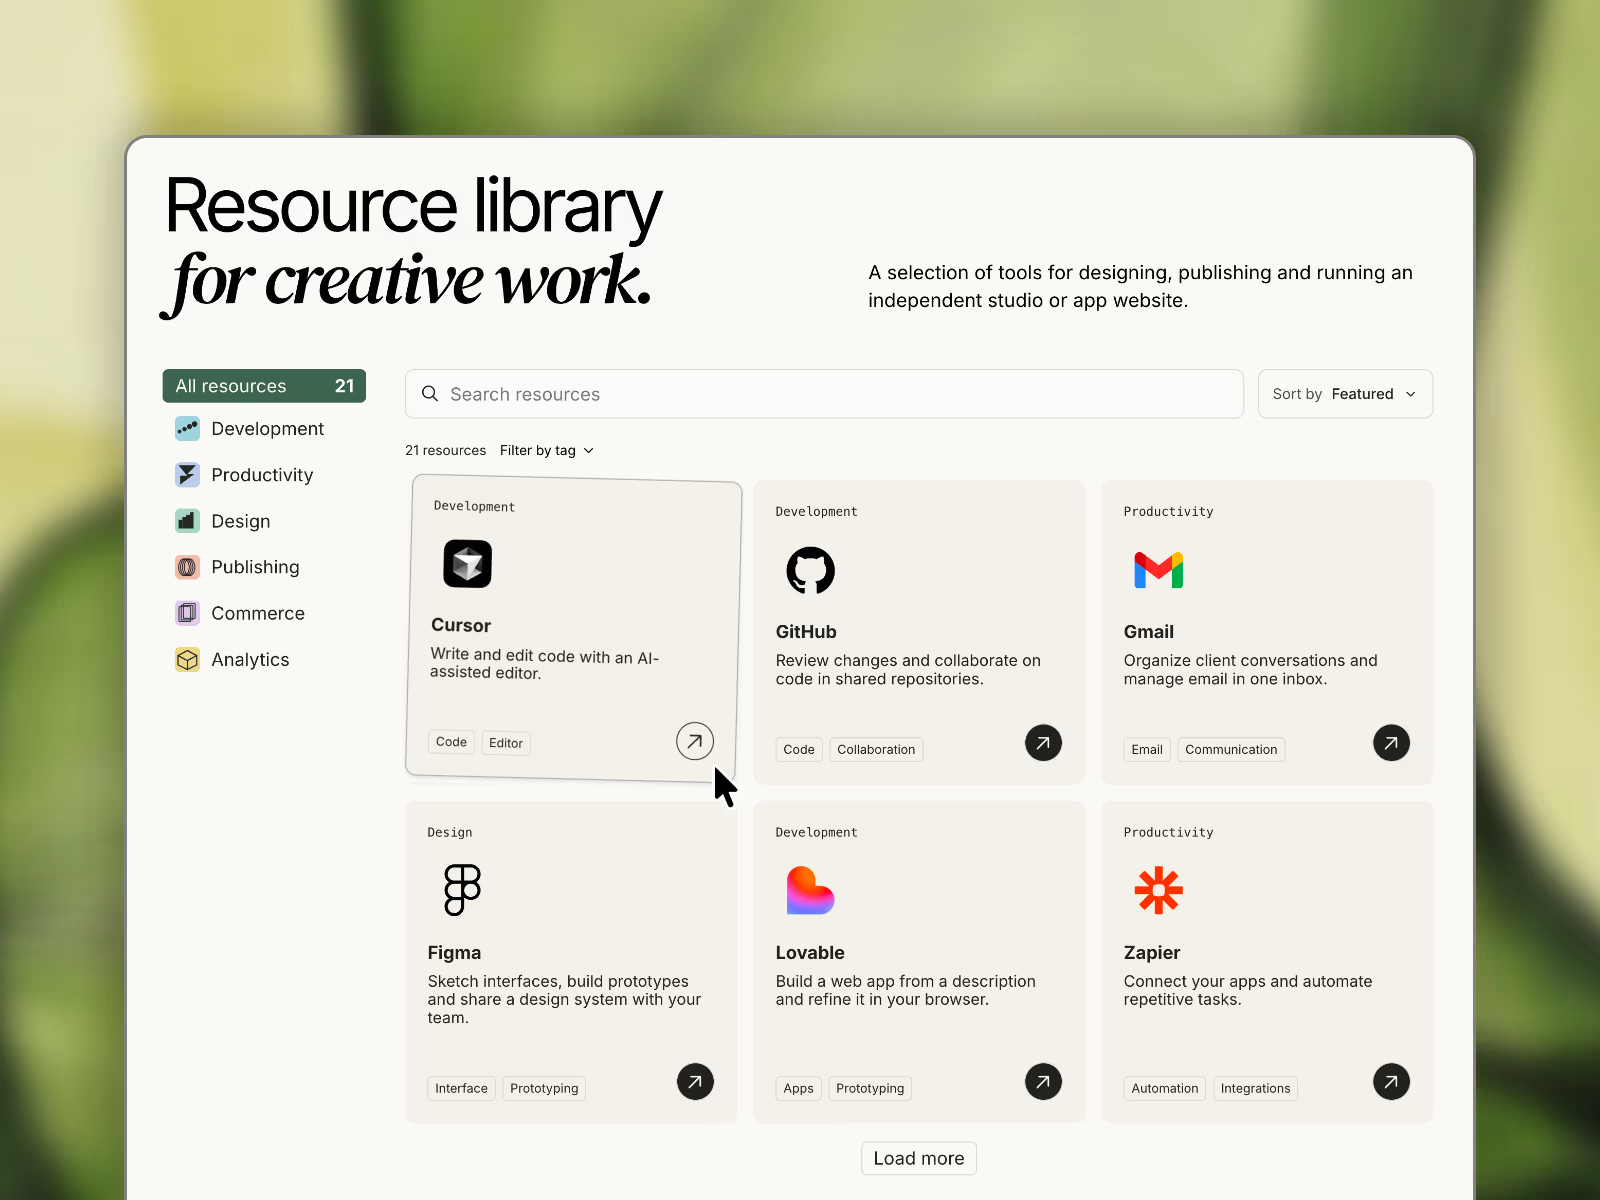
This is a customizable Framer code component for creating searchable, filterable resource directories with optional Framer CMS integration.
Use it to turn a static collection of links, tools, or resources into an interactive directory where visitors can search, filter by category or tags, and sort content. Built for resource libraries, SaaS websites, tool directories, curated collections, knowledge hubs, and inspiration galleries.
The component works with both manually added resources and Framer CMS collections, so you can manage everything directly from your Framer project without editing code.
What's included:
Fully responsive Framer code component
5 layout modes: Grid, List, Compact, Bento, and Editorial
Live search by resource name, description, and tags
Category navigation with optional custom icons
Multi-tag filtering
4 sorting options: Featured, Title, Newest, and Popular
Two pagination modes: Load More and Previous/Next
Optional Framer CMS integration
Manual resource management through the property panel
Custom logos, category icons, and card link symbols
Full color, typography, spacing, sizing, and hover controls
Sticky category navigation with adjustable navbar offset
Optional card edge fade effect
SEO-friendly ItemList structured data
Reduced-motion accessibility support
No external APIs or subscriptions required
How to add resources
There are two ways to manage the directory.
Option 1: Add resources manually
This is the easiest option if you have a smaller collection or don't need a CMS.
Add the component to your Framer canvas.
In the property panel, keep Use CMS disabled.
Open the Items section.
Add a resource and enter its title, description, category, tags, destination URL, and optional logo.
Repeat for as many resources as you need.
Choose your preferred layout and customize the appearance.
Categories and filters are automatically generated from the resources you add.
Option 2: Connect to Framer CMS
Recommended for larger directories or collections you plan to update frequently.
Step 1: Create your CMS collections
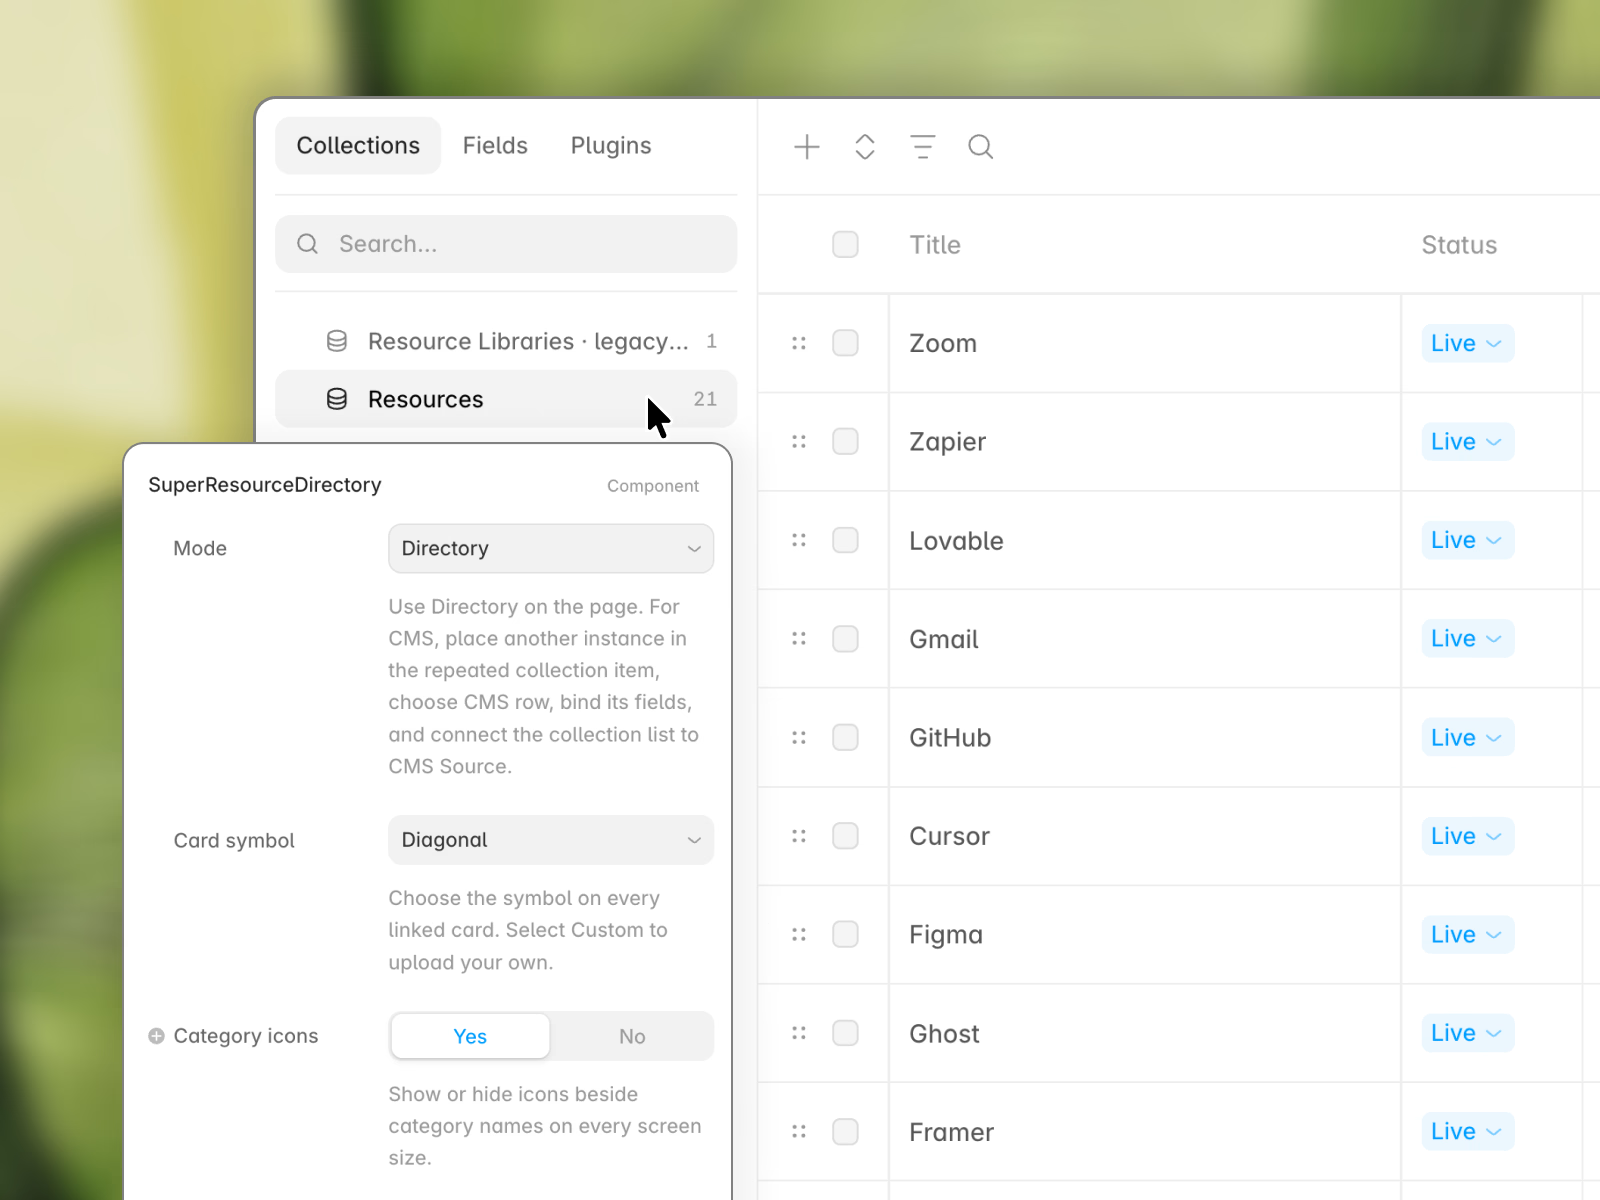
In Framer, create a collection called Resources with these fields:
Title – Text
Description – Text
Resource category – Reference
Tag 1, Tag 2, Tag 3 – Text
Destination – Link
Logo – Image
Featured – Boolean
Date – Text (YYYY-MM-DD)
Popularity – Number
Order – Number
You can also add optional fields such as Badge and Author.
Create a second collection called Resource Categories with:
Name – Text
Icon – Image
Connect the Resource category reference field in your Resources collection to Resource Categories. This lets you manage category names and icons centrally.
Step 2: Add the directory
Add Super Resource Directory to your Framer page.
Keep its Mode set to Directory.
Enable Use CMS in the property panel.
A new property called CMS Source will appear.
Step 3: Connect your collection
Insert a Framer Collection List and connect it to your Resources collection.
Inside the repeated Collection List item, add another instance of Super Resource Directory.
Change this second instance's Mode to CMS row.
Bind its properties to the corresponding CMS fields, including Title, Description, Category, Tags, Logo, and Destination.
For category names and icons, bind the corresponding fields from the Resource Categories reference.
Select the main Directory component and connect the entire Collection List to its CMS Source property.
Make sure the Collection List includes all the resources you want displayed.
The directory will now use your CMS content to generate cards, categories, search results, and filters.
To add, remove, or update resources, simply edit your CMS collection.
Important: The Directory and CMS row are two modes of the same component. The CMS row is used inside the Collection List to pass individual resources to the main directory.
Customization
All visual settings are available directly in the Framer property panel.
You can customize:
Card backgrounds, borders, corner radius, and spacing
Category navigation colors, icons, and active states
Search field and filter appearance
Typography for the interface, titles, and descriptions
Card logos, arrows, and hover effects
Number of resources displayed per page
Layout and pagination behavior
You can also switch between CMS and manual content management without rebuilding the component.
How delivery works
After purchase, you'll receive instant access to a downloadable HTML access file.
Inside the HTML file, you'll find:
The Framer Component URL
Installation instructions
Support contact details
To install the component, open the downloaded HTML file, copy the Framer Component URL, then open your Framer project and paste it directly onto the canvas using Cmd+V / Ctrl+V.
The component will appear on your canvas and will also be added to your project's Assets panel, where you can reuse it across your pages and customize it from the property panel.
Support
If you have any issues accessing, installing, or connecting the component to your Framer CMS, you can find my email inside the HTML file, together with the component link and installation instructions.
Refund policy
Because this is a digital product with instant delivery, refunds are generally not available once the downloadable HTML access file has been delivered.
By purchasing, you agree to receive immediate access to the digital product and understand that access cannot be returned once delivered.
If you experience a technical issue with the component or cannot access the file, please email me using the email address included in the HTML file.
Get it for$20.00
Tags
Framer

Framer Designer
Web Designer
Website CSS
Code Component
Directory
Product created by
Lucian Modiga Bucharest, Romania
- 1
- Followers
Lucian's other products

Integration Hub – Framer Component
$10.00
Swipeable Card Deck – Framer Component
$10.00
Get it for$20.00
Tags
Framer
Framer Designer
Web Designer
Website CSS
Code Component
Directory
This is a customizable Framer code component for creating searchable, filterable resource directories with optional Framer CMS integration.
Use it to turn a static collection of links, tools, or resources into an interactive directory where visitors can search, filter by category or tags, and sort content. Built for resource libraries, SaaS websites, tool directories, curated collections, knowledge hubs, and inspiration galleries.
The component works with both manually added resources and Framer CMS collections, so you can manage everything directly from your Framer project without editing code.
What's included:
Fully responsive Framer code component
5 layout modes: Grid, List, Compact, Bento, and Editorial
Live search by resource name, description, and tags
Category navigation with optional custom icons
Multi-tag filtering
4 sorting options: Featured, Title, Newest, and Popular
Two pagination modes: Load More and Previous/Next
Optional Framer CMS integration
Manual resource management through the property panel
Custom logos, category icons, and card link symbols
Full color, typography, spacing, sizing, and hover controls
Sticky category navigation with adjustable navbar offset
Optional card edge fade effect
SEO-friendly ItemList structured data
Reduced-motion accessibility support
No external APIs or subscriptions required
How to add resources
There are two ways to manage the directory.
Option 1: Add resources manually
This is the easiest option if you have a smaller collection or don't need a CMS.
Add the component to your Framer canvas.
In the property panel, keep Use CMS disabled.
Open the Items section.
Add a resource and enter its title, description, category, tags, destination URL, and optional logo.
Repeat for as many resources as you need.
Choose your preferred layout and customize the appearance.
Categories and filters are automatically generated from the resources you add.
Option 2: Connect to Framer CMS
Recommended for larger directories or collections you plan to update frequently.
Step 1: Create your CMS collections
In Framer, create a collection called Resources with these fields:
Title – Text
Description – Text
Resource category – Reference
Tag 1, Tag 2, Tag 3 – Text
Destination – Link
Logo – Image
Featured – Boolean
Date – Text (YYYY-MM-DD)
Popularity – Number
Order – Number
You can also add optional fields such as Badge and Author.
Create a second collection called Resource Categories with:
Name – Text
Icon – Image
Connect the Resource category reference field in your Resources collection to Resource Categories. This lets you manage category names and icons centrally.
Step 2: Add the directory
Add Super Resource Directory to your Framer page.
Keep its Mode set to Directory.
Enable Use CMS in the property panel.
A new property called CMS Source will appear.
Step 3: Connect your collection
Insert a Framer Collection List and connect it to your Resources collection.
Inside the repeated Collection List item, add another instance of Super Resource Directory.
Change this second instance's Mode to CMS row.
Bind its properties to the corresponding CMS fields, including Title, Description, Category, Tags, Logo, and Destination.
For category names and icons, bind the corresponding fields from the Resource Categories reference.
Select the main Directory component and connect the entire Collection List to its CMS Source property.
Make sure the Collection List includes all the resources you want displayed.
The directory will now use your CMS content to generate cards, categories, search results, and filters.
To add, remove, or update resources, simply edit your CMS collection.
Important: The Directory and CMS row are two modes of the same component. The CMS row is used inside the Collection List to pass individual resources to the main directory.
Customization
All visual settings are available directly in the Framer property panel.
You can customize:
Card backgrounds, borders, corner radius, and spacing
Category navigation colors, icons, and active states
Search field and filter appearance
Typography for the interface, titles, and descriptions
Card logos, arrows, and hover effects
Number of resources displayed per page
Layout and pagination behavior
You can also switch between CMS and manual content management without rebuilding the component.
How delivery works
After purchase, you'll receive instant access to a downloadable HTML access file.
Inside the HTML file, you'll find:
The Framer Component URL
Installation instructions
Support contact details
To install the component, open the downloaded HTML file, copy the Framer Component URL, then open your Framer project and paste it directly onto the canvas using Cmd+V / Ctrl+V.
The component will appear on your canvas and will also be added to your project's Assets panel, where you can reuse it across your pages and customize it from the property panel.
Support
If you have any issues accessing, installing, or connecting the component to your Framer CMS, you can find my email inside the HTML file, together with the component link and installation instructions.
Refund policy
Because this is a digital product with instant delivery, refunds are generally not available once the downloadable HTML access file has been delivered.
By purchasing, you agree to receive immediate access to the digital product and understand that access cannot be returned once delivered.
If you experience a technical issue with the component or cannot access the file, please email me using the email address included in the HTML file.
Lucian's other products
Integration Hub – Framer Component
$10.00
Swipeable Card Deck – Framer Component
$10.00
$20.00